


- 14 -
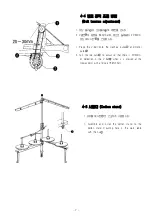
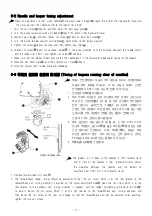
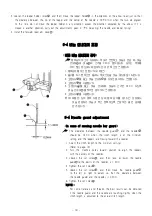
7-3 봉목의 길이 조절
(A djusting the stitch leng th)
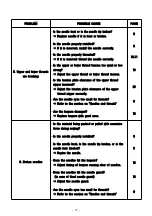
1. 조정캡나사①을 풀고, 풀리를 작업자 방향으로 조정캡
나사구멍과 일치되게 돌려주십시오.
2. 드라이버로 나사②를 돌린후, 풀리를 1/4정도 돌려서
조정구멍에 편심조절 나사③가 보이도록 합니다.
3. 이송편심조절나사③를 반시계방향으로 돌리면 땀폭은
줄어듭니다.
1. Loosen the adjusting cap screw①, keep turning the
machine pulley toward yourself to make all of same
height with the adjusting cap screw hole.
2. After turning the screw② with the driver, make the
screw③ visible by turning the pulley as much as aquarter(1/4).
3. It is possible to decrease the stitch length smaller,
when turning the screw③ counterclockwise.
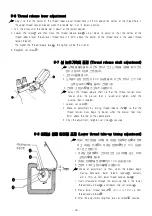
8. 손 질하기 (CLEANING)
☞
이 미싱의 기능을 유지하고 계속 사용하기 위해서는 손질을 매일하여 주십시오. 또는 오랜 시간 사용하지 않았을
경우는 아래의 손질하기를 행하고 나서 미싱을 사용하여 주십시오.
☞
The following cleaning operations should be carried out each day in order to maintain the performance
of this machine and to ensure a long service life.
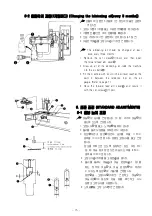
8-1 매일 손질하기 (Daily cleaning)
■
청소 (Cleaning the machine)
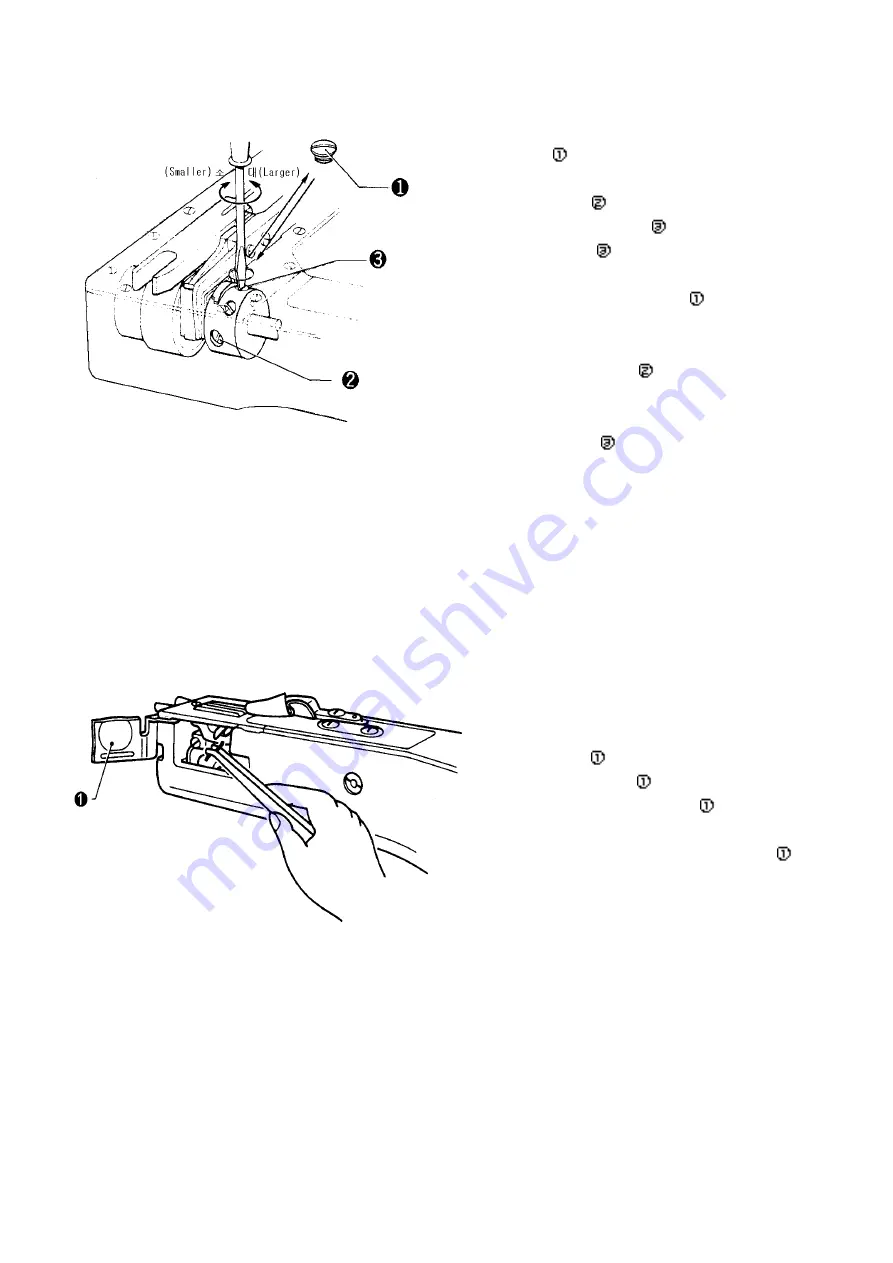
1. 루퍼 카바판①을 열고 실 등을 제거합니다.
2. 청소 후 루퍼카바판①을 닫습니다.
1. Open the looper side plate① and clean away
any thread scraps and other rubbish.
2. After cleaning, close the looper side plate①.
■
급유 (Lu brication )
☞
4-6. 급유 방법(p8)을 참조하여 주십시오.
☞
4-6. Refer to Lubrication(Page 8).
■
확인 (Chec king)
1. 실이 틀림없이 통과하고 있는 지를 확인합니다.(p10,11참조)
2. 실 끝이 찌그러져 있는 경우는, 바늘을 교환하여 주십시오.
3. 시험 재봉을 합니다.
1. Check that the threads are threaded correctly.(Refer to Page10,11)
2. If the tips of the needles are broken, replace the broken needles.
3. Carry out a trial sewing.
Summary of Contents for DT6-H892?3
Page 2: ......
Page 4: ...5 off A S 31 2 40 25 OFF A S A S...
Page 32: ...22 10 1 13 19 2 9 16 16 20 16 3 13 19 4 19 13...


