background image

13

Introduction

1

VOLUME Control

— lets you raise or lower the level of the sound.

2

SQUELCH Control

— lets you set the signal level required to receive a

transmission. If you open the squelch all the way, you will hear hissing
between transmissions. This lets you hear weak signals, but prevents
scanning. As you close squelch, a stronger signal is required to stop scanning
and open audio. You normally set the control to a point just where hissing on
all channels stops between transmissions.

3

SCAN

— press to begin scanning the channels or to resume scanning.

4

ALARM Select

— Set to 

Off

to disable alarm; Set to 

Radio

to enable the

radio alarm; Set to 

Tone

to enable the tone alarm.

5

SNOOZE/Backlight

— Backlight: Tap to turn the LCD backlight on for 15

seconds. Press and hold to permanently turn on the backlight. Press and hold
again to turn off the backlight. 
Snooze: Press while the alarm sounds to silence the alarm for 5 minutes.

6

TIME Set

— Use to select your desired operation: 

Alarm Set

Clock Set

;

Clock

.

7

HOLD

— press to temporarily stop scanning, limit searching, or weather

scanning and remain on the channel. The scanner displays the channel on
hold. Press again to resume searching or scanning.

8

E/PGM

— Press to enter the 

Program Mode

. In Program Mode, enter the

desired frequency using the numeric keys. Then press 

E/PGM

to store that

frequency into the memory.

In 

Limit Search Mode

, after entering the frequency, press 

E/PGM

to program

the upper and lower limit frequency.

9

0 to 9

— use the numeric keys in four basic operations:

• press a numeric key to enter a frequency.
• press a numeric key to change a channel using the Direct Channel Access 

feature.

• press a numeric key while scanning to enable or disable the associated 

scanning bank memory bands.

10 POWER

— Press to turn power on and off. The time displays when power is

off (standby mode).

11 ./CLR

— this key has three functions:

• press to input a decimal point when you enter a frequency.
• press to cancel a numeric key input 

0

to 

9

• press to clear an error display.

UB337ZH(BC340CRS)  1/13/06  4:19 PM  Page 13

Summary of Contents for BC340CRS

Page 1: ...BC340CRS OWNER S MANUAL OWNER S MANUAL...

Page 2: ...unity Changes or modifications to this product not expressly approved by Uniden or operation of this product in any way other than as detailed by this Operating Guide could void your authority to oper...

Page 3: ...n Other trademarks used throughout this manual are the property of their respective holders Important If you use the supplied AC adapter to power the scanner but have not installed batteries in the sc...

Page 4: ...hannels 20 Directly Selecting a Channel 20 Using AM FM TV Channel Memory 20 Using the Scanner Memories 21 Programming Memories 21 Selecting a Memory 22 Scanning Memory Banks 23 Locking Unlocking Memor...

Page 5: ...ther Channels 26 Care and Maintenance 27 General Use 27 Location 27 Cleaning 27 Repairs 27 Birdies 27 Resetting the Scanner Clearing all Memories 27 Technical Specifications 28 One Year Limited Warran...

Page 6: ...his device must accept any interference received including interference that may cause undesired operation Scanning Legally Your scanner covers frequencies used by many different groups including poli...

Page 7: ...th your scanner s internal components or using it in a way other than as described in this manual could invalidate your warranty and void your FCC authorization to operate it In some areas mobile and...

Page 8: ...canner BC340CRS Scanner If any item is missing or obviously damaged call the Uniden Parts Dept at 800 297 1023 Monday through Friday from 8 00 AM to 5 00 PM or online at www uniden com to remedy the s...

Page 9: ...s TV Channels 2 13 Your scanner can monitor the following bands 9 Introduction Introduction Band Lower Limit Upper Limit Step No MHz MHz Modulation kHz Service 1 0 5300 1 7000 AM 10 AM Broadcast 2 25...

Page 10: ...ty Channel Designate a specific frequency as a Priority Channel Then the radio scans and checks that channel every 2 seconds Select and designate up to 10 frequencies as Priority Channels one per bank...

Page 11: ...ht you can enable or disable the LCD back lighted display Key Touch Tone a tone sounds to confirm you have made a valid key input while a different tone sounds to alert you to an invalid entry EEPROM...

Page 12: ...12 Introduction 1 2 3 4 5 6 7 8 9 10 11 12 13 14 15 16 17 18 19 21 20 Controls Scanner...

Page 13: ...the alarm for 5 minutes 6 TIME Set Use to select your desired operation Alarm Set Clock Set Clock 7 HOLD press to temporarily stop scanning limit searching or weather scanning and remain on the channe...

Page 14: ...recall using the 0 9 keys 16 SVC DIR In Scanner mode press to change to Service Search mode In AM FM mode press to change to Direct Entry mode to allow channel frequency selection using the up down a...

Page 15: ...s the designated Priority channel 9 HOLD Indicates a hold in Scan Search WX and Direct Entry mode 10 POLICE Indicates a Police service search 11 FIRE EMS Indicates searching the Fire or Emergency Medi...

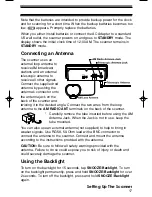
Page 16: ...plug into the power jack on the back of the scanner Then plug the Adapter into a standard household outlet that supplies 120V AC 60Hz Do not plug the adapter into a switch controlled outlet Open the...

Page 17: ...ner and twisting it to the desired angle Connect the two wires from the loop antenna to the AM RADIO ANT terminals on the back of the scanner Carefully remove the tube inserted before using the AM Ant...

Page 18: ...seconds reset to 00 Press E PGM AM PM flashes 4 Press or to select AM or PM To make your selection move the slide switch to Clock The scanner exits the clock setting mode Setting the Alarm Clock Foll...

Page 19: ...the selected audio source AM FM Scanner or Weather If you set the selector to Tone the scanner will sound a tone at the set time To silence the alarm slide Off Radio Tone to Off If you do not turn of...

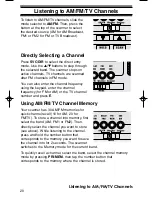
Page 20: ...ing the keypad enter the channel frequency for FM or AM or the TV channel number and press E Using AM FM TV Channel Memory Your scanner has 30 AM FM memories for quick channel recall 10 for AM 20 for...

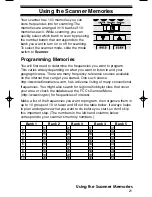
Page 21: ...s available on the internet that can get you started One such source http www radioreference com has a diverse listing of many conventional frequencies You might also search for regional hobbyist site...

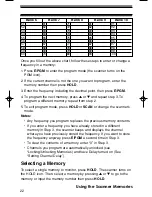
Page 22: ...you enter a frequency you have already stored in a different memory in Step 3 the scanner beeps and displays the channel where you have previously stored the frequency If you want to store the frequen...

Page 23: ...memory in each bank as a priority memory If you turn on the Priority feature the scanner will check the priority memories in enabled banks every 2 seconds even if it has stopped on a transmission on a...

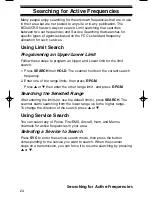
Page 24: ...h 1 Press SEARCH then HOLD The scanner holds on the current search frequency 2 Enter one of the range limits then press E PGM Press or then enter the other range limit and press E PGM Searching the Se...

Page 25: ...e memory to hold the frequency then press E PGM to store the frequency into the memory Search Lockouts If the scanner stops on a frequency that you don t want to hear you can lock it out When locked o...

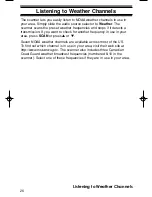
Page 26: ...if it detects a transmission If you want to check for another frequency in use in your area press SCAN or press or Seven NOAA weather channels are available across most of the US To find out which ch...

Page 27: ...he power to the unit before cleaning Clean the outside of the scanner with a mild detergent To prevent scratches do not use abrasive cleaners or solvents Be careful not to rub the LCD window Do not us...

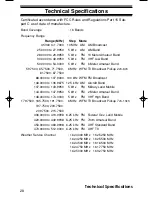
Page 28: ...7 7500 88 0000 to 107 9000 100 kHz WFM FM Broadcast 108 0000 to 136 9875 12 5 kHz AM Aircraft Band 137 0000 to 143 9950 5 kHz FM Military Land Mobile 144 0000 to 147 9950 5 kHz FM 2 Meter Amateur Band...

Page 29: ...uracy 20 seconds per month at normal temperature 25 C 5 C Audio Output normal 0 9W Max Power Requirements 120V AC 10 60Hz Antenna Telescoping included AM Radio Loop Antenna included External Jacks Ant...

Page 30: ...d by anyone other than as detailed by the Operating Guide for this product STATEMENT OF REMEDY In the event that the product does not conform to this warranty at any time while this warranty is in eff...

Page 31: ...ully preferably in its original packaging Include evidence of original purchase and a note describing the defect that has caused you to return it The Product should be shipped freight prepaid by trace...

Page 32: ...627 100 4 841 302 4 888 815 4 932 074 4 947 456 5 014 348 5 199 109 5 408 692 5 428 826 5 438 688 5 448 256 5 465 402 5 471 660 5 483 684 5 530 296 5 548 832 5 571 071 5 574 995 5 577 076 5 598 430 5...

Reviews: