background image

Basic Operation

Note:

You can fold out the Front Cover to see the Controls and Indicators while reading this

Guide.

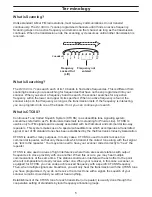
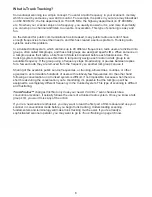
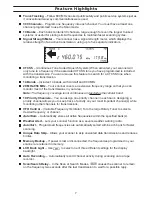
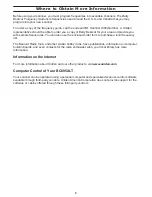
Setting the Squelch

To set the squelch, you must be in the Manual mode, and you should not be receiving a signal on
your scanner.

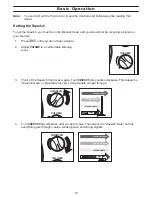
1.

Press

m

until you do not hear a signal.

2.

Adjust

VOLUME

to a comfortable listening

level.

3.

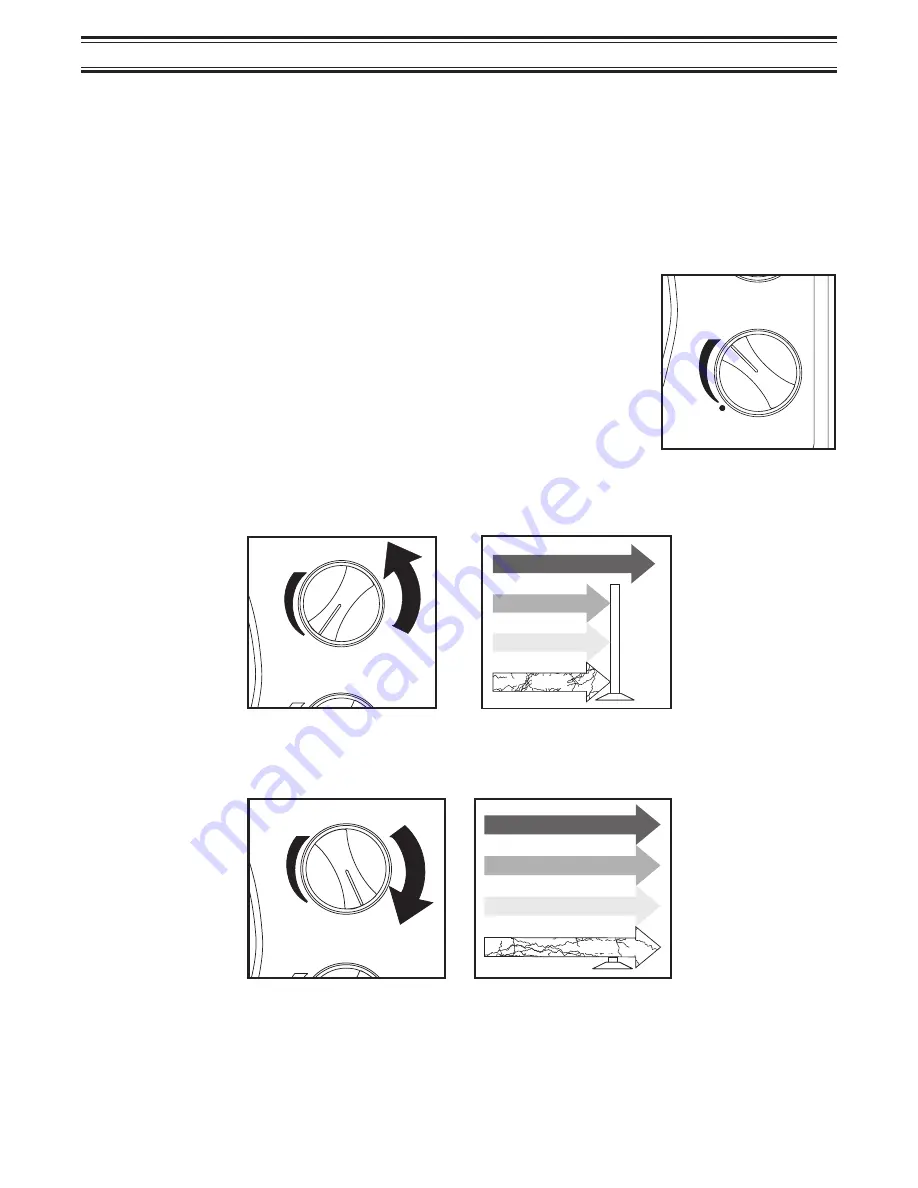
Think of the Squelch Control as a gate. Turn

SQUELCH

fully counter-clockwise. This raises the

“Squelch Gate” so high that only very strong signals can get through.

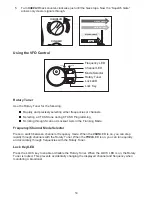
4.

Turn

SQUELCH

fully clockwise until you hear a hiss. This lowers the “Squelch Gate” so that

everything gets through—noise, weak signals, and strong signals.

VOLUME

SQUELCH

VOLUME

STRONG SIGNALS

MEDIUM SIGNALS

WEAK SIGNALS

NOISE

SQUELCH

VOLUME

STRONG SIGNALS

MEDIUM SIGNALS

WEAK SIGNALS

NOISE

13

Summary of Contents for BC895XLT

Page 1: ...ry 15 Programming using the Rotary Tuner 16 Programming using AutoStore 17 Transferring a Programmed Frequency 18 Duplicate Frequency Alert 20 Deleting a Stored Frequency 20 Preventing Accidental Prog...

Page 2: ...nel Activity Indicators 44 Scan Lists 45 Deleting a Stored ID 47 Fleet Map Programming 48 Selecting Trunking Programming Mode 48 Selecting a Preset Fleet Map 49 Programming a Fleet Map 49 Restoring De...

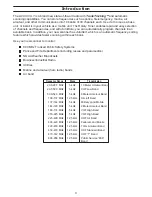
Page 3: ...ithin each bank Use your new scanner to monitor 800 MHz Trunked Public Safety Systems Police and Fire Departments including rescue and paramedics NOAA Weather Broadcasts Business Industrial Radio Util...

Page 4: ...ates cities and or local jurisdictions Your local law enforcement officials should be able to provide you with information regarding the laws in your community Changes or modifications to this product...

Page 5: ...repeaters This system makes use of a special subaudible tone which accompanies a transmitted signal A set of 38 standard tones has been established by the the Electronics Industry Association CTCSS i...

Page 6: ...alk group to an available frequency If the group using a frequency stops broadcasting or pauses between replies for a few seconds they are removed from the frequency so another talk group can use it S...

Page 7: ...ansmissions in your area Note The frequency coverage is not continuous and excludes the cellular band 10 Priority Channels You can assign one priority channel in each bank Assigning a priority channel...

Page 8: ...o use the enclosed order form to purchase a local frequency list The Bearcat Radio Club and other similar hobby clubs have publications information on computer bulletin boards and even contests for th...

Page 9: ...l l Now is the tim e fo4r all good men to come to the aid of the party Now is the tim e for all good men to come to the aid of the party Four score yeas ago our fathers set forth a new natio n conce i...

Page 10: ...r impedance for private listening Read the precautions on the inside front cover of this Guide Do not use the scanner in high moisture environments such as the kitchen or bathroom Avoid placing the un...

Page 11: ...s 1 Connect a cable from the LINE jack on the front of your scanner to the microphone input of the tape recorder 2 Connect a cable from the RCA type AUX jack on the back of your scanner to the tape re...

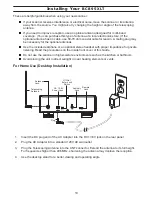
Page 12: ...ssories to the vehicle fuse box please see your automotive dealer for advice on proper installation before completing the steps below Temporary Power Cord Installation Warning Do not use the cigarette...

Page 13: ...VOLUME to a comfortable listening level 3 Think of the Squelch Control as a gate Turn SQUELCH fully counter clockwise This raises the Squelch Gate so high that only very strong signals can get through...

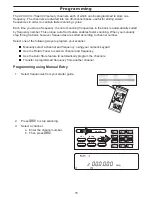
Page 14: ...to switch between channel or frequency mode When the CHAN LED is on you can step rapidly through channels with the Rotary Tuner When the FREQ LED is on you can tune quickly and accurately through fre...

Page 15: ...manually step through a bank however frequencies are sorted according to channel number Select one of the following ways to program your scanner Manually select a channel and frequency using your num...

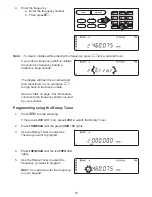
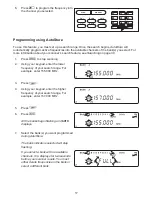
Page 16: ...on page 3 for information concerning the frequency bands covered by your scanner Programming using the Rotary Tuner 1 Press m to stop scanning If the green LOCK LED is on press LOCK to unlock the Rot...

Page 17: ...enter the lower frequency of your search range For example enter 155 000 MHz 3 Press i 4 Using your keypad enter the higher frequency of your search range For example enter 157 000 MHz 5 Press i 6 Pr...

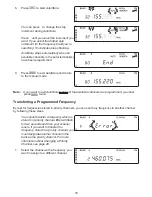
Page 18: ...re all the available channels are programmed you must press m twice Transferring a Programmed Frequency Except for frequencies stored in priority channels you can send any frequency to another channel...

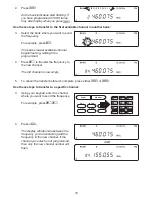
Page 19: ...transfer the frequency to the new channel The old channel is now empty 5 To cancel the transfer before it s complete press either N or m Use these steps to transfer to a specific channel 3 Using your...

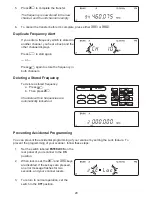
Page 20: ...uency a Press 0 b Then press e Channels with no frequencies are automatically locked out Preventing Accidental Programming You can prevent the accidental programming of your scanner by setting the Loc...

Page 21: ...nto channels 11 through 20 and so on Put the frequency that you listen to the most or the most important frequency into a Priority channel To quickly program a series of channels start with the lowest...

Page 22: ...annot deactivate all ten banks at the same time If you try to turn all the banks off the first bank is automatically selected To restore a bank to active scanning press the bank s number on your keypa...

Page 23: ...grammed channel and it can be set when your scanner pauses during a scan or when manual mode is selected To set Delay in Scan or Search Mode 1 Press s or set a search range and press S 2 When your sca...

Page 24: ...3 Press L to lockout the channel Lockout in Scanning Mode If the scanner keeps stopping on a particular channel due to noise or too frequent transmissions you may want to keep that channel from scanni...

Page 25: ...ress m again 3 Press L to unlock the channel Restoring All Locked Out Channels You can restore all locked out channels in a bank only when a bank is selected for scan If you have deselected a bank and...

Page 26: ...ivate Priority Scan in either the Manual or Scan Mode 1 Press p Note If you have locked out the priority channel this message appears when you select Priority mode 2 Press p again at anytime to deacti...

Page 27: ...your scanner see For use with an optional tape recorder on page 11 To program a channel for tape recording 1 Use your keypad or Rotary Tuner to select the channel you want recorded 2 Press x LINE dis...

Page 28: ...prove the reception Weather Alert In Weather Alert Mode your scanner functions as a severe weather warning radio This is especially useful when your area is expecting severe weather conditions late at...

Page 29: ...ress a ALERT displays and your scanner s volume is muted 3 Press and hold p for 2 seconds You will hear two short beeps and then the test siren will begin to sound 4 To cancel the siren press either a...

Page 30: ...wer frequency of your search range For example enter 155 000 MHz 3 Press i 4 Using your keypad enter the higher frequency of your search range For example enter 157 000 MHz 5 Press i 6 Press S You can...

Page 31: ...s during searches 1 Press d to activate the data skip feature The d indicator appears on the display 2 Press d again to cancel the data skip feature The d indicator disappears from the display When da...

Page 32: ...n press h to step up a frequency or press i to step down a frequency Press and hold either key to rapidly step through the frequencies You can also use the Rotary Tuner to step through frequencies jus...

Page 33: ...th a CTCSS Tone 1 Select a channel you want to program 2 Enter a frequency a Use your keypad to enter the frequency you want b Then press e 3 Press K and then press e If CTCSS Mode is already selected...

Page 34: ...CTCSS tone press m when your scanner stops on a channel 3 Press and hold K until you hear two short beeps CTCSS displays and begins flashing and the scanner starts searching for an associated CTCSS t...

Page 35: ...n press s When your scanner stops the CTCSS Tone Search begins immediately If a tone is found before the transmission ends press e to program the tone with the frequency stored in the channel Using CT...

Page 36: ...et in Step 1 If you want to program tones for several frequencies during your search follow these steps After you program a frequency and a CTCSS tone into a channel the CTCSS Tone Search Mode is canc...

Page 37: ...to erase 3 Press e The CTCSS tone begins flashing 4 Press 0 or use your Rotary Tuner to select 000 0 If you choose the wrong key press twice or if you re using your Rotary Tuner make sure FREQ is sel...

Page 38: ...access is called the radio s affiliation s In a Type II system when someone uses their radio only the radio ID is transmitted when PTT is pressed whereas in a Type I system the radio ID and its curren...

Page 39: ...tem in each bank of your scanner Trunking frequencies must be entered while in the Trunking Programming mode If you re in the Trunking Programming mode you cannot select channels in other banks For ex...

Page 40: ...ider the following You can only trunk track one bank at a time Use t to toggle between the conventional and the trunk tracking modes Press d while in the Trunk Tracking mode to review which bank is cu...

Page 41: ...However it usually only takes a few minutes to figure out police fire and emergency medical personnel Other IDs may take some time but determining who each ID represents is half the fun of TrunkTrack...

Page 42: ...en the ID displays The ID is locked out and the next active ID displays You can lockout up to 100 IDs Note If you lockout an ID in Search mode it is also locked out in Scan List mode Conversely if you...

Page 43: ...ips ID Delay Mode Use the Y key to select the Delay mode if it s not active This mode holds an ID for 5 seconds while you wait for a reply Other groups may use the system but your scanner will only lo...

Page 44: ...se and how much communication traffic is occurring Each frequency you program in a trunking bank corresponds to an activity indicator on your scanner s display The way in which the Activity Indicators...

Page 45: ...ke you scan conventional frequencies You can program your scan lists either manually or during trunking search mode You can use the VFO Tuner to scroll through the IDs in your scan lists Programming S...

Page 46: ...ys be active If you try and deactivate all the Scan Lists Scan List A will automatically be active 8 To restore a Scan List to active scanning press its number again 9 Press S to return to Trunk Track...

Page 47: ...n ID in an available Scan List location follow these steps 1 Press e when your scanner stops on an ID you want to store 2 Press S to return to Trunk Tracking Search mode Deleting a Stored ID To delete...

Page 48: ...here are 16 preset Fleet Maps listed in the appendix that you can choose and these are usually a good place to start when setting up a Type I IIi trunk tracking bank If you choose a preset map and sti...

Page 49: ...s For example 100 12 100 9 000 12 400 8 etc See User Defined Fleet Maps in the Appendix for more information about Type I IDs How do you know if the preset map is correct You ll have to listen to see...

Page 50: ...ck 8 Press e The next available block displays 9 Repeat Steps 7 and 8 until you have selected a size code for each block For specifics about each size code see Fleet Map Size Codes in the Appendix 10...

Page 51: ...p you selected or the Type I fleet map you programmed If you decide to select E1 for the bank again the last settings used will display Programming a Hybrid System A Hybrid system is simply a Type I s...

Page 52: ...the source of the noise If possible a higher elevation may provide better reception Also try changing the height or angle of the antenna Cleaning Disconnect the power to the unit before cleaning Clean...

Page 53: ...n optional multi band antenna Check with your dealer or local electronics store Scan won t stop 1 Adjust squelch threshold refer to Setting the Squelch on page 13 2 Check the antenna connection 3 Chec...

Page 54: ...e to a Type 1 Scanner setup Review Fleet Map Programming on page 48 2 Try another Preset Fleet Map or Program your own Fleet Map 3 Check to see that all of the systems frequencies have been entered Ch...

Page 55: ...0 MHz Federal Government 420 450 MHz 70 cm Amateur Band 450 470 MHz UHF Standard Band 470 512 MHz UHF T Band 806 956 MHz 800 Band Above bands in 12 5 kHz steps Operating Temperature 20 C to 60 C Scan...

Page 56: ...at 800 554 3988 8 00 AM to 5 00 PM EST Monday through Friday for information about ordering these optional accessories DC Power Cord Cigarette Lighter Power Cord External Speaker Earphone Mobile Mount...

Page 57: ...4 S12 S4 S4 S4 Block 1 0 2 3 4 5 6 7 S4 Preset Map E1P6 Size Code S10 S3 S4 S4 S12 S12 Block 1 0 2 3 4 5 6 7 Preset Map E1P7 Size Code S10 S10 S11 S4 S4 S4 S4 Block 1 0 2 3 4 5 6 7 S4 Preset Map E1P8...

Page 58: ...e block which contains the ID The next two digits identify which Fleet is active and the last digit s identifies the Subfleet The details concerning how the size codes are selected by a Type I System...

Page 59: ...locks Used S 0 Reserves block for Type II IDs S 1 128 4 16 1 S 2 16 8 64 1 S 3 8 8 128 1 S 4 1 16 512 1 S 5 64 4 32 1 S 6 32 8 32 1 S 7 32 4 64 1 S 8 16 4 128 1 S 9 8 4 256 1 S 10 4 8 256 1 S 11 2 16...

Page 60: ...lly hazardous to your hearing The output of the phone jack is monaural but you will hear it in both headphones of a stereo headset Set the volume to a comfortable audio level coming from the speaker b...

Page 61: ...P SQUELCH VOLUME 181 210 211 240 241 270 271 300 151 180 91 120 121 150 61 90 31 60 1 30 BA NK A B C D E F G H I J 12 5K Hz AM FM P S HOLD L O LINE DELAY WX ALERT CTCSS TRUNK SCAN PRIORITY AUTO SEARCH...

Page 62: ...cost except shipping and handling incurred by warrantor or its representatives in connection with the performance of this warranty THE LIMITED WARRANTY SET FORTH ABOVE IS THE SOLE AND ENTIRE WARRANTY...

Page 63: ...821 4 270 217 4 398 304 4 409 688 4 455 679 4 461 036 4 521 915 4 597 104 4 627 100 4 841 302 4 888 815 4 932 074 4 947 456 5 014 348 5 199 109 5 408 692 5 428 826 5 438 688 5 448 256 5 465 402 5 471...

Reviews: