background image

27

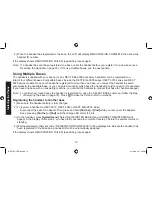
Deleting all Phonebook Entries

With the phone in standby, press [

].

Press 

[Select/menu]

, and then select DELETE ALL. DELETE ALL?  

appears in the display.
Move the cursor to select YES.
Press 

[Select/menu]

. You will hear a confirmation tone, and DELETED! 


appears in the display.

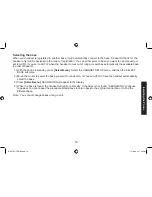
Copying Phonebook Entries to Another Handset

If you have more than one handset, you can transfer phonebook entries from one handset to another without having 

to re-enter names and numbers. You can transfer one phonebook entry at a time or all phonebook entries at once.

With the phone in standby, press

 [

]

To copy one entry, find the phonebook entry you want to copy. Press

 [Select/menu]

, and then select COPY. 

To copy all entries, press 

[Select/menu]

, and then select COPY ALL.

Move the cursor to select the handset which you want to transfer the entries to and then press 

[Select/menu]

.


If you select COPY ALL, ARE YOU SURE? appears on the display screen. Move the cursor to select YES, and 

then press 

[Select/menu]

.

The phonebook entries will be transferred to the designated handset. During the copy process, the receiving 

handset shows RECEIVING and the ID of the sending handset.

When the transfer is completed, DONE! appears on the handset.

Notes: • The handsets must be currently connected to the same base (see page 4).
 

• If the handset you want to transfer to already has seventy entries in its phonebook, you will hear a beep, 

and NOT ENOUGH MEMORY IN RECEIVING UNIT appears on the display. 


• If the selected handset is out of range or data transfer is cancelled, UNAVAILABLE appears in the display. 

Phonebook listings will not be transferred.

)
2)

3)
4)

)
2)

3)

4)

5)

C r e a t e   N e w

C o p y   A l l
D e l e t e   A l l

C r e a t e   N e w

C o p y   A l l
D e l e t e   A l l

Setting Up the Phonebook

DECT ELITE OM.indb   27

13/3/08   3:18:19 PM

Summary of Contents for DECT Elite 9035+1

Page 1: ...DECT Elite 9035 DECT Elite 9035 1 DECT Elite 9035 2 DECT ELITE OM indb 1 13 3 08 3 16 43 PM ...

Page 2: ...swering system features 15 Terminology Used in this Manual 16 Manual Conventions 16 Parts of the Handset 17 Parts of the Base 18 Using the Interface 19 Reading the Handset Display 19 Using the Four way Function Key 20 Using the Handset Menu 20 Entering Text from Your Handset 21 Basic Setup 22 Setting the Day Time 22 Activating Personal Settings 22 Activating the Key Touch Tone 23 Insert 0 23 Setti...

Page 3: ...iece and Speaker Volume 36 Adjusting the Ringer Volume 36 Muting the Ringer One call only 36 Adjusting the Earpiece Volume 36 Adjusting the Speaker Volume 37 Adjusting the Audio Tone 37 Finding a Lost Handset 38 Using Hold Conference and Transfer 38 Placing a Call on Hold 38 Conferencing 38 Transferring a Call 39 Answering a transferred call 39 Using Special Features 40 Privacy Mode 40 Using the I...

Page 4: ...ff the Message Alert Tone 49 Operating the Answering System While You Are Away from Home 49 Setting a security code or Personal Identification Number PIN 49 Dialing in to your answering system 49 Maintenance 51 Specifications 51 Battery Information 51 Battery life 51 Low battery alert 52 Cleaning the charging contacts 52 Battery replacement and handling 52 Power Failures 52 Troubleshooting 53 Comm...

Page 5: ...k you for purchasing a Uniden Multi Handset phone Note Illustrations in this manual are used for explanation purposes Some illustrations in this manual may differ from the actual unit DECT ELITE OM indb 4 13 3 08 3 16 46 PM ...

Page 6: ...rformance PLACE YOUR BASE Near an AC outlet and a telephone wall jack Microwave ovens Refrigerators TVs Other electronics Direct sunlight Extreme temperatures Fluorescent lighting Personal computers Wireless LAN equipment Dust Excessive moisture Other cordless telephones Areas with a lot of background noise Shock Vibration In a centrally located open area TRY TO AVOID TVs Other electronics Direct ...

Page 7: ...cker in the handset s battery compartment Place the cover over the battery compartment and slide it up into place Battery pack Battery cover Handset Locate the battery pack battery cover and the handset Push the battery pack connector in firmly You should hear it click into place Gently tug on the battery wires to make sure the connection is secure Line up the red and black wires on the battery pa...

Page 8: ...here it people might trip over it or step on it If a power cord becomes chafed or worn out it can create a fire or electrical hazard To the charging cradle for multi handset packs only Use only the Uniden AAD 600S AC adapter with the charging cradle AC Route the cord through the molded wiring channel Connect the adapter to a standard 240V AC wall outlet AC Route the cord through the molded wiring ...

Page 9: ...e Check the AC adapter connection Make sure that the charge LED illuminates when the handset is seated Place the handset in the base cradle with the display facing forward If you have an accessory handset place it in the charging cradle with the display facing forward Charge your handset at least 15 to 20 hours before plugging into the phone line Make sure that the charge LED illuminates when the ...

Page 10: ...CK TEL LINE appears on the handset display The telephone cord may not be connected correctly Check the telephone cord connection Do you have DSL or any high speed Internet service delivered through your phone line Try putting a DSL filter between the base and the wall jack Without a filter telephone line based Internet services can interfere with standard phones Telephone cord Telephone wall jack ...

Page 11: ...dset Make sure the battery pack is fully charged Make sure the AC adapter cord is securely connected to the DC IN 9V jack and a standard power outlet Try resetting the handset see page 55 Make a quick test call and then press to hang up What if there is a lot of static Check the sources of interference described in Choosing the Best Location see page 5 is the base near any of those Note Make sure ...

Page 12: ... sides of the belt clip into the holes on either side of the handset Press the belt clip down until it clicks into place Tug on the clip to make sure it s secure To remove the belt clip gently pull the tabs out of the holes then slide the belt clip off of the handset DECT ELITE OM indb 11 13 3 08 3 17 48 PM ...

Page 13: ...sory handsets When charged registered handsets display a handset ID number Handsets that have not been registered display as shown To register a DECT Elite 9005 accessory handset Charge the handset for 15 20 hours Place the handset in the base cradle for about thirty seconds HANDSET REGISTERING will appear in the LCD When the handset has registered to the base the LCD will display REGISTRATION COM...

Page 14: ...ering machine you can tell the handset to connect that base to check messages Note To confirm how many bases the handset is registered to open the SELECT BASE submenu follow the step 1 of Selecting the base on page 14 Press to close the list and return to standby Registering the handset to another base Make sure the handset battery is fully charged To register a handset to DECT 6015 DECT 6035 or D...

Page 15: ... ID With the phone in standby press Select menu Select the HANDSET SETUP menu and then the SELECT BASE submenu Move the cursor to select the base you want to connect to or choose AUTO to have the handset automatically select the base Press Select menu SEARCHING will appear in the display When the base is found the handset will return to standby If the base is not found SEARCHING continues to appea...

Page 16: ...ng Store 30 Caller ID numbers on each handset Speakerphone on handset 10 ringer options 5 tones 5 polyphonic melodies Last 5 number redial Handset Keypad Lock Caller ID Name Tag Personal Settings features require subscription to the Caller Display service from your network supplier A fee normally applies for this The Caller ID on Call Waiting service is currently unavailable in New Zealand Answeri...

Page 17: ... settings that apply to all registered handsets and the base These features are available by selecting GLOBAL SETUP or DAY TIME in the handset menu Only one handset can change global settings at a time and you have to make sure the phone is not currently being used If you have multiple bases the different bases have each global settings select the base before changing the global setting see Select...

Page 18: ...nebook left flash key talk flash key Redial pause key redial pause Headset jack cover Belt clip hole Speakerphone speaker and ringer Battery compartment key up Select menu key key caller ID right key end call mute key messages mute key down Twelve key dial pad key Microphone Charging contacts DECT ELITE OM indb 17 13 3 08 3 17 54 PM ...

Page 19: ...of the Base find key find handset Charging contacts charge LED key delete on off key answering system on off message counter LED key play stop key skip key repeat Speaker key volume up key volume down DECT ELITE OM indb 18 13 3 08 3 17 57 PM ...

Page 20: ...con indicates that the ringer is turned off The speaker icon appears when the speaker phone is in use The CID icon appears when you have new Caller ID records The mute icon appears while the microphone is muted The privacy icon appears when the Privacy Mode is turned on The battery icon indicates the handset battery status full medium low and empty DECT ELITE OM indb 19 13 3 08 3 18 04 PM ...

Page 21: ... menu key The option currently highlighted appears in reversed out text Use on the four way function key to highlight the next upper option and to highlight the next lower option To select the highlighted option press Select menu To go back to the previous screen press left on the four way function key To exit the menu press If you don t press any keys for thirty seconds the phone will time out an...

Page 22: ...ursor to the next position to enter the second letter For example to enter the word Movies Press 6 once to enter M Use right on the four way function key to move the cursor to the right Press 6 six times to enter o Press 8 six times to enter v Press 4 six times to enter i Press 3 five times to enter e Press 7 eight times to enter s Press Select menu to end your text entry If you make a mistake whi...

Page 23: ...Settings You can assign special ringer tones to anyone in your phonebook When your phone gets a call it looks up the Caller ID information in your phonebook If you ve assigned a personal ring and color to that number the phone uses it so you know who is calling To turn the personal ringing on or off follow these steps Press Select menu Select the HANDSET SETUP menu and then the PERSNL SETTINGS sub...

Page 24: ...ith the phonebook number will be displayed To change the Name Tagging setting follow the steps listed below Press Select menu Select the HANDSET SETUP menu and then the NAME TAG submenu Move the cursor to select ON or OFF Press Select menu You will hear a confirmation tone Insert 0 This feature adds 0 or 00 at the beginning of the number received from Caller ID The default setting for New Zealand ...

Page 25: ...u EDIT NAME appears Enter the name for this entry EDIT NAME Use the keypad to enter a name for this entry the name can contain up to sixteen characters See Entering Text from Your Handset on page 21 for instructions on entering text If you do not want to enter a name for this entry your phone will store this entry as NO NAME Press Select menu when you are finished Enter the number for this entry E...

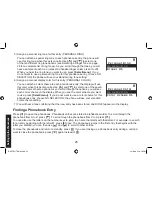
Page 26: ...book entry choose NO SELECTION the phone will use your standard color scheme setting You will hear a tone confirming that the new entry has been stored and DONE appears in the display Finding a Phonebook Entry Press to open the phonebook Phonebook entries are stored in alphabetical order To scroll through the phonebook from A to Z press To scroll trough the phonebook from Z to A press You can also...

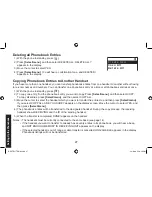
Page 27: ...pen the Caller ID list or Redial pause to open the redial list Use and to scroll through the Caller ID records or redial numbers When you come to the information you want to store press Select menu Select STORE INTO PB EDIT NAME appears If the phone number is already stored in memory you will hear a beep and THIS DATA IS ALREADY SAVED appears in the display The number will not be stored Continue b...

Page 28: ...andset which you want to transfer the entries to and then press Select menu If you select COPY ALL ARE YOU SURE appears on the display screen Move the cursor to select YES and then press Select menu The phonebook entries will be transferred to the designated handset During the copy process the receiving handset shows RECEIVING and the ID of the sending handset When the transfer is completed DONE a...

Page 29: ...t menu You will hear a confirmation tone Note When you have multiple bases and even if the handset ID is changed when you switch to a different base the handset will keep the banner name Selecting a Ringer Tone You may choose from five melodies or five tones for your phone s primary ring tone Each handset can use a different ring tone or melody Press Select menu Select the HANDSET SETUP menu and t...

Page 30: ...hear a confirmation tone Color Scheme You can change the color of your phone s display There are seven different colors to choose from Press Select menu Select the HANDSET SETUP menu and then the COLOR SCHEME submenu Move the cursor to select a color scheme As you scroll through the options you will see each color scheme on the display When you see the color scheme you want to use press Select men...

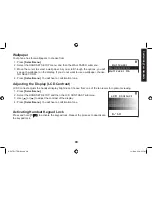
Page 31: ...dset display brightness Choose from one of the ten levels for optimum viewing Press Select menu Select the HANDSET SETUP and then the LCD CONTRAST submenu Use or to adjust the contrast of the display Press Select menu You will hear a confirmation tone Activating Handset Keypad Lock Press and hold to activate the keypad lock Repeat the process to deactivate the keypad lock 2 3 4 2 3 4 Wallpaper No ...

Page 32: ... up the handset from the cradle Press Listen for the dial tone Dial the number OR Pick up the handset from the cradle Dial the number Press 2 3 4 2 3 Answering a call Pick up the handset If AutoTalk is on the phone will answer when you pick up the handset from the cradle Press flash If Any Key Answer is on you can also press any key on the dial pad 2 Pick up the handset Press 2 Hanging up Press or...

Page 33: ...ansmit the saved code number This is referred to as chain dialing Enter the code number up to twenty digits into the phonebook see Creating Phonebook Entries on page 24 Be sure to enter the code number into the phonebook exactly as you would enter it during a call During a call when you hear the prompt that tells you to enter the code number press Use or to select the phonebook entry that contains...

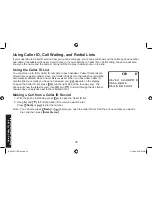
Page 34: ...will be automatically deleted when a new call is received When you have new Caller ID records that is records you have not reviewed yet appears on the display To open the Caller ID list press on the right side of the four way key The phone will show the latest record Use and to scroll through the list New records have an asterisk next to the received time Making a Call from a Caller ID Record With...

Page 35: ...e and a second call comes in when you are on the phone a call waiting tone will sound If you subscribe to Caller ID on Call Waiting the handset displays the name and phone number of the waiting call For Australian Model Press flash and then 2 on the handset to accept the waiting call The first caller is put on hold and you will hear the new caller after a short pause To return to the original call...

Page 36: ...f the redial memory is empty EMPTY appears in the display and you will hear a beep You can also press flash or before you open the redial list Find the phone number you want to dial and then press Select menu Deleting a Redial Record If you want to delete a phone number from the redial list follow the steps below With the phone in standby press Redial pause Use and to scroll through the redial lis...

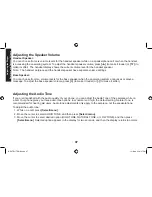
Page 37: ...se stop pressing keys The station will use the new ringer volume starting with the next incoming call Note If you set the ringer volume to OFF the station won t ring Other stations will ring according to their individual settings Muting the Ringer One call only While the phone is ringing press mute or on the handset or on the base to mute the ringer for this call The phone will ring again on the n...

Page 38: ...ssage To adjust the base speaker volume press to make it louder or to make it softer Adjusting the Audio Tone If you aren t satisfied with the audio quality of your phone you can adjust the Audio Tone of the earpiece while on a call Your phone gives you three audio tone options low natural and high the default setting Natural Tone is recommended for hearing aid users Audio tone adjustments only ap...

Page 39: ...LD To return to the party on hold press flash or The phone will return to the holding party Notes You can only place a caller on hold for five minutes Once five minutes has passed that party s line will be disconnected and the phone will return to standby While a call is on hold Call Waiting and CID on Call Waiting do not work Conferencing If you have more than one handset up to three people can p...

Page 40: ... When a handset receives a call transfer it sounds a paging tone handsets also show the ID of the handset that is paging To accept the call transfer To answer the page and speak to the transferring handset press flash or Int com clear Note If AutoTalk is on the handset will automatically answer the page when you pick up the handset from the cradle If Any Key Answer is on you can also press any key...

Page 41: ...talk to another handset without using the phone line The handsets must be currently connected to the same base see page 14 Making an intercom page With the phone in standby press Int com clear Use or to select the handset you want to talk with and then press Select menu Select ALL to page all other handsets To cancel the intercom page press Notes Intercom paging will be cancelled if any of the fol...

Page 42: ...the page when you pick up the handset from the cradle If Any Key Answer is on you can also press any key on the handset s dial pad To hang up an intercom call press Muting the Microphone Mute turns off the microphone so the caller can t hear you This only works while you are on a call Press mute MUTE ON and appear in the display remains while muting is on To cancel muting press mute again MUTE OFF...

Page 43: ...ith an optional headset To use this feature insert the headset plug into the headset jack Your phone is ready for hands free conversations Headsets may be purchased by contacting Uniden See warranty on inside back cover for contact information DECT ELITE OM indb 42 13 3 08 3 18 45 PM ...

Page 44: ...ack You will hear intermittent beeps indicating that the system is in the command waiting mode Press 8 to start the recording The system announces Record greeting Begin recording after the announcement When you finish recording press 8 again or press 5 You will hear a confirmation tone and your recorded greeting plays back for you Selecting a Greeting Once you have recorded a personal greeting the...

Page 45: ...delete the pre recorded greeting Press mute The system announces the number of new and old messages then starts to play the messages unless it has no messages Press 5 to stop the announcements or message playback You will hear intermittent beeps indicating that the system is in the command waiting mode Press 6 The system plays the current greeting Switch to your personal greeting if necessary See ...

Page 46: ...callers have to record a message Set the record time to 1 MINUTE or 4 MINUTES to limit the time for incoming messages If you set the record time to ANNOUNCE ONLY the answering system answers the call but prevents callers from leaving a message Press Select menu Select the ANSW SETUP menu and then the RECORD TIME submenu Move the cursor to select a record time 1 MINUTE 4 MINUTES or ANNOUNCE ONLY Pr...

Page 47: ...ct menu You will hear a confirmation tone Activating the Base Call Screen With the call screen feature you can listen to callers as they leave a message without answering the call Press Select menu Select the ANSW SETUP menu and then the CALL SCREEN submenu Move the cursor to select ON or OFF Press Select menu You will hear a confirmation tone 1 2 3 4 1 2 3 4 Message Alert On Off Message Alert On ...

Page 48: ...r a confirmation tone 1 2 3 4 Turning Off With the phone in standby press on off The phone announces Answering System is off The message counter LED is no longer illuminated 1 2 3 Press Select menu Select the ANSW SETUP menu and then the ANSWER SETUP submenu Move the cursor to select OFF Press Select menu You will hear a confirmation tone 1 2 3 4 Notes If the answering system announces No remainin...

Page 49: ...ey were received Repeating a message Press once to go to the beginning of the current message Press repeatedly to go back to a previous message Press 1 once to go to the beginning of the current message Press 1 repeatedly to go back to a previous message Skipping a message Press to go to the beginning of the next message Press 3 to go to the beginning of the next message Deleting a message While a...

Page 50: ...atically deactivate The tone will not deactivate until all new messages are played back To quickly turn off the tone press any key on the base Operating the Answering System While You Are Away from Home When you are away from home you can operate your answering system with any touch tone telephone Setting a security code or Personal Identification Number PIN To operate your answering system when y...

Page 51: ...command If you want to Press If you want to Press Play incoming messages then 2 The answering system plays back messages for four minutes then waits for another command To continue playing your messages press then 2 again Stop the current operation to enter a different command then 5 Repeat this message then 1 after the first four seconds of this message Turn the answering system off then 9 Go bac...

Page 52: ...reate a fire or electrical hazard Do not place the base in direct sunlight or subject it to high temperatures Battery Information Battery life With average use your handset battery provides more than ten hours of talk time and approximately seven days of standby time You can achieve optimum battery life and performance by returning the handset to the base or charging cradle after each use When you...

Page 53: ...e handset to the cradle Caution Do not use paint thinner alcohol or other chemical products Doing so may discolor the surface of the telephone and damage the finish Battery replacement and handling With average use your phone s battery should last approximately two years To order replacement batteries please contact Uniden s Parts Department The contact information is listed on inside the back cov...

Page 54: ...ects or appliances and try again No handsets can make or receive calls Checking the telephone cord connection If CHECK TEL LINE appears on the handset display the telephone cord may not be connected correctly see page 9 Disconnecting the base AC adapter Wait a few minutes then reconnect it see page 7 A single handset can t make or receive calls but other handsets can Checking the battery pack conn...

Page 55: ...ing the handset see page 55 The handset doesn t communicate with other handsets Register all handsets to the same base and then select the same base on all handsets see page 14 I can t join the conversation Checking to see that there are not two handsets already using the conference feature see page 38 Checking to see that another handset is not in privacy mode see page 40 Register all handsets to...

Page 56: ...ee if the touch tone phone you re using can transmit the tone for at least two seconds If it cannot try using a different touch tone phone Resetting the Handset You may need to reset your handset in the following instances You lose a handset and purchase a new one You get the message Registration Failed when you try to register the handset You are unable to register any handsets to the base When y...

Page 57: ... reset the handset without the base see the next section Resetting the Handset Without the Base If your original base is not available for some reason you can still reset the handset and use it with another base Press and hold and for at least five seconds Move the cursor to select BASE UNAVAILABLE and then press Select menu Select the base which you want to de register from and then press Select ...

Page 58: ...INSTRUCTED BY CUSTOMER SERVICE PRESS SELECT appears Press Select menu Move the cursor to select TYPE A TYPE B or OFF Press Select menu You will hear a confirmation tone Traveling Out of Range During a call if you move your handset too far from your base noise may increase If you pass the range limit of the base the handset will beep display OUT OF RANGE and then go to standby The base will maintai...

Page 59: ...least 3 days Once the handset is completely dry reconnect the battery pack and the battery cover Recharge the handset s battery pack for 15 to 20 hours before using 2 3 4 Disconnect the AC adapter from the base cutting off electrical power Disconnect the telephone cord from the base Let dry for at least 3 days 2 3 IMPORTANT You must unplug the telephone line while recharging the battery packs to a...

Page 60: ...s in our products and accessories Important Safety Instructions When using your telephone equipment basic safety precautions should always be followed to reduce the risk of fire electric shock and injury to persons including the following Do not use this product near water for example near a bath tub wash bowl kitchen sink or laundry tub in a wet basement or near a swimming pool Avoid using a tele...

Page 61: ...l screening 46 49 Call waiting 35 Chain dialing 32 Color scheme 29 Conferencing 38 D Day and time 22 F Finding a handset 38 Four way function key 20 G Greetings Deleting 44 Recording 43 Selecting 43 H Handset Accessory handsets 12 Banner 28 Choosing a ringer 28 Color scheme 29 Copying phonebook entries 27 Entering text 21 Finding 38 LCD contrast 30 Parts of the handset 17 Reading the display 19 Re...

Page 62: ...ing entries 27 Creating new entries 24 Deleting entries 26 27 Editing entries 26 Finding entries 25 Making a call from 32 Storing Caller ID or redial numbers 26 Privacy mode 40 R Redial Deleting a record 35 Making a calls with 35 Ringer Choosing a handset ringer 28 Muting 36 Personal ring 22 25 Volume 36 S Safety notices 59 Screening calls 46 49 Security code 49 Selecting the base 14 T Text enteri...

Page 63: ...op the announcement 4 Press then 6 to turn the answering system on REMOTE OPERATION CARD CUT Remote access away from home Turn on the answering system remotely 1 Call your phone number from a touch tone phone 2 During the outgoing message press and enter your PIN code The answering system announces the number of messages stored in memory and the voice prompts 3 To quit hang up the phone 1 Call you...

Page 64: ...age Delete a Message Stop Operation Answering System On Answering System Off Help C U T Task Key Repeat a Message Play Incoming Messages Skip a Message Delete a Message Stop Operation Answering System On Answering System Off Help C U T Task Key Repeat a Message Play Incoming Messages Skip a Message Delete a Message Stop Operation Answering System On Answering System Off Help DECT ELITE OM indb 63 ...

Page 65: ...64 MEMO DECT ELITE OM indb 64 13 3 08 3 21 47 PM ...

Page 66: ...65 MEMO DECT ELITE OM indb 65 13 3 08 3 21 47 PM ...

Page 67: ...e Serial Number label of the product has been removed or damaged beyond recognition Warranty only valid in the country of original retail sale PARTS COVERED This warranty covers for one 1 year the Product and included accessories STATEMENT OF REMEDY In the event that the Product does not conform to this warranty at any time while this warranty is in effect the warrantor at its discretion will repa...

Page 68: ... 2008 Uniden Australia Pty Limited Uniden New Zealand Limited Printed in China UCZZ01541BZ 0 DECT ELITE OM indb 67 13 3 08 3 21 48 PM ...

Reviews: