background image

4

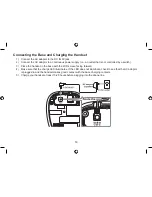
Connecting the Base and Charging the Handset 

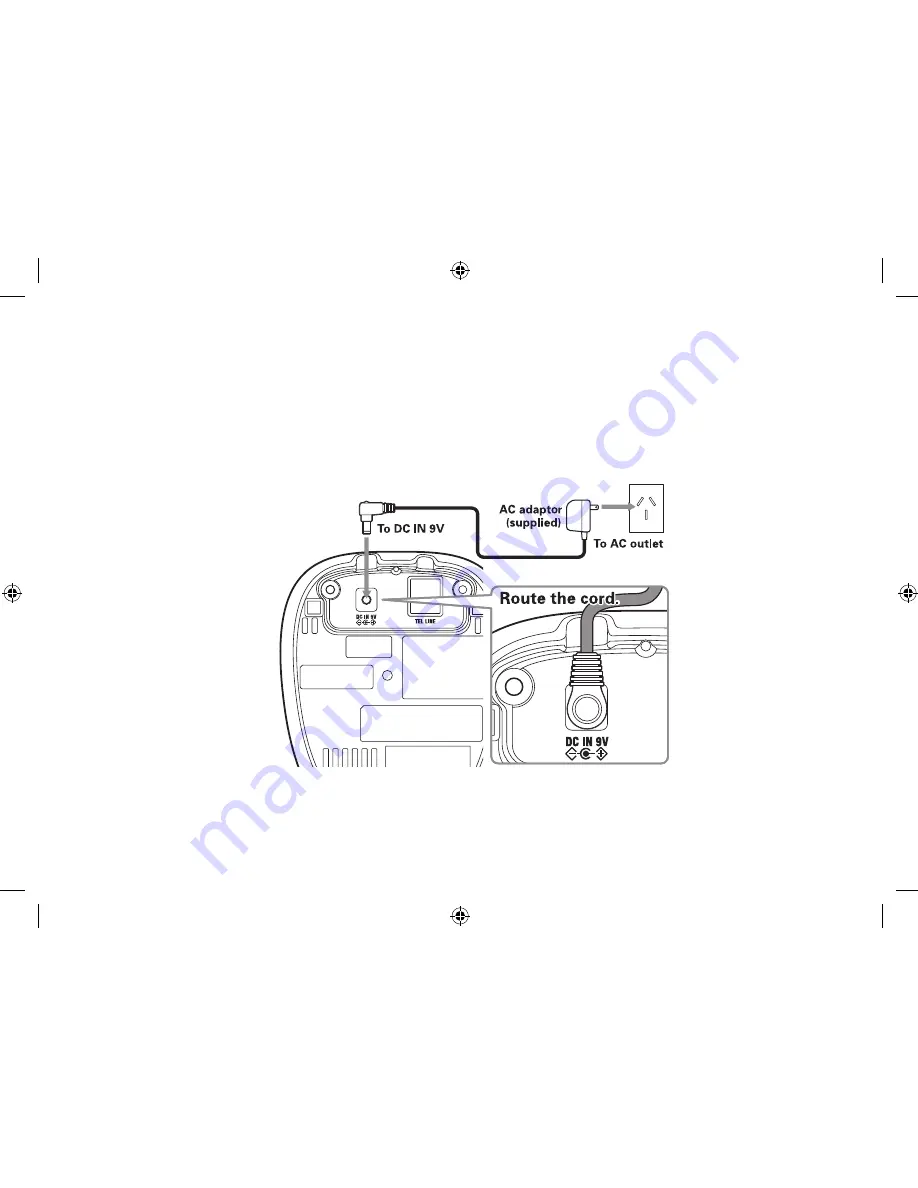
Connect the AC adaptor to the DC IN 9V jack.
Connect the AC adaptor to a continuous power supply (i.e., an outlet that is not controlled by a switch). 
Place the handset in the base with the LCD screen facing forward. 
Make sure that the charge LED illuminates. If the LED does not illuminate, check to see that the AC adaptor 

is plugged in and the handset makes good contact with the base charging contacts. 
Charge your handset at least 5-20 hours before plugging into the phone line. 

)
2)
3)
4)

5)

Summary of Contents for DSS7915 Series

Page 1: ...DSS7915 DSS7915 1 Series Owner s Manual OWNER S MANUAL ...

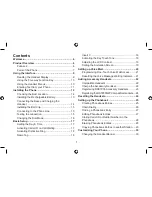
Page 2: ...ive Ring 18 Name Tag 18 Insert 0 18 Activating the Key Touch Tone 19 Adjusting the LCD Contrast 19 Setting the Animation Screen 19 Setting up Voice Mail 20 Programming One Touch Voice Mail Access 21 Resetting the Voice Message Waiting Indicator 21 Adding Accessory Handsets 22 Compatible Handsets 22 Charge the Accessory Handset 22 Registering DSS7905 Accessory Handsets 23 Registering the DSS7805WP ...

Page 3: ...justing the Speaker Volume 39 T coil Handset only 39 Finding a Lost Handset 40 Using Hold Conference and Transfer 40 Placing a Call on Hold 40 Conferencing 41 Transferring a Call 41 Answering a Transferred Call 41 Using Special Features 42 Muting the Ringer One Call Only 42 Muting the Microphone 42 Privacy Mode 42 Using the DirectLink Feature 43 Intercom 44 Room Monitor 45 Tone Dialing Switch Over...

Page 4: ... Precautions 55 Rechargeable Nickel Metal Hydride Battery Warning 55 Index 57 One Year Limited Warranty 62 ...

Page 5: ... Welcome Thank you for purchasing a Uniden Multi Handset phone Note Illustrations in this manual are used for explanation purposes Some illustrations in this manual may differ from the actual unit ...

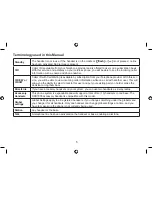
Page 6: ... a call with another user This will allow you the ability to select to talk to this user and put your existing party on hold or make the decision to ring them back DirectLink If you have accessory handsets on your system you can use two handsets as 2 way radios Accessory Handsets This phone system is expandable and will support a total of ten 10 handsets to one base The DSS7905 accessory handset i...

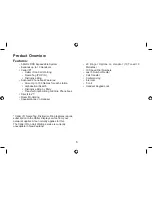
Page 7: ...Single Listing or Entire Phonebook DirectLink Room Monitoring Speakerphone on Handset 20 Ringer Options on Handset 10 Tones 10 Melodies 10 Speed Dial Numbers Last 3 Number Redial Call Transfer Conferencing Intercom T coil Handset Keypad Lock Caller ID Name Tag Distinctive Ring features require subscription to the Caller Display service from your network supplier A fee normally applies for this The...

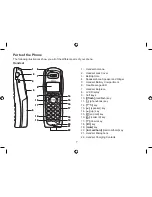
Page 8: ...v wxyz def tone speaker hold oper mute int com 2 1 3 5 4 6 7 8 11 12 19 20 21 22 13 17 18 15 14 16 9 10 Handset Antenna Headset Jack Cover Beltclip Hole Speakerphone Speaker and Ringer Handset Battery Compartment New Message LED Handset Earpiece LCD Display Soft keys flash talk flash key phonebook key tone key speaker key up key end call key caller ID key down key key mute key int com hold interco...

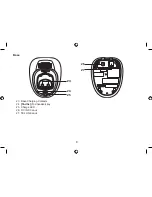
Page 9: ... Base 23 26 27 24 25 Base Charging Contacts find hs find handset key Charge LED DC IN 9V Jack TEL LINE Jack 23 24 25 26 27 ...

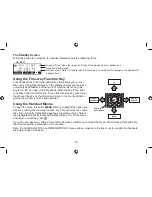
Page 10: ...lk The privacy icon appears when Privacy mode is turned on Talk The mute icon appears when you mute the handset Talk The speaker icon appears when the handset speakerphone is in use Talk This icon appears when T coil mode is turned on Standby The ringer off icon indicates that the ringer is turned off Standby Talk The battery icon indicates the handset battery status empty low medium and full ...

Page 11: ... thumb over the key on the station and move to the four positions to get the feel of how it moves and operates Using the Handset Menus To open the menu press the MENU soft key Highlight the option you want by pressing the four way function key This will move the cursor the option currently highlighted appears in reversed out text Select the highlighted option by pressing the OK soft key To exit th...

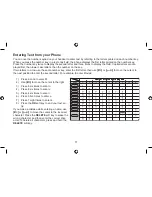
Page 12: ...st letter then use or tone to move the cursor to the next position to enter the second letter For example to enter Movies Press 6 once to enter M Use to move the cursor to the right Press 6 six times to enter o Press 8 six times to enter v Press 4 six times to enter i Press 3 five times to enter e Press 7 eight times to enter s Press the OK soft key to end your text en try If you make a mistake wh...

Page 13: ...igh as possible The base should be placed in an open area for optimum range and reception If your home has wired alarm equipment connected to a phone line be sure that installing the system does not disable your alarm equipment If you have questions about what will disable alarm equipment contact your telephone company or a qualified installer Note For maximum range Keep the antenna free of obstru...

Page 14: ...er indention for a better grip and slide the cover downward to remove Plug the battery cable into the battery jack Be sure to match the red and black wires to the label near the jack The cable should snap into place Gently pull on the battery cable If the battery connector comes lose try connecting again until the battery snaps into place Place the battery case cover back on the handset and slide ...

Page 15: ...s not controlled by a switch Place the handset in the base with the LCD screen facing forward Make sure that the charge LED illuminates If the LED does not illuminate check to see that the AC adaptor is plugged in and the handset makes good contact with the base charging contacts Charge your handset at least 15 20 hours before plugging into the phone line 2 3 4 5 ...

Page 16: ... connect the tele phone line cord to the TEL LINE jack and to a telephone outlet Testing the connection To test your connection try making a call If your call connects the settings are fine If your call does not connect check the following Check the AC adaptor cord Make sure it is securely connected to the DC IN connector and to a standard AC power outlet Check to make sure the battery is fully ch...

Page 17: ...eed to change your phone s dial mode If you cannot connect to the tele phone network please follow the steps below to modify your phone s settings Press the MENU soft key Select the GLOBAL SETUP menu and then the DIAL MODE submenu Press on the four way function key to select PULSE The initial setting is Tone Press the OK soft key You will hear a confirmation tone If you ever need to change the dia...

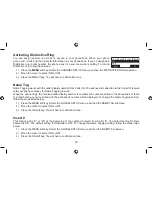
Page 18: ...ft key Press or to To select AM or PM then press the SAVE soft key You will hear a confirmation tone Activating Caller ID on Call Waiting Your phone supports Caller ID on Call Waiting CIDCW so you can see the name and number of someone who calls when you re already on the line You ll need to subscribe to these features with your phone company before you can use them To let your phone support these...

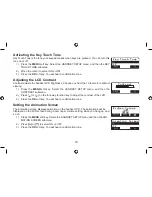
Page 19: ...h your phone company for Name Tagging to work When the phone rings the received caller display number is compared to numbers stored in the phonebook If there is a match then any name stored with the phonebook number will be displayed To change the Name Tagging setting follow the steps listed below Press the MENU soft key Select the GLOBAL SETUP menu and then the NAME TAG submenu Move the cursor to...

Page 20: ...the CONTRAST submenu Press or on the four way function key to adjust the contrast of the LCD Press the OK soft key You will hear a confirmation tone Setting the Animation Screen The Animation screen displays animation on the handset LCD The animations will be displayed on the LCD screen during a call ringer volume setting when you hang up and so on Press the MENU soft key Select the HANDSET SETUP ...

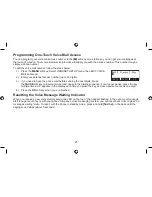
Page 21: ...ssage LED flashes whenever you have messages waiting in your voice mailbox If you have programmed your access number into your phone you can simply press the soft key to access your voice mail When you subscribe to the service your voice mail provider provides you with the access number and the required voice mail signaling tone ...

Page 22: ...gits press the PAUSE soft key to insert a two second pause in the dialing sequence For a longer pause press the key multiple times A P appears in the display each time you press the key and each pause counts as one digit Press the OK soft key when you are finished Resetting the Voice Message Waiting Indicator When you receive a new voice mail message the LED on the top of the handset flashes In th...

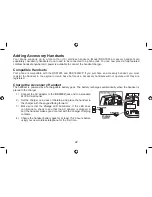
Page 23: ...andsets will not operate until they are registered Charge the Accessory Handset The handset is powered by a rechargeable battery pack The battery recharges automatically when the handset is placed in the charger Connect the AC adaptor to the DC IN 9V jack and to a standard 240V AC wall outlet Set the charger on a desk or tabletop and place the handset in the charger with the keypad facing forward ...

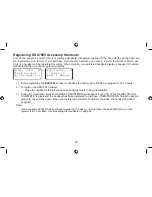
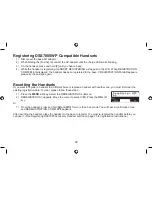
Page 24: ...U CPWCN Before registering the DSS7905 accessory handset the battery pack MUST be charged for 15 20 hours To register the DSS7905 handset Place the handset in the telephone base charging cradle to begin registration During the registration process HANDSET REGISTERING will appear in the LCD When REGISTRATION COMPLETE is displayed the handset has been registered to the base If REGISTRATION FAILED ap...

Page 25: ... handset to a different base or replace a handset with another one you must first clear the existing registration data To clear please follow these steps Press the MENU soft key Select the DEREGISTER HS submenu DEREGISTER HS appears Move the cursor to select YES Press the OK soft key Or From the handset press and hold and for more than 5 seconds You will hear a confirmation tone and DEREGISTRATION...

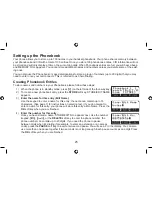
Page 26: ...t key STORE EDIT NAME appears Enter the name for this entry Edit Name Use the keypad to enter a name for this entry the name can contain up to 16 characters See page 11 for instructions on entering text If you do not want to enter a name for this entry your phone will store this entry as No Name Press the OK soft key when you are finished Enter the number for this entry Once you have stored a name...

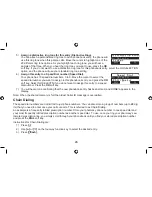
Page 27: ...s the OK soft key You will hear a tone confirming that the new phonebook entry has been stored and DONE appears in the display Note When the shared memory is full the oldest Caller ID message is overwritten Chain Dialing The speed dial numbers are not limited to just phone numbers You can also store a group of numbers up to 20 dig its that you need to enter once your call connects This is referred...

Page 28: ...d letter and so on The phonebook jumps to the first entry that begins with the letter you entered you can then use or on the four way function key to scroll to other en tries For example to search for an entry beginning with the letter M press 6 once To close the phonebook press on the handset If you are looking up a phonebook entry during a call and want to close the phonebook press the BACK soft...

Page 29: ...ion you want to store press the STORE soft key STORE EDIT NAME appears Follow the steps for Creating Phonebook Entries on page 25 Note If the Caller ID message was received as a private or unknown number or the message does not have the number you cannot store the message in the phonebook If it was received as private or unknown name the message will be stored as NO NAME Erasing Phonebook Entries ...

Page 30: ...ur way function key or the number key 0 2 9 to select desired phonebook entry then press the COPY soft key The phonebook entries will be transferred to the designated handset During the copy process the receiving handset shows RECEIVING and the Banner name of the sending handset When the transfer is completed DONE appears Note If your Phonebook contains 100 entries you cannot store any new phonebo...

Page 31: ... intercom The banner lets you customize the name your handset displays The name will be displayed on the LCD screen during Standby Intercom Intercom Hold Room Monitor and Copy Phonebook operations The banner name will be displayed on the receiving handset as well Press the MENU soft key Select the HANDSET SETUP menu and then the BANNER submenu Use the keypad or the DELETE soft key to enter or edit...

Page 32: ... 6 Lorri Song Light Bug When the Irish Eyes Are Smiling Irish Eyes Beep Boop Aura Lee Tone Board Let Me Call You Sweet Heart Sweetheart Chip Chop Waltzing Matilda W Matilda Party Clap Old MacDonald Old MacDld Reminder Press the MENU soft key Select the HANDSET SETUP menu and then the RINGER TONES submenu Move the cursor to highlight a ring tone As each ring tone is highlighted you will hear a samp...

Page 33: ...elect ON or OFF and press the OK soft key You will hear a confirmation tone Activating Any Key Answer Any Key Answer allows you to answer the phone by pressing any key in the number key pad Press the MENU soft key Select the HANDSET SETUP menu and then the ANYKEY ANSWER submenu Select ON or OFF and then press the OK soft key You will hear a confirmation tone 2 3 2 3 WVQ 6CNM 1P 1HH 6 1 WVQ 6CNM 1P...

Page 34: ...Press flash 2 3 4 2 3 Remove the handset from the charging cradle Press Listen for the dial tone Dial the number OR Remove the handset from the charging cradle Dial the number Press 2 3 4 2 3 Answering a call Pick up the handset If AutoTalk is on the phone will answer when you remove the hand set from the charging cradle Press flash If Any Key Answer is on you can also press any number keypad 2 Pi...

Page 35: ... with the or on the four way function keys until you find the phonebook entry you want to call See Finding a Phonebook Entry on page 27 Press the DIAL soft key to dial the number Making a call with Speed Dial When the phone is in standby press and hold the number key 0 9 until the assigned phonebook entry ap pears in the display Press flash or on the handset to dial the number Switching to the Han...

Page 36: ...d name may not appear Using the Caller ID List You can store up to 100 Caller ID numbers in each handset Your phone shares memory between your Phonebook and Caller ID When the shared memory is full and when you store a new phonebook entry the oldest Caller ID message is overwritten Once you reach your maximum phonebook entries of 100 Caller ID information will not be stored but it will still displ...

Page 37: ...er ID list Use or to find the Caller ID you want to dial Press the DIAL soft key to dial the number Deleting Caller ID Numbers To delete only one Caller ID number go to the Caller ID list and select the number you want to delete Press the DELETE soft key When the phone asks you to confirm select YES To delete all the Caller ID numbers go to the Caller ID list and press the DELETE soft key Select Y...

Page 38: ...n 2 on the handset to accept the waiting call The first caller is put on hold and you will hear the new caller after a short pause To return to the original caller press flash and then 2 again For New Zealand Model Press flash on the handset to accept the waiting call The first caller is put on hold and you will hear the new call er after a short pause To return to the original caller press flash ...

Page 39: ...Note If the number exceeds 32 digits only the first 32 digits are retained in redial memory If the redial memory is empty you will hear a beep Deleting a Redial Record If you want to delete a phone number from the redial list follow the steps below With the phone in standby press the REDIAL soft key Use to scroll through the redial list When you find the redial number you want to delete press the ...

Page 40: ... the speaker volume while on a call press to make it louder or to make it softer T coil Handset only Digital spread spectrum cordless phones generate magnetic signals that could cause noise to be heard by users wearing hearing aids set to T mode The T mode is only found on hearing aids equipped with a telecoil T coil feature This phone includes a special T coil mode that when activated reduces the...

Page 41: ...laced handset press find hs on the base when the phone is in standby All registered handsets will beep for 60 seconds and PAGING appears on the handset display To cancel paging press find hs on the base Note If the battery pack is completely drained the handset will not beep when paging Using Hold Conference and Transfer Placing a Call on Hold During a call press int com hold on the handset to pla...

Page 42: ...tically be placed on hold and a paging tone sounds To cancel the transfer press flash or on the initiating handset When another station accepts the transferred call your call will be disconnected If you want to rejoin the call press flash or on the handset Answering a Transferred Call When a station receives a call transfer it sounds a paging tone and shows the ID of the station that is paging To ...

Page 43: ...on will appear and remain in the display until the feature is turned off To cancel muting press the MUTE soft key or mute MUTE OFF appears Privacy Mode If you don t want another station to interrupt you while on a call you can turn on privacy mode As long as your sta tion is in privacy mode other stations won t be able to join your call or make any calls of their own While on a call press the PRIV...

Page 44: ...ft key The display shows TO ENTER DIRECTLINK MODE PRESS ENTER Press the ENTER soft key You will hear a confirmation tone and DIRECTLINK MODE COMPLETE appears in the display Making a DirectLink Call To call another handset with DirectLink press the DirectLink soft key Select the handset you want to call by pressing the number key 0 9 If the handset is out of range or not in DirectLink operation the...

Page 45: ...ash int com hold or the ANSWER soft key Or press a number key tone or when Any Key Answer is enabled or pick up the handset from the cradle when AutoTalk is on To hang up an intercom page press the END soft key or on either handset Note If the party is busy the handset returns to standby If the party is out of range UNAVAILABLE appears in the display and the operation will be canceled If you recei...

Page 46: ...er handset or return the handset to the cradle Note Warning The Room monitor function is not a replacement for regularly checking the safety and security of children The operating time is limited to the remaining charge of the battery and is not suitable for continuous overnight use This feature only works when both handsets are within range of the base If the party is out of range UNAVAILABLE app...

Page 47: ... pulse dialing make your call normally Once your call connects press tone on the handset Any digits you enter from then on will be sent as tone dialing When this call ends the phone automatically returns to pulse dialing Installing the Optional Headset Your phone may be used with an optional headset To use this feature insert the head set plug into the headset jack Your phone is ready for hands fr...

Page 48: ...ase 9V DC 350mA Charging Cradle 9V DC 210mA Battery Part Number Capacity BT 446 3 6V DC 800mAh or BT 750 3 6V DC 750mAh Notes Use only the supplied AAD 041S M or AAD 041S and AAD 600S M or AAD 600S AC adapters Do not use any other AC adapter Do not place the power cord where it creates a trip hazard or where it could become chafed and create a fire or electrical hazard Do not place the base in dir...

Page 49: ... Caution Do not use paint thinner alcohol or other chemical products Do ing so may discolor the surface of the telephone and damage the finish Warning To avoid the risk of personal injury or property damage from fire or electrical shock use only Uniden AAD 041S M or AAD 041S 9V 350mA and AAD 600S M or AAD 600S AC adapters and Uniden BT 446 or BT 750 battery pack with your phone Caution Use only th...

Page 50: ... battery icon appears Talk and Standby Times With average use your handset battery provides approximately 5 hours of talk time and approximately 7 days of standby time When your handsets are not being used and are left off of their charging cradles the battery will grad ually discharge You can achieve optimum battery life and performance by returning the handset to the charging cradle after each u...

Page 51: ...ss and hold and for more than 5 seconds You will hear a confirmation tone The handset will clear its registration information from the base and then delete its own base information PLACE HANDSET ON MAIN BASE TO REGISTER To re register the handset to the base see page 23 If the handset cannot contact the base it will display OUT OF RANGE Make sure the handset is in range of the base and the base is...

Page 52: ...s using the same security code or if you are instructed to change this code by a manufacturer s Call Center Representative you can change the code by Perform Resetting the Handset for all of your handsets Re register each handset by following the steps on page 23 Traveling Out of Range During a call if you move your handset too far away from your base noise may increase If you pass the range limit...

Page 53: ... receive calls Make sure that you are not too far from the base Make sure the line is not in use If an outside call is already using a line you cannot use that line to make another outside call Check both ends of the base telephone line cord Make sure the AC adaptor is plugged into the base and wall outlet Disconnect the AC adaptor and reconnect Change the Digital Security Code see page 51 The han...

Page 54: ...urs Change the Digital Security Code see page 51 Make sure you have not stored 10 handsets already The handset doesn t commu nicate with other handsets Change the Digital Security Code see page 51 Make sure that you have registered all handsets An accessory handset can t join the conversation Make sure there are not 2 handsets already using the conference feature Make sure that another station is ...

Page 55: ...r off and the battery pack disconnected for at least 3 days Once the handset is completely dry reconnect the battery pack and the battery cover Recharge the handset s battery pack for 15 to 20 hours before using IMPORTANT You must unplug the telephone line while recharging the battery packs to avoid charge interruption Base Disconnect the AC adaptor from the base cutting off electrical power Disco...

Page 56: ...atteries contained in this equipment may explode if disposed of in a fire Do not short circuit the battery Do not charge the rechargeable battery used in this equipment in any charger other than the one specified in the owner s manual Using another charger may damage the battery or cause the battery to explode Rechargeable Batteries Must Be Recycled or Disposed of Properly The exclamation point wi...

Page 57: ...r than a cordless type during an electrical storm There may be a remote risk of electric shock from lightning Do not use the telephone to report a gas leak in the vicinity of the leak Use only the power cord and batteries indicated in this manual Do not dispose of batteries in a fire They may explode Check with local authorities for possible battery disposal instructions Do not disassemble any com...

Page 58: ...e Microphone 42 Muting the Ringer 42 O Optional Headset 46 Out of Range 51 P Phonebook 25 Placing a Call on Hold 40 Privacy Mode 42 Product Overview 6 R Redialing a Number 38 Registering DSS7905 Accessory Handsets 23 Resetting the Handset 24 50 Ringer Tones 31 Ringer Volume 39 Room Monitor 45 Index A Adding Accessory Handsets 22 23 Animation screen 19 Answering a Call 33 Any Key Answer 32 AutoTalk...

Page 59: ...58 S Speaker Volume 39 Speed Dial 26 34 T T coil 39 Talk and Standby Times 49 V Voice Mail 20 Voice Mail Programming 21 Voice Mail Tone 20 Voice Message Waiting Indicator Reset 21 ...

Page 60: ...59 Memo ...

Page 61: ...60 Memo ...

Page 62: ...61 Memo ...

Page 63: ...or as part of a system not manufactured by Uniden or F Where the Serial Number label of the product has been removed or damaged beyond recognition Warranty only valid in the country of original retail sale PARTS COVERED This warranty covers for one 1 year the Product and included accessories STATEMENT OF REMEDY In the event that the Product does not conform to this warranty at any time while this ...

Page 64: ... 2007 Uniden Australia Pty Limited Uniden New Zealand Limited Part Code UPZZ01856BZ 0 Printed in China ...

Reviews: