background image

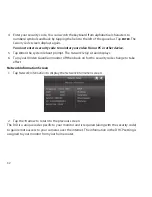
35

1.  Tap 

Power Saving

, then 

Enable

 to activate Power saving mode (Default = Disable).  

2.  A check mark appears on your selection.
3.  Tap      to return to the previous screen.

screen auto Lock

When you turn on Auto Lock mode, the monitor automatically enters screen lock mode after being 
idle for 2 minutes. Auto Lock disables the touchscreen and removes the icons from the display. 
When the auto-lock feature has been enabled and your Live screen is locked, just tap the 

PoWer


button once to unlock the screen and return to normal touch screen operation.  At any time from 
the Live screen, you can manually lock the system by tapping the 

PoWer

 button, whether or not the 

auto-lock feature has been enabled.

1.  Tap 

Screen Auto Lock

. The 

Activate Touch Screen Operation Auto-lock

 screen displays.   

2.  Tap your selection; a check mark displays.
3.  Tap the 

BaCK

 arrow to return to the previous screen.

Summary of Contents for Guardian G955

Page 1: ...Video Surveillance System G955 User s Guide Rev 3 December 2013 ...

Page 2: ...t to your place of purchase Our customer care specialists are available to serve you Quickly find answers to your questions by 1 Reading your owner s manual included with this product 2 Visiting our customer support website at www uniden com 3 Calling our customer care specialists at 1 800 658 8068 ...

Page 3: ...rnet Setup 30 Security Code 31 Network Information Screen 32 Alarm Setup Screen 33 Period 33 Melody 34 System Setup Screen 34 Power Saving 34 Screen Auto Lock 35 Time 36 Storage Management 38 System Upgrade 39 Language 40 Quick Tips Screen 41 REMOTE ACCESS 42 OVERVIEW 42 System Requirements 42 Connecting to the Internet 42 Connecting to the Intranet Home network 43 Setting up a Portal Account 43 E...

Page 4: ...PECIFICATIONS 61 IMPORTANT INFORMATION 63 Lithium Polymer Battery Warning 63 Recycling and Disposal Information 63 Compliance Information 63 FCC Part 15 Compliance Statement 63 RF Exposure Information 64 IC Compliance Information 64 Radio Equipment Notice 64 CE Compliance Information 64 One Year Limited Warranty 65 ...

Page 5: ...rview This section lists basic operations in an abbreviated format It references screen details in the third section Uniden Guardian Screen Descriptions Here you will find detailed descriptions of each screen and how it is used Remote Access This section tells you how to connect your surveillance system to the internet and access it from your PC or other devices Maintaining Your System Solving Pro...

Page 6: ...tems G955 Monitor Camera 2 Stand 2 AC Adapter 3 Antenna 2 Not Shown Mounting screws Ethernet cable 2 extension cords and microSD card and adapter If any items are missing or damaged contact our Customer Care Line immediately Never use damaged products ...

Page 7: ...itor screen freezes use a blunt object like an unbent paper clip to press RESET and reset the monitor The monitor turns off Press POWER to turn it back on again 5 DC 5V Connects the DC 5V power adapter to the monitor 6 Rubber feet Prevents the monitor from sliding when using the stand 7 Internet jack Connects the G955 to the internet through the Ethernet cable 8 Stand Pull out to create stable bas...

Page 8: ...ower pigtail Pair button Microphone Power jack Ethernet Connector What the lights mean Light State What it means Power status On Red The camera is on Off The camera is off Link status Flashing The camera is in pairing mode On Green The camera is connected to the monitor Off The camera is in standby ...

Page 9: ...rayed on them and they will still work however the cameras cannot be submerged Although the cameras can be exposed directly to the rain it is recommended that if they are used outdoors they be mounted under some type of cover like a patio overhang or eave As rainwater drops start to dry on the camera glass it can create spots that will reflect the light from the infrared LEDs used for night vision...

Page 10: ... into the right position when you have the display handy 1 Hold the base of the camera stand where you want to mount it and mark the location of the screw holes 2 Use the included screws and anchors to attach the base to the wall or ceiling 3 Before attaching the camera tug gently on the stand to make sure it is securely in place Attach the Camera 1 For each camera attach the camera bracket to the...

Page 11: ...mera s pigtail and connect the AC adapter to the extension cord Be sure the power plug and the connector are tightly twisted together to avoid water leaking in 7 Make sure the Power status light turns on If it doesn t try reconnecting the AC adapter and make sure the power outlet isn t controlled by a wall switch 8 You should now have video on your Live screen SETTING UP YOUR SYSTEM You can now se...

Page 12: ...on page 35 Time Time on page 36 Security code Security Code on page 31 Language default language is English Language on page 40 Recording Settings Motion Detection Motion Detection on page 25 Schedule Recordings Schedule Record on page 28 ...

Page 13: ...ve screen lets you view the camera transmissions It also lets you set up your screen display and make adjustments to it Icons on the screen itself let you monitor power and camera status The Uniden Guardian system always defaults to the Live screen in Quad mode after being idle for 2 minutes while in any other system screen This default ensures that the system is ready to record video even if you ...

Page 14: ...ume level Uniden Guardian System Settings Access the Uniden Guardian Software Operation screens or view recorded events MICROSD Capacity Indicates memory capacity remaining Battery Capacity Displays battery capacity This graphic shows battery at nearly full Internet INtranet Status Appears in Live view Indicates connection to the internet intranet is in progress Appears in Live view and Pop Up Men...

Page 15: ...ys the camera number and signal strength through the status lines to the left of the number Record Status Tap to start or stop recording for that camera Steady on Not recording Flashing Recording Motion System indicates motion detection recording in progress Scheduled System indicates scheduled recording in progress Pop up Menu Tab Opens and closes the pop up menu display ...

Page 16: ...display on the Live screen Full view displays a single camera s video on the entire screen If you are in Quad view tap on the camera quadrant you want to expand to Full view Tap on that image to return to Quad view Using the PentaZoom Feature While in any camera s full screen view selecting the icon on the right side of the screen enables the PentaZoom feature PentaZoom lets you select from 5 sect...

Page 17: ...nking You can record from all cameras at the same time Playing Back Recorded Video From the pop up menu tap the following icons as they appear on the screens This screen should display 1 Tap on the highlighted day containing the recording you want to view or on a specific camera to only view that camera s recordings The Record List screen displays those recordings listed in a folder ...

Page 18: ...visible you can fast forward rewind by dragging the playback bar forwards or backwards On the playback progress bar tap the double arrow to skip forward or backwards about 10 seconds Tap the arrow and bar to skip to the next or previous video 4 When playback ends tap to return to the Record List Deleting Recorded Files You can delete a single recorded file or a folder containing all recorded files...

Page 19: ...ring cameras If a camera is already assigned to the selected channel the monitor overwrites that camera link with the new one Only pair one camera at a time The monitor links to the first camera it detects If two or more cameras are in pairing mode you can t control which camera the monitor will detect first Pair Camera 1 From the Pairing Camera screen see Pairing on page 23 tap the camera image y...

Page 20: ...ttached and the monitor s antenna is extended making sure the camera is paired to the correct channel re pairing the camera and monitor the camera s signal status icon shows one or two bars or the video quality is poor See General Guidelines on page 9 to improve video quality the camera won t pair with the monitor making sure the camera is plugged in and the red LED is on pressing and releasing th...

Page 21: ...default Main Screen Sub Screens What it Does Camera Setup Pairing Pairs new cameras to the monitor Camera on Makes the cameras visible to the monitor Brightness Brightens or darkens the video of that camera Recorder Setup Motion Detection Records when something moves in front of the camera Continues recording for 2 minutes Motion detection is on by default Email Alert Sends email notification to u...

Page 22: ...ly turns off the LCD after the system is idle for 2 minutes to conserve power Screen Auto Lock Locks the screen from further activity until the screen is unlocked Time Clock Alarm Set an alarm Time Setting Set the current time including Daylight Savings Time Time Zone Set the time zone for your G955 system Storage Management Formats erases all the data on the microSD card Permits new records to ov...

Page 23: ...tor links to the first camera it detects If two or more cameras are in pairing mode you can t control which camera the monitor will detect first From the pop up menu tap the following icons as they appear on the screens This screen should display 1 Tap the camera image you want to pair A processing icon displays for a 60 second countdown 2 Press and release the Pairing button on that camera s powe...

Page 24: ...ned on From the pop up menu tap the following icons as they appear on the screens This screen should display 1 Tap the camera you want to turn on 2 A check mark replaces the X under the camera 3 To turn a camera off tap the camera icon An X replaces the checkmark and indicates the camera is turned off Although the camera is turned off it is still powered The monitor will not receive video signals ...

Page 25: ...he default brightness is 0 and the range is from 2 through 2 Tap on the camera to cycle through a range of settings Recorder Setup Screen Use the Recorder Setup screen to select between Motion Detection Email Alert or Schedule Record Select Motion Detection Motion Detection From the pop up menu tap the following icons as they appear on the screens This screen should display ...

Page 26: ...ian system you must enter both incoming and outgoing email addresses Uniden recommends you use Gmail to set up as the outgoing email server The outgoing email server SMTP server is responsible for sending out the email notification to tell users when the Uniden Guardian system detects motion from any camera Motion Detection must be activated The incoming mail server Email To receives the email not...

Page 27: ...rt information tap OK A keyboard screen displays 3 Enter your outgoing e mail SMTP server You can switch the keyboard from alphabetical characters to numbers symbols and back again by tapping the field to the left of the space bar Tap Enter The Email Alert screen displays again 4 Repeat the previous step for the Password field Tap Enter The password entered here must be the same password as the pa...

Page 28: ...wing table For Gmail SMTP Server smtp gmail com Enter this SMTP Port 465 Enter this Username XXXX gmail com Enter your gmail address in full including gmail com Password XXXXXXXXXX Enter the password for this gmail account Email to XXXX gmail com Enter the email address where you want the alerts sent Schedule Record You can schedule up to 5 recording sessions You are limited to the size of the mic...

Page 29: ...en displays 5 Tap on the date you want the recording The previous screen displays 6 Set up the recording and then tap SAVE You can select another recording session to schedule return the previous screen or return to the Live screen Scheduled recordings are broken up into 15 minute file sizes For example if you record a 50 minute event you will have three 15 minute recordings plus one 5 minute reco...

Page 30: ...p up menu tap the following icons as they appear on the screens This screen should display Internet Setup 1 Tap Internet Setup to display the Internet Setup screen 2 Tap on your selection and fill in the fields requested Tap OK Selection Fields Static IP IP Address Subnet Mask Default Gateway DNS Server DHCP None 3 Tap OK at the system reboot prompt The Network Setup screen displays ...

Page 31: ...e system from a remote location 1 Tap Security Code to display the Security Code screen 2 If you have not entered a security code you can enter it here If you have previously entered a security code your current security code displays The default security code is set to 123456 We recommend that you change this code to something you will remember You will need the code to access your video from a r...

Page 32: ...oot prompt The Network Setup screen displays 6 Turn your Uniden Guardian monitor off then back on for the security code change to take effect Network Information Screen 1 Tap Network Information to display the Network Information screen 2 Tap the arrow to return to the previous screen The DID is a unique code specific to your monitor and is required along with the security code to gain remote acce...

Page 33: ...lody for the alarm Period This selection allows you to select the length of time the alarm will sound for the alarm clock 1 Tap Period The Change Siren Duration screen displays 2 Tap the duration you want the siren to last 2 10 or 30 seconds or tap None to turn sirens off 3 Tap to return to the previous screen ...

Page 34: ...r briefly plays a sample of the selected melody 3 Tap to return to the previous screen System Setup Screen Power Saving When you turn on Power Saving mode the monitor goes into sleep mode LCD turns off after it is idle for 2 minutes Press the Power button once to reactivate the monitor Default Disable If a motion detection event or scheduled recording begins the LCD turns back on ...

Page 35: ...moves the icons from the display When the auto lock feature has been enabled and your Live screen is locked just tap the power button once to unlock the screen and return to normal touch screen operation At any time from the Live screen you can manually lock the system by tapping the power button whether or not the auto lock feature has been enabled 1 Tap Screen Auto Lock The Activate Touch Screen...

Page 36: ...ey appear on the screens The following screen displays Clock Alarm This feature operates as an independent alarm clock It does not affect the operation of live video or recording video 1 Tap to display the Clock Alarm screen 2 Tap on an alarm button total of 5 to select from 3 Tap on the hour block The UP DOWN arrows move to the hour block Set the hour ...

Page 37: ...o 4 Tap Daylight Saving to set Daylight Savings time 5 Tap SAVE when you are finished It is important to set the correct time to ensure that the recorded video files and the scheduled record times are correct Time Zone Time Zone allows you to set the time zone your monitor is in This is especially useful if you are using the app in another time zone and you want to remotely access your recorded fi...

Page 38: ...t lets you reformat your microSD card erasing all records or allow new video records to copy over older records when the microSD card is full Overwrite erases the oldest record to free space for the new file More than one record may be erased depending on the new file s size The Uniden Guardian System supports up to a 32 GB microSD Card From the pop up menu tap the following icons as they appear o...

Page 39: ...dest records in order to record new records when the microSD card is full It might be necessary to delete more than one record to save the new record depending on size 1 Tap the Overwrite portion of the Storage Management screen 2 A checkmark displays to indicate that the oldest files will be overwritten If you turn off this feature an X displays and the system displays an out of space message whe...

Page 40: ...roSD card and insert it into the G955 monitor 6 Navigate to System Setup Update Firmware see path shown above Tap on the Update Firmware screen to begin the update 7 The system displays various processing messages ending with a notice that the system will shut down in 5 seconds Either let the system shut down on its own or shut it down manually 8 Turn the system back on The memory card will initia...

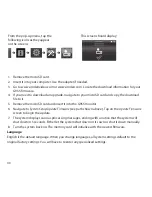
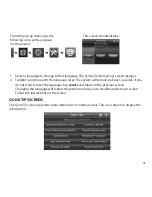
Page 41: ...ontinue with the language reset The system will reboot in about 5 seconds If you do not want to reset the language tap CANCEL and return to the previous screen Changing the language will reboot the system and ask you to recalibrate the touch screen Follow the instructions on the screen Quick Tips Screen The Quick Tips screen provides more detail into 10 common areas Tap on a subject to display the...

Page 42: ... DID code and security code The number of remote viewers is determined by the amount of available upload bandwidth on your home network Each remote viewer requires 350kbps of bandwidth on the network System Requirements Microsoft Windows XP Vista or Windows 7 Internet Explorer 8 or greater iPhone or iPad or AndroidTM smartphone or tablet Connecting to the Internet When you are connected to the int...

Page 43: ...s in progress Connecting to the Intranet Home network When the monitor is connected to your router through the ethernet cable included you can access your live video from a PC smart phone or tablet as long as those devices are also connected to the same network as the monitor For example your smart phone is connected to your home network via WiFi In this case live video will still be displayed on ...

Page 44: ... displays 4 Enter Account Name 1 5 Enter a Password 2 6 Enter it again to Verify Password 3 7 Complete all required fields 4 8 Click in the check box 5 to receive information on special offers from Uniden 9 Click Submit 6 The New Account Created screen displays 10 Click Continue The Video System Registration screen appears 1 2 3 4 5 6 ...

Page 45: ...deo from your PC you must download and install the OCX plug in Click on the link near the bottom of the page and it will ask you to Run or Save the file If you choose to Save remember where the download location is on your computer After the download is complete find that file and click on it to install After the installation is complete return to the View Now page on the Portal On this page you w...

Page 46: ...ake the corresponding change on the Portal or apps Record Video FROM PORTAL The Portal lets you record live video and save it to your PC 1 Click Record to start recording 2 Click Stop Record to stop recording Take A Snapshot FROM PORTAL The Portal lets you take snapshots of video and save to your PC Click Snapshot You specify the save location for all video and snapshots Select Save and then brows...

Page 47: ...for your G955 system in the System Name field Enter the same DID code from your Uniden Guardian monitor in the DID field If your phone is connected via WiFi to the same network as the Guardian system tap Search The app will look on your network and find your Uniden Guardian system s DID code Enter the security code Tap the Email Alert box to have the system send you e mails when motion triggers th...

Page 48: ...ows the following icons Main screen Tap to add an additional Uniden Guardian system The app takes you back to the same screen you used to add your current system see page 47 Tap to enter System Setup page Tap to refresh the screen Tap to display the Information options There is also an option to en able disable the PIN lock System Setup Icons These icons display when you tap the icon from the Main...

Page 49: ... lock when starting box if desired Enter this code when you activate the app About Tap this icon to display the APP version number and the API version number To Enable Event Notification You can set your smartphone or device to notify you when there is a new recorded file 1 Tap Settings on your device 2 Tap Notifications A list of apps displays 3 Tap Uniden Guardian 2 4 The Uniden Guardian 2 setti...

Page 50: ...lect it for deletion You can set a filter to display all files recorded within the past hour past 6 hours etc Tap Search magnifying glass icon to display the filter selections Select a filter and then tap Yes The Event List displays again filtered accordingly When you set a filter be sure the Time Zone feature is set accurately in the monitor to reflect the current time zone for the system not the...

Page 51: ...niden Guardian system to remotely connect to and view camera videos Follow these steps to establish your G955 system on the app 1 From your iPhone or iPad go to the Apple App Store and search for Uniden Guardian 2 Download and install this app to your device 2 Launch the app tap Press to add cameras to add your system information to the app Enter a name for your G955 system in the System Name fiel...

Page 52: ...em is connected the app will display the globe screen momentarily and then display the last image from that system 4 If you have more than one system on the app tap your desired system s globe to view live video from that system App Operation When you open the app on your iPhone or iPad the Globe screen displays It also shows the following icons ...

Page 53: ...dit System Tap this icon to change your settings Delete System Tap this icon to delete Uniden Guardian systems from the app View Recorded Files Tap this icon to display a list of recorded files see page 54 Information Options These options display when you tap on the Main screen Set up PIN Lock Activating this function prevents others from activating the app and viewing your camera images Enter a ...

Page 54: ...list of recorded files Event List displays You also have the following options available At the top of the screen is a camera selection field with a drop down menu you can select which camera s Event List you want to view Tap Delete All to delete all recorded files displayed Tap Delete One and tap the file to delete Red and white status buttons display on the left side of the file name and a Delet...

Page 55: ... to return to the previous screen TO DELETE FILES 1 Tap the Delete All or Delete One button on the bottom of the list of files 2 If you tap DELETE ALL a confirmation message display Tap Yes or No If you tap DELETE ONE the Event List displays again with red and white circles Tap the circle on the file you want to delete and then tap DELETE ...

Page 56: ...Return Snapshot icon Tap to take a picture The picture is saved to your phone Record icon Tap to begin recording A red circle displays in the upper right hand corner of the screen The app records for 2 minutes and the recorded files are stored on the monitor s microSD card Return icon Tap to return to the previous screen ...

Page 57: ...SD card take it out of the adapter and reinsert it into the monitor 6 Upgrade the firmware see System Upgrade on page 39 Taking Care of Your Hardware Monitor As you use your monitor keep the screen clean by wiping it with a microfiber cloth to remove fingerprints dust etc Cameras When dust and grime builds up on the camera lens and glass it affects night vision capability The infrared light reflec...

Page 58: ...croSD card from the monitor 2 Insert it into your computer s SD card slot Use an adapter if necessary 3 Navigate to the microSD card and locate your files 4 Copy them to the computer These files can now be deleted from the microSD card or the microSD card can be formatted ...

Page 59: ...d this free player from www apple com Video will play in players such as Windows Media Player if an H 264 CODEC plug in is installed I schedule a recording save the schedule and the recording does not happen at the scheduled time Ensure that the system time is set to the current time Make sure that the microSD card is inserted into the monitor and there is still memory available on that card The c...

Page 60: ...will power off Tap the Power button to turn the LCD back on I have my regular Live screen but there are no icons Tap the Power button on top of the monitor Screen lock may be on and tapping the Power button will unlock the screen The monitor picture has frozen Using a blunt object like an unbent paper clip to press RESET and reset the monitor The monitor turns off Press POWER to turn it back on I ...

Page 61: ... sight Image Specification Output Image resolution 480 X 272 320 x 240 QVGA Image processing H 264 Exposure Auto White balance Auto System Specifications Camera Monitor Weight 13 oz 370 g 1lb 4 2 oz 572 g Dimension 5 94 x 2 9 x 1 9 in 151 x 74 x 49 mm 10 25 x 6 02 x 0 75 in 260 5 x 153 x 19 mm Operating temperature 14 F 10 C to 122 F 50 C Battery charging temp 32 F to 113 F 0 C to 45 C Input volta...

Page 62: ...Specifications Camera Monitor Power consumption 650 mA max Low light solution 20 IR LEDs 1 Low light sensor N A Low light sensitivity 1 8 lux N A Picture sensor OV7725 1 4 Color CMOS N A Lens F3 6mm H 55 V 44 N A ...

Page 63: ...rmation Do not dispose of electronic devices or any of their components especially batteries and LCD displays in your municipal trash collection Consult your local waste management authority or a recycling organization like Earth911 com to find an electronics recycling facility in your area Compliance Information FCC Part 15 Compliance Statement This device complies with Part 15 of the FCC Rules O...

Page 64: ...mpliance could void your authority to operate the equipment RF Exposure Information The antenna used for this transmitter must be installed to provide a separation distance of at least 20 cm 7 9 from all persons and must not be collocated or operating in conjunction with any other antenna or transmitter IC Compliance Information Radio Equipment Notice The term IC before the radio certification num...

Page 65: ...is product STATEMENT OF REMEDY In the event that the product does not conform to this warranty at any time while this warranty is in effect warrantor will either at its option repair or replace the defective unit return it to you without charge for parts service or any other cost except shipping handling incurred by warrantor or its representatives in connection with the performance of this warran...

Page 66: ...ely secure the battery in its own separate packaging within the shipping carton The Product should include all parts accessories originally packaged with the Product Include evidence of original purchase a note describing the defect that has caused you to return it The Product should be shipped freight prepaid by traceable means to warrantor at Uniden America Service 743 Henrietta Creek Rd Roanoke...

Page 67: ...67 ...

Page 68: ... 2013 Uniden America Corporation All rights reserved Printed in China ...

Reviews: