background image

58

3.

At the Setup Menu, use 

S

 and 

T

 to 

highlight the setting you want to change 

and press 

[ENTER]

.

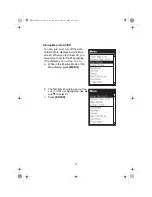
You can change the default setting for any 
of the following:

z

RF Select

z

Initialize

z

Nav Screens

z

Coord System

z

Map Datum

z

Elev Mode

z

Time Format

z

Nav Units

z

North Reference

z

Daylight Savings

z

Light Timer

z

Beeper

z

Clear Memory

z

NMEA

z

Baud Rate

z

Simulate

z

Language

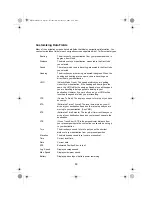
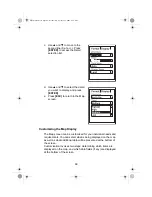
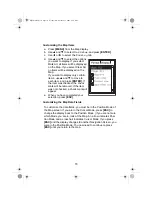
At this menu, you can change the default settings. When you select 
any of the items

you will see a

 different selection menu. 

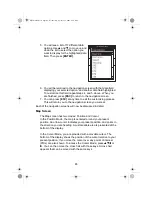
Use 

S

 and 

T

 to highlight the value you want 

and press 

[ENTER]

. In some cases you have a second list to choose 

from. Use the same procedure to select the value. When you are 
finished with all the changes, press 

[ESC]

 to return to the Channel 

Display. Each of the settings are discussed in the following 
paragraphs.

RF Select

The procedure for 

RF Select

 is covered on page 33.

Initialize

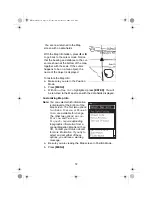
You can initialize the 

MYSTIC

 at any time. Select 

Initialize

When you press 

[ENTER]

, the unit will initialize from the beginning, as 

described on page 55.

Setup  Menu

RF Select

Initialize

Nav Screens
Coord System
Map Datum
Elev Mode

Time Format

Nav Units

Daylight Saving
Light Timer
Beeper

North Reference

Mystic OM.book  Page 58  Wednesday, October 22, 2003  8:59 PM

Summary of Contents for MYSTIC - Marine GPS Receiver

Page 1: ...MISTIC 1024 10 24 03 3 26 PM Page 1 ...

Page 2: ...Mystic OM book Page 2 Wednesday October 22 2003 8 59 PM ...

Page 3: ...ransmitting 21 Entering Channel Numbers into Memory Scan 22 Review Channel Memory 23 Marine Distress Procedure 23 Sending a Distress Call 24 Receiving a Distress Call 25 MYSTIC Setup 32 Default Settings 32 MYSTIC Setup 33 Select Operating Mode RF Select 33 Select U I C USA International or Canada 34 Directory 35 FIPS codes 37 Channel Tag 38 MMSI Entry 40 DSC Watch 41 Auto Channel Switch 41 POSITIO...

Page 4: ...stom Icon and Name 96 Adding a Message to a Waypoint 97 Accessing Waypoints in the Database 98 Routes 100 Vertical Profile 105 Sun Moon Screen 105 Fish Hunt Screen 106 Contrast 107 Alarms 108 VHF FM Marine Radio Telephone Channel and Functions USA Channels 110 VHF FM Marine Radio Telephone Channel and Functions Int Channels 111 VHF FM Marine Radio Telephone Channel and Functions CAN Channels 112 N...

Page 5: ... radio with a damaged antenna If a damaged antenna comes into contact with the skin a minor burn may result Please contact your local dealer for a replacement antenna z Use only the supplied or an approved antenna Unauthorized antennas modifications or attachments could impair call quality damage the radio or result in violation of FCC regulations Body worn Operation This device was tested for typ...

Page 6: ... Parts Department at 800 554 3988 VHF Radio Operating Guide Antenna Wrist Strap Belt Clip Mounting Hardware Data Cable Charging Cradle Li ion Battery MapSend Software AC Adapter Cigarette Lighter Adapter Included with your MYSTIC Radio Mystic OM book Page 4 Wednesday October 22 2003 8 59 PM ...

Page 7: ...within the battery pack to temperatures above 60 C 140 F may cause the battery to rupture fail or reduce performance In case of exposure to cell contents wash the affected area thoroughly and seek medical attention Additional battery information and warnings are described on page 12 and page 13 of this Operating Guide Lithium Ion Battery Pack Warning Mystic OM book Page 5 Wednesday October 22 2003...

Page 8: ...ld to turn Weather Alert On or Off 6 Cursor keys STWX Press to move cursor up or down on screens and maps 7 1W 5W LOCK Press to change between 1 Watt and 5 Watt transmit power Press and hold to place radio in KEY LOCK Mode 8 OUT Press to zoom out on a Navigation Map 9 ENTER Press to accept selection in any Menu screen 10 MENU Press to access MYSTIC Menu screens 11 SCAN MEMORY Press to place radio ...

Page 9: ...7 Top Controls 1 Belt Clip 2 Antenna 3 Speaker Microphone Connector 4 Squelch Control 5 On Off Volume Control LCD Display Mystic OM book Page 7 Wednesday October 22 2003 8 59 PM ...

Page 10: ...C Mode WX Indicates Weather Mode is ON ALERT Indicates Weather Alert Mode is ON TRIPLE Indicates Triple Watch Mode is ON LOCK Indicates Key Lock Mode is ON Current Time Displays in format chosen in Setup Current Date Displays in format chosen in Setup GPS Information Displays status of satellite acquisition Battery Level Current battery level May display 0 12 Bat tery Low 24 36 48 60 72 86 and 100...

Page 11: ...ws and washers as shown To mount the charger on a vertical surface Insert the two mounting screws into the wall keeping the same space as the holes on the charger Place the charger with the screws through the larger opening of the mounting holes Adjust the charger so the screw heads are over the smaller opening and tighten the screws Getting Started Mystic OM book Page 9 Wednesday October 22 2003 ...

Page 12: ...the other end into the drop in charger When you mount the drop in charger on your boat use the DC adapter instead Attaching the Antenna Attach the antenna to the MYSTIC Be sure the antenna is firmly seated Mystic OM book Page 10 Wednesday October 22 2003 8 59 PM ...

Page 13: ...y release clip until it clicks Be sure the battery pack fits tightly against the MYSTIC s body Attaching the Belt Clip 1 Hold the belt clip in the direction shown 2 Place it firmly on the mounting button on the back of the radio and slide it down and turn until it clicks Mystic OM book Page 11 Wednesday October 22 2003 8 59 PM ...

Page 14: ...pack See page 5 for the Lithium Ion Warning Note Before operating your MYSTIC charge the battery pack for 4 hours without interruption in the charging cradle 1 Be sure the AC adapter or DC adapter is connected to the charging cradle and the appropriate power source 2 Place the MYSTIC in the charging cradle Mystic OM book Page 12 Wednesday October 22 2003 8 59 PM ...

Page 15: ...guish You may leave the MYSTIC in the charging cradle without overcharging the battery pack z You can monitor incoming calls while the MYSTIC is in the charging cradle Warning Do not attempt to replace the battery with the unit on This may damage the memory system of your radio Be sure to turn the unit off before removing the battery Mystic OM book Page 13 Wednesday October 22 2003 8 59 PM ...

Page 16: ...the most from your radio please read this Operating Guide thoroughly This guide contains information about your radio and the GPS mapping capabilities If this is the first time you are using this MYSTIC complete all the steps in the MYSTIC Setup Section page 32 and the GPS Setup Section page 55 before attempting communications or GPS usage z JIS7 Submersible z Full Screen Mapping GPS z Triple Watc...

Page 17: ...me screen appears and remains on the display for 5 seconds Note You can press ENTER immediately at any of the beginning screens to proceed quickly to the next screen After 10 seconds or if you press ENTER before then the display changes to a Warning screen The message remains displayed for 10 seconds During that time press the ENTER key to agree to the information on the screen The display then ch...

Page 18: ...the MYSTIC only as a marine VHF radio You will not have the use of the GPS functions B Map Screen If the MYSTIC is set for GPS Only and you press ENTER while the Warning message is displayed the display changes to the Map Screen W Gladstone St 348 O M 25 4 M I Mystic OM book Page 16 Wednesday October 22 2003 8 59 PM ...

Page 19: ...u now press ESC the MYSTIC will return to the Warning screen You will have another 10 seconds to press ENTER to agree to the message Squelch The SQUELCH SQ control allows you to set the threshold at which signals can be heard This allows you to determine how strong a signal must be before it breaks squelch That is how strong it must be before you can hear it This keeps static and unwanted weak or ...

Page 20: ...nually hear a hissing sound the unit will not scan properly Using the MYSTIC keys Your MYSTIC has 11 keys and a four way cursor Of the 11 keys 6 are dual function That is you press that key to access one function and you press and hold that key to access another Note Example Press WX ALERT to change from the VHF Channels to the Weather Channels Press and hold WX ALERT to set the Weather Alert Mode...

Page 21: ...or the T cursor key to select a different Weather Channel To exit from Weather channels press WX ALERT The radio returns to the previous Marine Channel Instant Channel 16 Channel 9 Communications To access instant Channel 16 or Channel 9 communications press the 16 9 TRIPLE key You can access Channel 16 instantly while tuned to another Channel Press the 16 9 TRIPLE key again to access Channel 9 co...

Page 22: ...iple Watch Triple Watch monitors Channel 16 Channel 9 and the current Marine Channel or Weather Channel To activate Triple Watch press and hold the 16 9 TRIPLE key for 2 seconds TRIPLE appears on the display indicating the Triple Watch mode is in effect If a signal is received on either Channel 16 or Channel 9 the radio will change to that Channel and remain until the signal ends Mystic OM book Pa...

Page 23: ...ine frequencies and receives on eighty marine frequencies Channel 70 of the USA International and Canadian frequencies and Channel 15 of the USA frequencies and WX CH are for receiving only The Mystic transmits on Channel 70 when sending DSC information Your radio will not transmit voice on these channels For your reference a listing of all the available marine channels are located on pages 110 11...

Page 24: ... and holding the 1W 5WLOCK key while you press the PTT button Entering Channel Numbers into Memory Scan You can enter channels into Memory Scan for instant scanning at any time When a Channel is selected for Memory Scan MEM appears on the LCD display To enter a Channel into Memory Scan select the Channel you want to store by pressing S or T and then press and hold SCAN MEMORY for 2 seconds The Cha...

Page 25: ...creen with the selected Channel displayed Marine Distress Procedure Speak slowly clearly calmly 1 Make sure your radio is On 2 Tune to Channel 16 3 Press the PTT button on the radio and say MAYDAY MAYDAY MAYDAY 4 Give your ship ID 5 Say MAYDAY your ship name 6 Give your location what navigational aids or landmarks are near 7 State the nature of your distress 8 Give the number of persons aboard and...

Page 26: ... user MMSI in order to send a Distress call Refer to MMSI Entry in the Setup Section page 40 to set the MMSI 1 To transmit a Distress call flip up the red plastic cover over the DISTRESS button Press and hold DISTRESS for 5 seconds When the Distress screen appears press W or X to select Yes Press ENTER 2 The radio will sound a DSC acknowledge Wait tone and the Waiting screen appears To cancel the ...

Page 27: ...d internally After the Distress call has been sent the Distress alert will sound every other second and it also shadow watches for a transmission between CH16 and CH70 until an acknowledgment signal is received from the Coast Guard shore station 5 When the radio receives an Acknowledgement a DSC Routine tone sounds And a Message Screen is displayed indicating the Acknowledgement and the replying r...

Page 28: ...the radio displays NO POSITION The waypoint is not marked and the current route is cleared 2 When your radio receives a Distress Relay Call the DSC Distress tone sounds and a Message Screen is displayed The screen will display DISTRESS RELAY a nature code the original calling radio s MMSI time and position information 256 130 NO POSITION 256 130 DISTRESS RELAY Mystic OM book Page 26 Wednesday Octo...

Page 29: ... Routine tone sounds and a Message Screen is displayed The screen will display DISTRESS RELAY ACK a nature code the original calling radio s MMSI time and position information 256 130 DISTRESS RELAY ACK Mystic OM book Page 27 Wednesday October 22 2003 8 59 PM ...

Page 30: ...Much of the information you need to take advantage of the many functions in your MYSTIC must be entered via the MENU procedures The specific data to be entered is covered in the MYSTIC Setup Section starting on page 32 The next paragraphs cover the techniques for entering data Nature Code FIRE FLOODING COLLISION GROUNDING CAPSIZING SINKING ADRIFT ABANDONING PIRACY ARMED OVERBOARD EPIRB UNDESIGNATE...

Page 31: ...VHF radio select VHF and press ENTER 2 The sub menu will give you more items to select In this example the VHF Menu is shown with Directory selected When you press ENTER you advance to the next sub menu for that category 3 From that point the options depend on the specific data you are dealing with In some cases you need to select an item and press ENTER In other cases you need to enter alphanumer...

Page 32: ... from uppercase to lowercase or from lower case to upper case characters highlight the Shift button and press ENTER z To move the cursor back one position erasing the last character entered highlight the Back button and press ENTER z To add a space to the Name highlight the button between Shift and Back and press ENTER z To erase the whole Name and start over highlight the Clear button and press E...

Page 33: ...e number When you have the first digit set use X to move to the next digit position 3 When you have entered all the digits press ENTER The highlight will move to OK box Press ENTER to accept the entry If you do not want this entry press X to move the highlight to the Cancel box and press ENTER 4 The screen returns to the previous Menu The next Section covers the data you need to enter to set up yo...

Page 34: ...ust make in memory to take full advantage of all the MYSTIC features The default radio settings are FUNCTION STATUS MRN CH 16CH WX CH WX 1CH SCAN mode OFF TRIPLE WATCH mode OFF WX mode OFF WX ALERT mode OFF EMG 16 9CH mode OFF TX POWER 5W Memory Channel All Channel OFF Key Lock OFF Back Light Level OFF FIPS NONE USER MMSI NONE GROUP MMSI NONE U I C USA USA Channel 16CH CAN Channel 16CH INT Channel...

Page 35: ...N Only In this Mode you can use the radio as a Marine radio only and you have no GPS functions z GPS only In this Mode only the GPS functions will work and you will not receive any Marine signals z MRN GPS In this Mode all functions of the MYSTIC are in use This is the factory default setting To select the operating Mode 1 Press MENU 2 At the Menu screen select Setup and press ENTER 3 At the Setup...

Page 36: ...ect U I C USA International or Canada The MYSTIC can operate on any of the Marine channels listed at the back of this Guide However you must determine which set of channels you will use depending on the location where you will be using the radio The default is USA channels You can change that to International or Canadian via the MYSTIC Menu Note When you change the U I C selection the following Mo...

Page 37: ...press ENTER 4 The only entry you should see at the Directory screen at this point is New User Press ENTER 5 At the Edit User screen press ENTER The Name field is highlighted indicating you can enter a ship s name Press ENTER 6 Use the alphanumeric keypad to enter the data using the technique covered in the previous Section Entering Data on page 28 Directory names can be up to 12 characters long 7 ...

Page 38: ...ou are finished press ENTER 8 The highlight will move to the OK box Press ENTER to accept the entry If you do not want this entry press X to move the highlight to the Cancel box and press ENTER 9 The edited entry is now saved and the screen returns to the Directory Menu You can now edit another Directory entry or enter a new one using the procedures above Deleting a Directory Entry 1 Press MENU 2 ...

Page 39: ... ll see an ERROR message If you don t program any FIPS codes you will receive a WX Alert for all S A M E alerts no matter where in the country it occurs To set a FIPS code 1 Press MENU 2 At the Menu screen select VHF and press ENTER 3 At the VHF Menu screen select FIPS Code and press ENTER 4 The only entry you should see at the FIPS Menu at this point is New Location Press ENTER 5 Press ENTER to h...

Page 40: ...u You can now edit another FIPS code or enter a new one using the procedures above Deleting a FIPS code 1 Press MENU 2 At the Menu screen select VHF and press ENTER 3 At the VHF Menu screen select FIPS Code and press ENTER 4 At the FIPS Menu select the code you want to delete When you have selected the code press MENU 5 At the new screen select Delete Location and press ENTER The FIPS Code you sel...

Page 41: ...u used to enter a ship s name in the directory 8 Use the keypad as you did in the procedures above to enter a tag for that Channel Reminder The tag can be no more than 12 characters long 9 When you are finished and press ENTER at the OK button you will return to the Channel TAG yyy list At this point you can add a Channel Tag to another Channel using the same procedure Editing or Restoring a TAG Y...

Page 42: ...SI your MMSI 1 Press MENU 2 Select VHF and press ENTER 3 At the VHF Menu select MMSI Entry and press ENTER 4 At the MMSI Entry screen select User MMSI and press ENTER 5 Enter the User MMSI number using the same technique as you did for FIPS Codes 6 When you have entered all the digits press ENTER The highlight will move to the OK box Press ENTER to accept the entry If you do not want this entry pr...

Page 43: ...select VHF and press ENTER 3 At the VHF Menu select DSC Watch and press ENTER 4 Select On or Off and press ENTER The MYSTIC returns to the VHF Menu 5 Press ESC to return to the VHF screen Note If the MYSTIC is currently tuned to Channel 70 it will receive DSC Calls even if DSC Watch is Off If you send a Distress Call the MYSTIC automatically turns DSC Watch On Auto Channel Switch This feature allo...

Page 44: ...VHF Menu select Auto CH Switch and press ENTER 4 Select On or Off and press ENTER The MYSTIC returns to the VHF Menu 5 Press ESC to return to the VHF screen Mystic OM book Page 42 Wednesday October 22 2003 8 59 PM ...

Page 45: ...ion automatically or on a call by call basis To set the Position Reply option 1 Press MENU 2 At the Menu screen select VHF and press ENTER 3 At the VHF Menu select Position Reply and press ENTER 4 Select Auto or Manual and press ENTER The MYSTIC returns to the VHF Menu 5 Press ESC to return to the VHF screen Mystic OM book Page 43 Wednesday October 22 2003 8 59 PM ...

Page 46: ...e view of the sky is poor due to large cliffs mooring roofs buildings heavy foliage or other obstructions the satellite signals can be blocked and the GPS receiver may take longer to compute a position fix You will observe the acquisition of the satellites and other important information on the default Channel and Navigation Screen that appears after the power up sequence The GPS Information displ...

Page 47: ...which enables you to view how well the MYSTIC is receiving satellite information These screens will be described briefly here More detailed information on the different screens can be found in the GPS Advanced Operation Section page 96 z Map Screen The Map screen has two modes Position or Cursor Position Mode In the position mode your present position is indicated by the large arrow icon in the ce...

Page 48: ... present position icon will appear centered on the map z Compass Screen The Compass Screen is a handy to have at your fingertips while you are navigating It is totally customizable to display the information that is useful to you The lower portion of the Compass screen not only displays your heading in a graphical manner but also displays the relationship of the sun moon and your destination if na...

Page 49: ...ination information To and the current Channel Number CH z Position Screens The Position screens 1 and 2 display your present position using the coordinate systems that you select in Setup This screen shows all of the basic position time and satellite information Additionally current navigation information is shown in the bottom half of the screen You can move to the second Position screen by pres...

Page 50: ...tion at the top of the screen between the destination information To and the current Channel Number CH z Data Screen The Data screen provides you with six data fields and an active compass that is the same as the one used on the road screen You have the option of customizing this screen by selecting what data is displayed in the upper six fields This screen is handy when you need to see a lot of i...

Page 51: ...set Press W or X to alternate the information at the top of the screen between the destination information To and the current Channel Number CH z Satellite Status Screen The Sat Status screen provides you with a graphical display of the satellites in view and which ones are being used to compute the navigation data The bar graph shows the relative signal strength being received for each satellite ...

Page 52: ...tion on the globe into memory There are a number of ways you can save a waypoint The most common are saving your present position entering the coordinates of a position or saving the position of the cursor while viewing the Map screen These waypoints can then later be used to create routes or as the destination of a GOTO A GOTO is a single leg route that is defined as a route from your present pos...

Page 53: ...a start point your present position and a single destination point a waypoint you select All that is required to create a GOTO route is having the destination waypoint saved in memory This waypoint can be one that you have saved earlier which is stored in your User Waypoint List or any of the landmarks that come with the MYSTIC in its built in database The uses for a GOTO route are endless You cou...

Page 54: ...or X to select the desired method Selecting Alphabetical will display all the waypoints in the category you select in alphabetic order Nearest To will display a list of the 20 waypoints nearest to your position or waypoint you select in order of their distance away 4 To select the GOTO Destination Waypoint from the selected Category and Find By press the ENTER key A list of all the waypoints you h...

Page 55: ... Categories This is covered in the GPS Advanced Operation Section page 96 Navigating on a GOTO Route The MYSTIC has the tools you ll need to navigate to your destination You have the choice of three customizable screens that display the information that you need in the layout that you desire You may find the compass screen perfect for you or you may prefer the Large Data or Map screen Press ESC un...

Page 56: ... MYSTIC off you will need to re enter the GOTO However Routes are stored in memory If you need a GOTO but expect to turn the MYSTIC off before arriving you might consider making a 1 leg Route using the Route menu This is covered in the GPS Advanced Operation Section starting on page 96 Mystic OM book Page 54 Wednesday October 22 2003 8 59 PM ...

Page 57: ...has in memory to select what satellites are overhead From this information the unit can then select the satellites that will give it the best information for computing its location Under normal use the MYSTIC will save the last position it calculated and use that position the next time it is turned on However when the MYSTIC is new or when memory has been completely erased it has no last position ...

Page 58: ...rease or decrease the number b Use W and X to move the cursor to the next or previous number position c When the time is correct press ENTER to move to the date field Set the date using the same procedure as setting the time d When you are finished setting the date press ENTER to highlight the Done field and press ENTER Mystic OM book Page 56 Wednesday October 22 2003 8 59 PM ...

Page 59: ... up the other parameters for the MYSTIC GPS functions GPS Settings Your MYSTIC comes with a number of default settings You can change these settings to suit the way you intend to use the MYSTIC To setup your MYSTIC 1 Press the MENU key 2 At the main Menu use S and T to highlight Setup Press ENTER Mystic OM book Page 57 Wednesday October 22 2003 8 59 PM ...

Page 60: ...ighlight the value you want and press ENTER In some cases you have a second list to choose from Use the same procedure to select the value When you are finished with all the changes press ESC to return to the Channel Display Each of the settings are discussed in the following paragraphs RF Select The procedure for RF Select is covered on page 33 Initialize You can initialize the MYSTIC at any time...

Page 61: ...which navigation screens are displayed by selecting them individually from this Menu The default is all screens On Each time you press ENTER you see one of the navigation screens and a selection list Select either On or Off to have that screen displayed or not When you have finished with all navigation screens you are returned to the Setup Menu Coord System Allows you to set the coordinate system ...

Page 62: ...vation based upon the elevation entered The default is 3D Time Format You can choose from three different time formats Local 24 Hr military time Local AM PM or UTC If you select Local 24 Hr or Local AM PM you will be prompted to enter your local time The default is UTC NAV Units You can select the units of measure that MYSTIC will use Miles Yards MPH Miles Feet MPH Nautical Miles Feet Knots or Kil...

Page 63: ...s 4 Minutes 10 Minutes or Timer Off The default is 4 Minutes Beeper You can select which actions will cause the beeper to sound You can choose from Off Keys Only pressing a key causes a beep Alarms Only when an alarm is activated or Keys Alarms The default is Keys Alarms Clear Memory You can clear the information in memory if you want to store other information instead This may be useful if you ar...

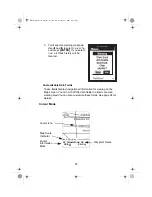
Page 64: ...aud When you are loading maps using MapSend Streets and Destinations USA see page118 the baud rate can be determined automatically determined The default is 4800 baud Language You can select the language that the MYSTIC uses to display text Customizing the Navigation Screens From the basic Channel display press the ESC key to access the navigation screens The navigation screens are displayed in th...

Page 65: ...stination However if you are off course your VMG will be less than the speed at which you are travelling CTS Course To Steer The angle you need to turn to put you back on course ETA Estimated Time of Arrival The local time at which you will arrive at your destination based on the rate of speed you are moving to your destination See VMG ETE Estimated Time Enroute The length of time it will take you...

Page 66: ... move the highlight until it is at Customize Press ENTER 3 You will be returned to the same navigation screen with the first data field highlighted For example if you are at the Compass screen it would now look like this 4 To customize that data field press ENTER To customize another data field use W or X to move the highlight to the field you want Then press ENTER SPEED Mystic OM book Page 64 Wed...

Page 67: ...f the navigation screens will now be discussed in detail Map Screen The Map screen has two modes Position and Cursor In the Position Mode the map is centered around your present position An arrow cursor indicates your present position and points in the direction you are heading A customizable area is presented at the bottom of the display In the Cursor Mode you are provided with a movable cursor T...

Page 68: ...laced with an hourglass icon Map Scale Indicator Provides the scale for the map The number displayed represents approximately 1 4 of the screen s width Scale can be changed with the IN and OUT keys Track History The dotted line on the map displays the history of where you have travelled since the last time you cleared the Track history To clear the Track history 1 Press MENU 2 Use S and T to selec...

Page 69: ...e fields display navigational information for viewing on the Map screen You can turn off the data fields to allow more map viewing area You can also customize these fields See page 64 for details Cursor Mode W Gladstone St 348 O M 25 4 M I Cursor Icon Map Scale Indicator Waypoint Name Cursor Information Block Mystic OM book Page 67 Wednesday October 22 2003 8 59 PM ...

Page 70: ... and OUT keys Cursor Information Block Whenever the cursor is over a map object the Waypoint Name displays the name of the map object If the cursor is not over a map object the word cursor appears The data shown below the Waypoint Name is the heading and dis tance from your present position to the cursor Setting the Map Detail a Press MENU b Use S and T to select Map Setup and press ENTER Mystic O...

Page 71: ... Map Display The Map screen can be customized for your individual needs and requirements You can select what is being displayed on the map as well as what additional data will be presented at the bottom of the screen Customization involves two steps determining which items are displayed on the map and which data fields if any are displayed at the bottom of the screen Mystic OM book Page 69 Wednesd...

Page 72: ...be removed If the item was not checked a check mark will appear e When you have completed your selection press ESC Customizing the Map Data Fields To customize the data fields you must be in the Position Mode of the Map screen If you are in the Cursor Mode press ESC to change the display back to the Position Mode If you are not sure which Mode you are in look at the Map An arrow indicates Posi tio...

Page 73: ...hen you turn them off you have more room for the Map display The Default is Show Map Info a While in the Position Mode of the Map display press MENU b The first item should be Hide Map Info If it is not highlighted use S and T to select it c Press ENTER Mystic OM book Page 71 Wednesday October 22 2003 8 59 PM ...

Page 74: ...u will be returned to the Map screen with the data fields displayed Customizing Map Info Note You can select which information is displayed at the bottom of the Map screen The first two options Two Data Fields or Street Info are available for change The other two options Horiz Profile and Terrain Project require uploading topographic information from a special Magellan MapSend Topo CD Contact your...

Page 75: ... press ENTER d Use S and T to highlight Two Data Fields and press ENTER You are returned to the Map display with two data fields displayed at the bottom To customize the data fields a Press MENU Mystic OM book Page 73 Wednesday October 22 2003 8 59 PM ...

Page 76: ...d T to highlight Select Map Info and press ENTER c The top item has now changed to Customize Fields Use S and T to highlight Customize Fields and press ENTER Mystic OM book Page 74 Wednesday October 22 2003 8 59 PM ...

Page 77: ...treet your present position arrow is on If you are in the cursor mode the block displays the bearing and distance from your present position and when you are over a street the name of that street To select Street Info instead of Two Data Fields a Be sure you are viewing the Map screen in Position Mode b Press MENU c Use S and T to highlight Select Map Info and press ENTER HEADING Mystic OM book Pa...

Page 78: ...n change how the map is orientated on the screen the level of detail the Track Mode and the Primary Usage land or marine depending on how you plan to use your MYSTIC Note Although you can set most of these parameters from either Map screen Mode it is better to start from the Position Mode 1 Press MENU W Gladstone St Mystic OM book Page 76 Wednesday October 22 2003 8 59 PM ...

Page 79: ...cedure is the same 3 You are now at the Map Setup options screen Note that there are two tabs The first set of parameters are on the Format tab Orientation a Use S and T to move to the first line Orientation Press ENTER to access the Orientation selection list Mystic OM book Page 77 Wednesday October 22 2003 8 59 PM ...

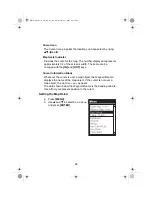
Page 80: ...gher level to view more detail The default is Medium a Use S and T to move to the next parameter Detail and press ENTER b Use S and T to select the orientation you want and press ENTER Selecting Track Mode The Track Mode determines how often the MYSTIC stores track points zSetting the mode to OFF stops the MYSTIC from saving any new track points zIn Auto or Auto Detailed mode the MYSTIC uses a met...

Page 81: ...that you use the Auto mode whenever possible The following is an overly simplified diagram of the three track rate options In most cases Auto should meet all of your require ments but if you want more detail on turns and still not clutter memory with excessive track points select Auto Detailed To set the Track Mode a Use S and T to move to Track Mode Press ENTER to access the Track Mode selection ...

Page 82: ...n white and water areas as dark gray For marine applications it may be desirable to reverse the display showing water as white and land as dark gray This will make reading some of the data information on the water easier To select primary usage a Use S and T to move to Primary Usage Press ENTER to access the Primary Usage selection list Mystic OM book Page 80 Wednesday October 22 2003 8 59 PM ...

Page 83: ...to the Map screen Your Map screen selections have now been set You can go back and change any of them at any time Compass Screen Destination Name Destination Icon Compass Customizable Data Fields Heading Marker Sun Moon Position Markers Mystic OM book Page 81 Wednesday October 22 2003 8 59 PM ...

Page 84: ...or this data to be valid Destination Icon When you are travelling on a route an icon representing the desti nation of the leg or GOTO is displayed outside the compass This provides you with the direction you need to head to arrive at the destination When you are on course and heading straight for the destination the destination icon will be lined up with the heading marker Customizable Data Fields...

Page 85: ...is placed here or multileg routes the name dis played is the name of the destination for the leg of the route you are presently navigating on Customizable Data Fields See page 64 for the steps for customizing these fields Destination Name Customizable Data Fields Mystic OM book Page 83 Wednesday October 22 2003 8 59 PM ...

Page 86: ...on is displayed GPS Status Provides information on the current status of the GPS receiver portion of the MYSTIC Customizable Data Fields See page 64 for the steps for customizing these fields Note Some of the data displayed requires you to be moving to be computed Invalid data is indicated by dashes Trip Odometer The odometer performs like the odometer in your car It can be reset as follows a Pres...

Page 87: ... here or multileg routes the name dis played is the name of the destination for the leg of the route you are presently navigating on Compass Displays your heading in a familiar compass format Road Graphically displays the route GOTO or other routes that is active As you move left or right of your intended track the road will move on the display indicating which way you need to steer to get back on...

Page 88: ... the scale Data Screen Destination Name When you are navigating on a GOTO or multileg route the name of the destination is placed here or multileg routes the name dis played is the name of the destination for the leg of the route you are presently navigating on Compass Displays your heading in a familiar compass format Destination Name Customizable Data Fields Compass Mystic OM book Page 86 Wednes...

Page 89: ...me of the destination for the leg of the route you are presently navigating on Speedometer Displays your speed using a familiar speedometer display The scale of the speedometer is not adjustable but will change dynam ically to best display your present speed Customizable Data Fields See page 64 for the steps for customizing these fields Destination Name Speedometer Customizable Data Fields Odomete...

Page 90: ... The outer circle represents the horizon and the inner circle represents 45 from the horizon The center of the circle is 90 from the horizon or directly overhead Satellite Signal Strength Chart Clear bar indicates that the MYSTIC is starting to get information from the satellite Satellites that are being used to compute your position are shown with solid bars The height of the bar indicates the re...

Page 91: ...g computed z Blank MYSTIC is not computing a position fix Satellite Position Where the satellite is located relative to your position WAAS Satellites Location of the WAAS Satellites W Battery Life Indicator Indicates remaining battery life This completes the set up for your MYSTIC GPS unit Mystic OM book Page 89 Wednesday October 22 2003 8 59 PM ...

Page 92: ... CALL LIGHT That takes you to the DSC Menu From there you can select several different Calls you can make Individual Call Group Call All Ships Call Position Request Position Send Standby and Call Wait They are described in the paragraphs below Note Although Directory names can be up to 12 characters long Individual Call 1 Select an open unused working Channel 2 Press CALL LIGHT 3 At the DSC Menu u...

Page 93: ...ing Channel 2 Press CALL LIGHT 3 At the DSC Menu use S and T to select All Ships Press ENTER 4 At the All Ships menu use S and T to select Urgency Safety or Routine 5 Press ENTER You will see the Attention screen Use W or X to select Yes and press ENTER to make the call Or select No and press ENTER to cancel the call Note ROUTINE calls tune to the previously selected Channel When sending either an...

Page 94: ... reply 6 The MYSTIC will wait 10 seconds for an acknowledgement If it does not detect an acknowledgment it will send the Position Request Call again If no acknowledgement is received you will be returned to the VHF screen 7 When the called vessel sends the position information the POSITION REPLY screen appears showing the caller s MMSI or name time and position information Note The requested radio...

Page 95: ...nt to send your position to Note You must have entries in your directory to make a Position Send Call See the Setup Section page 35 4 Press ENTER You will see the Attention screen Use W or X to select Yes and press ENTER to make the call Or select No and press ENTER to cancel the call 5 After the call is made the radio returns to the VHF screen Receiving a Position Send Call 1 When your MYSTIC rec...

Page 96: ...utton this feature will be canceled Call Waiting If you receive a call and do not answer within 5 minutes or if the radio is set on DSC Standby or Auto CH SW Off the call will be recorded The DSC Call Wait Log records 20 received Distress calls and records 30 Individual calls If the call is answered within 5 minutes the call will not be recorded 1 Press CALL LIGHT 2 At the DSC Menu use S and T to ...

Page 97: ...At this point you can call back any of the radios displayed in the log Geographical Call Note The MYSTIC receives geographical calls only sending geographical calls is not available in the MYSTIC radio This function can receive the electric wave transmitted towards the ship that is present in the domain specified from the call side It also indicates the time when the geographical call is received ...

Page 98: ...t will help you find the waypoint when you are using the map screen To do this press and hold GOTO for 2 seconds Use STWX to move the highlight to the Icon field and press ENTER The Icon Select window is displayed Use the STWX to move from one icon to another Note the name of the icon displayed at the top As a reference tool all of the icons and their names are listed at the back of this Operating...

Page 99: ...ypoint names can be up to 9 characters in length Adding a Message to a Waypoint You can also add a message to Waypoint you are creating There is a memory limit however You can save up to 500 user entered Waypoints in your MYSTIC but only 200 Waypoint of those can have a message assigned to it Adding a message to a Waypoint can help you identify the waypoint If this was a Waypoint for a specific lo...

Page 100: ... access waypoints in the database whenever you are editing waypoints activating a GOTO route or creating a multileg route There are three major types of categories that need to be explained User Preloaded and Uploaded User These are waypoints that you have saved using the MARK function of the receiver There can be up to 500 user entered waypoints stored in memory Select User Waypoint in the list P...

Page 101: ...n the Find By field the waypoints will be listed in alphabetical order and you need to scroll through the list until you find the waypoint you need b With User Waypoint selected as the category you will go directly to the alphabetized list Since the number of waypoints in the other categories can be in the thousands there are tools you can use to make the search easier Keyboard Search Before displ...

Page 102: ...r present position as the starting point and a destination Waypoint that you choose from the Waypoint Database A 1 leg Route is similar to a GOTO except you can save it in Memory To create a 1 leg route 1 From any Map Screen press MENU 2 At the Map Menu select Routes and press ENTER 3 At the Routes Menu select any empty Route series of dashes and press ENTER 4 Select Starting Waypoint and press EN...

Page 103: ... routes have been termed multileg in an effort to make the understanding of them a little clearer To create a Multileg Route follow the same procedure as for a 1 leg route with one exception Instead of saving the Route after the first Destination Waypoint add as many Destination Waypoints as you need Then save the Route Backtrack Route A Backtrack route creates a Route using track information stor...

Page 104: ...Menu If the Route is not active the next screen will automatically have Activate Route selected in the Menu 4 Press ENTER to Activate or Deactivate View a Route You can view the legs of a Route using the same screen that was used to create the Route Viewing a route can be used if you just wanted to see the components of the Route or if you want to edit a route To View a Route 1 From any Map Screen...

Page 105: ...t you want to delete a Waypoint 2 Press MENU 3 Select Insert and press ENTER 4 Select Database and press ENTER 5 Select the desired Waypoint and press ENTER To Delete a Leg 1 Select the Destination Waypoint for the Leg that you want to delete a Waypoint 2 Press MENU 3 Select Delete and press ENTER To Replace a Leg Replaces the Destination of an existing Leg with a new Destination 1 Select the Dest...

Page 106: ...se a route 1 From any Map Screen press MENU 2 At the Map Menu select Routes and press ENTER 3 At the Routes Menu select the desired Route and press MENU 4 Select Reverse and press ENTER Delete a Route You can Delete any route in Memory This may be useful when you want to add a new route but no EMPTY routes are available To Delete a Route 1 From any Map Screen press MENU 2 At the Map Menu select Ro...

Page 107: ...ENTER Vertical Profile The Vertical Profile displays the elevation as a graphical display for the option you select Note Only Track History is available for this function if you have not uploaded MapSend Topo for the United States map data Sun Moon Screen The Sun Moon screen displays the sunrise time sunset time and lunar phase for any waypoint you have stored in the User category in the waypoint ...

Page 108: ...tion for the position selected To change the Sun Moon Date 1 From any Map Screen press MENU 2 At the Map Menu select Sun Moon and press ENTER 3 Select the On field and press ENTER a Use S and T to increase or decrease the number b Use W and X to move the cursor to the next or previous number position 4 When you have finished setting the Date press ENTER Fish Hunt Screen The Fish Hunt Screen displa...

Page 109: ...e 1 From any Map Screen press MENU 2 At the Map Menu select Fish Hunt and press ENTER 3 Select the On field and press ENTER a Use S and T to increase or decrease the number b Use W and X to move the cursor to the previous or next number position 4 When you have finished setting the Date press ENTER Contrast You can set the Contrast to give you the best viewing for the current lighting conditions T...

Page 110: ...o set the distance from the destination that the alarm will begin to sound Anchor Alarm The anchor alarm will sound when you have drifted from your anchor point at a distance you set An example of its use would be as you set anchor you turn on the anchor alarm to beep at a given distance With the MYSTIC still operating and computing fixes you can then go fishing or other activities knowing that if...

Page 111: ...ever the MYSTIC has lost its ability to compute position fixes due to loss of signal from the satellites This is handy in that it alerts you that you may need to move to an area that has a clearer view of the sky Mystic OM book Page 109 Wednesday October 22 2003 8 59 PM ...

Page 112: ...uard Yes Yes USCG 23 157 150 157 150 Coast Guard Yes Yes USCG 24 157 200 161 800 Public Corresp Duplex No Yes TELEPHONE 25 157 250 161 850 Public Corresp Duplex No Yes TELEPHONE 26 157 300 161 900 Public Corresp Duplex No Yes TELEPHONE 27 157 350 161 950 Public Corresp Duplex No Yes TELEPHONE 28 157 400 162 000 Public Corresp Duplex No Yes TELEPHONE 60 61 156 075 156 075 CCG 62 63 156 175 156 175 ...

Page 113: ...ard Duplex Yes Yes INTL 23 157 150 161 750 Coast Guard Duplex Yes Yes INTL 24 157 200 161 800 Public Corresp Duplex No Yes TELEPHONE 25 157 250 161 850 Public Corresp Duplex No Yes TELEPHONE 26 157 300 161 900 Public Corresp Duplex No Yes TELEPHONE 27 157 350 161 950 Public Corresp Duplex No Yes TELEPHONE 28 157 400 162 000 Public Corresp Duplex No Yes TELEPHONE 60 156 025 160 625 Duplex TELEPHONE...

Page 114: ...00 161 600 Duplex 1W Yes Yes PORT OPR 21 157 050 157 050 Yes Yes CCG 22 157 100 157 100 Yes Yes USCG 23 157 150 161 750 Duplex Yes Yes INTL 24 157 200 161 800 Duplex No Yes TELEPHONE 25 157 250 161 850 Duplex No Yes TELEPHONE 26 157 300 161 900 Duplex No Yes TELEPHONE 27 157 350 161 950 Duplex No Yes TELEPHONE 28 157 400 162 000 Duplex No Yes TELEPHONE 60 156 025 160 625 Duplex TELEPHONE 61 156 07...

Page 115: ...Warning AVW 0 AVALANCHE Volcano Warning VOW 0 VOLCANO Shelter In Place Warning SPW 0 SHELTER Civil Danger Watch CDA 0 CIVIL DANGER Radiological Hazard Watch RHA 0 RADIOLOGICAL Hazardous Material Watch HMA 0 HAZARDOUS Winter Storm Watch WSA 0 WINTER STORM High Wind Dust Storm Watch HWA 0 HIGH WIND Tornado Watch TOA 0 TORNADO Severe Thunderstorm Watch SVA 0 THUNDERSTORM Flash Flood Watch FFA 0 FLASH...

Page 116: ...e position CTS Course to Steer The direction you should be traveling in order to return to the course while proceeding towards the destination It is a compromise course bearing that projects from your current position to a point on the courseline midway between a point perpendicular to your position and the current leg destination waypoint Datum Refers to the theoretical mathematical model of the ...

Page 117: ...ling the earth parallel to the equator from 0 to 90 LAT LON Coordinate system using latitude and longitude coordinates to define a position on the earth Leg Route A segment of a route that has a starting FROM waypoint and a destination TO waypoint A route may consist of 1 or more legs A route that is from waypoint A to waypoint B to waypoint C to waypoint D has three legs with the first being from...

Page 118: ...ny geographical meridian UTC Universal Time Coordinated Formerly referred to as Greenwich Mean Time GMT UTM Universal Transverse Mercator metric grid system used on most large and intermediate scale land topographic charts and maps VMG Velocity Made Good The component of the velocity that is in the direction of the destination WPT Waypoint A location saved in the receiver s memory which is obtaine...

Page 119: ...ge City Sight Seeing ATM Lighthouse Small City Auto Repair Major City Sounding Boating Marina Sports Arena Camping Medium City Tourist Info Exit Ramp Museum Truck Service First Aid Obstruction Winery Fixed Nav Aid Park Wreck Floating Buoy Resort Zoo GPS Waypoint Icons Mystic OM book Page 117 Wednesday October 22 2003 8 59 PM ...

Page 120: ... into the unit Maps are not pre cut to counties or other boundaries z Create manage and upload download waypoints and routes z Allows straight line distance computation on the map z Search for map objects such as cities lakes etc by name PC Requirements Minimum Requirements z IBM PC AT 486 or compatible z 32 MB RAM z VGA Video Card z 60 MB Hard Drive Space z 8x CD ROM drive z MS Windows 95 98 NT 4...

Page 121: ...nly to demonstrate the most commonly used function uploading detailed maps 1 Make sure your MYSTIC is in the charging cradle and the data cable connected to the serial port of your PC 2 Make sure your MYSTIC has at least 50 battery charge remaining 3 Start the application on your PC 4 Set up your Map Using the zoom in and zoom out tools select the location on the map for the area that you want for...

Page 122: ...n To move the region place the cursor inside the region Keep the left mouse button pressed and move the entire region To change the size of the region place the cursor on any of the black dots found in the corners or along the sides of the region press the left mouse button move the mouse to increase or decrease the size of the defined area 6 Cut the Region Click on the Cut Region icon on the MapS...

Page 123: ...ess Next MapSend will then poll the COM ports looking for the MYSTIC radio When the COM port has been found a message box will indicate the correct port d Press Next The map region will be uploaded to your MYSTIC Depending on the size of the map this could take a few minutes e Now using the MYSTIC go to the Map screen and zoom out over the area on the map where you have uploaded the region Once yo...

Page 124: ...hat you are receiving WAAS signals What are some of the problems with WAAS The signal coverage with WAAS is not global like GPS satellites In some locations receiving WAAS signals can be difficult and intermittent There are two satellites transmitting WAAS for corrections in the Americas and two more over Africa and India providing similar coverage for Europe These satellites are geostationary i e...

Page 125: ...estricted use in the United States The Channel assignments include frequencies assigned for exclusive use of the U S Coast Guard use in Canada and use in international waters Operation in these frequencies without proper authorization is strictly forbidden For frequencies channels that are currently for use in the world see pages 110 111 and 112 Please contact the FCC Call Center at 1 888 CALLFCC ...

Page 126: ... and another radio can hear a click but no audio is heard Bad microphone element Send the radio in for repair While scanning the radio stops on a particular Channel all the time A source of noise may nearby Eliminate the source of the noise or delete the Channel from the scan memory There is noise on the receiver that the squelch will not eliminate An external noise is being generated by some devi...

Page 127: ...r Source LiON battery Receiver Type Dual Conversion Superheterodyne Signal to Noise Ratio 40 dB Nominal Frequency Range 156 164 MHz Receiver Sensitivity 0 2 µv at 12 dB SINAD Audio Output Power 0 5 Watt Frequency Range 156 158 MHz Frequency Stability 500Hz Power Output 5 Watt 1 Watt selectable Current Drain 1 6 Amps 5 Watts 900 Milliamps 1 Watt Spurious Emissions 5W 70 dBc Modulation FM 5 KHz devi...

Page 128: ...126 Notes Mystic OM book Page 126 Wednesday October 22 2003 8 59 PM ...

Page 129: ...127 Notes Mystic OM book Page 127 Wednesday October 22 2003 8 59 PM ...

Page 130: ...128 Notes Mystic OM book Page 128 Wednesday October 22 2003 8 59 PM ...

Page 131: ...tor or its representatives in connection with the performance of this warranty THE LIMITED WARRANTY SET FORTH ABOVE IS THE SOLE AND ENTIRE WARRANTY PERTAINING TO THE PRODUCT AND IS IN LIEU OF AND EXCLUDES ALL OTHER WARRANTIES OF ANY NATURE WHATSOEVER WHETHER EXPRESS IMPLIED OR ARISING BY OPERATION OF LAW INCLUDING BUT NOT LIMITED TO ANY IMPLIED WARRANTIES OF MERCHANTABILITY OR FITNESS FOR A PARTIC...

Page 132: ...MISTIC 1024 10 24 03 3 26 PM Page 2 ...

Reviews: