background image

12

guides to keep the cable correctly positioned. Then, 

route the remainder of the cable toward the location of 

your target scanner. When doing so, be sure to avoid 

sharp metal edges of your vehicle’s body, or other 

possible hazards. Be sure the cable does not interfere 

with controls, operation of the vehicle, or passenger 

safety. Insert the cable’s special connector in the front 

port of the UBCD996T mobile scanner, or the side port 

of the UBCD396T handy scanner.

Data Port Cable — Firmware Updates

The Remote Head has a data port (see 


UBC-RH96 

Connections

)so you can update the 

fi

 rmware using the 

data transfer cable provided with your scanner. Con-

nect the data transfer cable to this port on the bottom 

of the Remote Head. Connect the other end to the DB9 

serial port on your PC. This is the only purpose of this 

connection.

Important:

For best operation, be sure your scanner always has the 

latest 

fi

 rmware. Visit www.uniden.com.au (Australian 

model) or www.uniden.co.nz (New Zealand model) 

to verify that your scanner has the most up-to-date 

fi

 rmware.

UBC-RH96 Digital Scanner OM.indd12   12

UBC-RH96 Digital Scanner OM.indd12   12

10/9/07   4:16:00 PM

10/9/07   4:16:00 PM

Summary of Contents for UBC-RH96

Page 1: ...UBC RH96 Remote Head unit for the UBCD396T UBCD996T Digital Scanners UBC RH96 Digital Scanner OM indd1 1 UBC RH96 Digital Scanner OM indd1 1 10 9 07 4 15 55 PM 10 9 07 4 15 55 PM...

Page 2: ...2 UBC RH96 Digital Scanner OM indd2 2 UBC RH96 Digital Scanner OM indd2 2 10 9 07 4 15 56 PM 10 9 07 4 15 56 PM...

Page 3: ...guration 15 Operation 16 Setting the UBC RH96 Backlight 17 Configuration Menu Mode 18 Setting the UBC RH96 LCD Contrast 18 Setting Mobile Options 19 Mobile Default Key Assigment 19 Setting Handy Optio...

Page 4: ...tialize Memory Reset 25 Using the Cable Clamp 25 Specifications 26 One Year Limited Warranty 26 UBC RH96 Digital Scanner OM indd4 4 UBC RH96 Digital Scanner OM indd4 4 10 9 07 4 15 57 PM 10 9 07 4 15...

Page 5: ...ons It serves as a large LCD with your handy scanner It recognizes the scanner baud rate for reliable communications between units Its Volume and Squelch controls emulate those on the scanner It provi...

Page 6: ...quickly to the bracket Remote connection cable 3m in length A correctly polarized vehicle DC adapter to let you connect the Remote Head to a convenience outlet in your vehicle that provides 12 13 8 VD...

Page 7: ...ing surface before making any holes be it above or below or in front of your dash armrest console or other location If you drill carelessly expensive damage can result If in doubt consult your vehicle...

Page 8: ...er Cord to the rear power jack marked DC IN 13 8V Then plug the adapter end into a dash mounted 12V DC socket Insert the 3 Conductor Mini Plug of the supplied ten foot cable in the REMOTE jack on the...

Page 9: ...ial is generally available from electronic supply stores and hardware stores Do not apply the tape to the rear until all cables are installed and routed correctly Do not cover the slotted guide with t...

Page 10: ...are updates 1 2 3 4 1 2 3 4 Always route both cables through the channel Note Connect the Remote Cable and route it through the cable channel as shown Then connect the DC Power Cable and route it thro...

Page 11: ...eter with a center pin 2 mm diameter and wire it with the center positive using at least 18 gauge wire to an extra fuse block terminal of your vehicle The Remote Head cannot turn power to the scanner...

Page 12: ...irmware Updates The Remote Head has a data port see UBC RH96 Connections so you can update the firmware using the data transfer cable provided with your scanner Con nect the data transfer cable to thi...

Page 13: ...s the functionality of its controls to match the operation of the target scanner Important If you have more than one scanner be sure to turn off power to the UBC RH96 before switching target scanners...

Page 14: ...F2 F3 MENU L O LIGHT FUNC pri rcl rev att UBCD396T F1 F2 F3 The UBCD396T Key Configuration UBC RH96 Digital Scanner OM indd14 14 UBC RH96 Digital Scanner OM indd14 14 10 9 07 4 16 00 PM 10 9 07 4 16...

Page 15: ...Configuration F1 F2 F3 MENU L O UBCD996T LIGHT SRCH1 SRCH2 SRCH3 SRCH4 SRCH5 SRCH6 REV ATT F1 F2 F3 FUNC UBC RH96 Digital Scanner OM indd15 15 UBC RH96 Digital Scanner OM indd15 15 10 9 07 4 16 01 PM...

Page 16: ...If you have not connected a target scanner you see the screen below If the UBC RH96 remains on while you turn on the scanner this display is automatically replaced with the scanner s initial display U...

Page 17: ...down the remote head the remote head off the Scanner off the Scanner does not turn does not turn Brightness Auto Adjust mobile scanners only When you connect a mobile scanner the Remote Head automati...

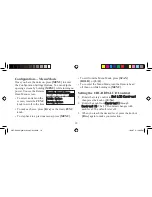
Page 18: ...u Mode turn the Remote head off then on while holding in MENU Setting the UBC RH96 LCD Contrast Rotate the rotary control to Set LCD Contrast Set LCD Contrast then press the knob or E Yes Rotate the k...

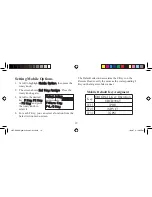
Page 19: ...you can select a function from the Select Action menu screen 1 2 3 4 The Default selection associates the F Keys on the Remote Head exactly the same as the corresponding F Key on the target mobile sc...

Page 20: ...om Search Mode Goto CC Only Close Call Only Mode Goto Tone Out Tone Out Standby Mode CC Band Menu Close Call Band Setting Menu Settings Menu Settings Menu Brdcst Scrn Menu Broadcast Screen Band Menu S...

Page 21: ...Key select a function from the Select Action menu screen 1 2 3 4 The Default selection associates the F Keys on the Remote Head exactly the same as the corresponding F Key on a Mobile scanner or a fun...

Page 22: ...you press it if you do nothing else The five settings are Off Function mode is continuously enabled only while pressing the Control or SQ knob 3 sec Function mode is enabled for 3 seconds after relea...

Page 23: ...ngs For Handy Scanner While it is possible to configure the UBC RH96 rotary FUNC control as your VOL control we suggest not doing so The VOL control still functions as a volume control If the FUNC con...

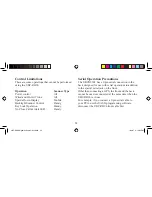
Page 24: ...96T has a 9 pin serial connection in the back designed for use with serial operations in addition to the special serial jack on the front Other than connecting a GPS the front and the back cannot be u...

Page 25: ...ou next turn on the unit NN GOQT NGCT NN GOQT NGCT 2NGCUG 9CKV 2NGCUG 9CKV Using the Cable Clamp A self adhesive clamp guide is provided to assist you to safely route the Remote Cable to your target s...

Page 26: ...al country of purchase ELEMENT OF WARRANTY Uniden warrants to the original retail owner for the duration of this warranty its UNIDEN UBC RH96 Remote Head herein after referred to as the Product to be...

Page 27: ...vice This warranty does not provide for reimbursement or payment of incidental or consequential damages This EXPRESS WARRANTY is in addition to and does not in any way affect your rights under the TRA...

Page 28: ...07 Uniden Australia Pty Limited Uniden New Zealand Limited Printed in China UUZZ01705AZ 0 UBC RH96 Digital Scanner OM indd28 28 UBC RH96 Digital Scanner OM indd28 28 10 9 07 4 16 05 PM 10 9 07 4 16 05...

Reviews: