8
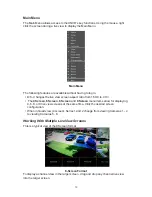
Connect the Power Adapter and Power ON the NVR
1.
Connect the included power adapter to the DC IN port on the NVR’s rear panel.
Then connect the power adapter to a wall socket or a surge protector.
Connect Power
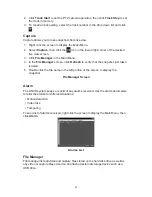
2. The UNVR logo appears on the TV screen and a short beep sounds as the
system performs a self check. After a few minutes a live view appears as shown
from the camera(s) connected.
UNVR Live Camera View
CONNECTING CAMERAS
Note: A professional installation option is available. See the InstallerNet insert.
Installing Cameras
CAUTION
Each type of camera requires different installation techniques. For specific installation
instructions check the documentation supplied with the camera.
Installation Tips
• Test the cameras before permanent installation. Make a plan for camera wire
routing and for camera angle.
• Mount the camera so the lens is away from direct and intense sunlight.
•
Plan to route the wiring so it does not interfere with power lines or telephone lines.
• Ensure that the camera wiring is not exposed or easily cut.
• Mount the camera in an area that is visible, but out of reach.
•
Avoid pointing the camera at a glass window to see outside. This may result in a
bright white ring in the night vision image, as the light from the night vision LEDs
may reflect off the glass.
• Adjust the camera angle so that it covers an area with high traffic.


