


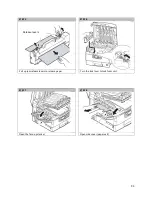


STEP 5
STEP 6
Leave the Guide Arm down.
Close the Media Door, and press Done on the control
panel.
The Extension Arm will automatically adjust to
12.375” wide. This is not wide enough for 12.90”
(327.66mm) wide media, so a manual adjustment
can be made.
Wait for the Extension Arm to finish adjusting.
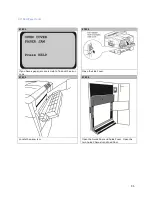
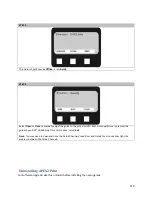
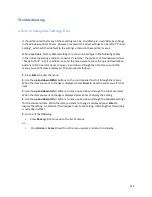
STEP 7
STEP 8
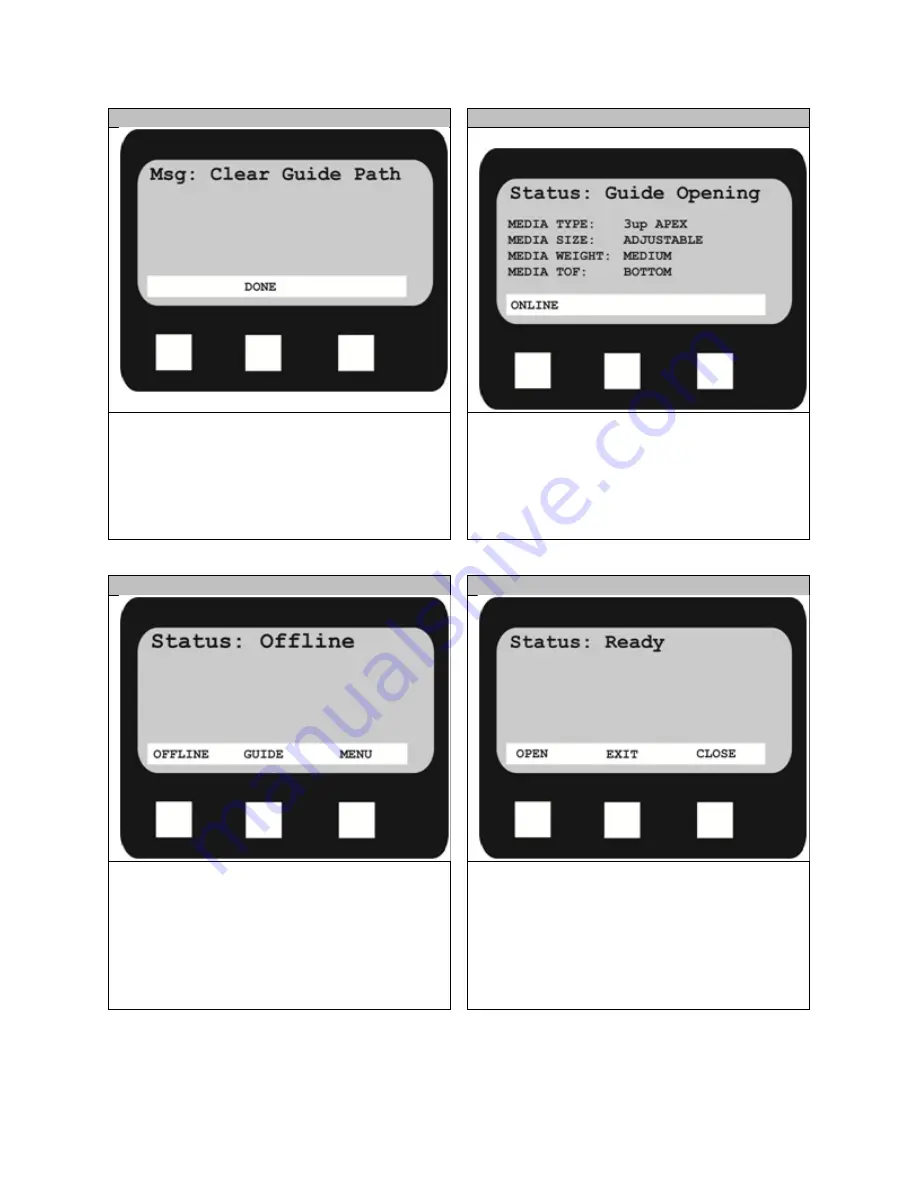
Press the Online/Offline button so the control panel
shows this screen:
PRESS and HOLD the Guide button for approximately
3 seconds.
The control panel should now look like this:
Press the Open button 60 times (each press opens
the Extension Arm an additional 0.25mm.)
The Extension Arm will now be open approximately
12.975” (329.57mm) wide.
102
Summary of Contents for iCOLOR 900
Page 1: ...iCOLOR 900 APEX2Print Installation and User Guide ...
Page 23: ...Navigate to the 2 Install RIP vR2 Folder Run the Prepare_Uninet_RIP_v2 1 exe file 23 ...
Page 24: ...STEP 3 of 8 The KEYLOK and Sentinel Drivers will install 24 ...
Page 26: ...STEP 5 of 8 Click Done STEP 6 of 8 26 ...
Page 27: ...Navigate to the 3 Install APEX2Print folder Run the APEX2Print_Install msi file Click Next 27 ...
Page 53: ...Appendix 53 ...
Page 57: ...57 ...
Page 59: ...PAGE 3 59 ...
Page 68: ...STEP 2 of 4 The Creating a New User Media Entry window will display Click Edit STEP 3 of 4 68 ...
Page 80: ...STEP 7 of 10 The job is ready for printing Click Print Nesting 80 ...
Page 87: ...STEP 3 The Preview Screen will display the scaled object 87 ...
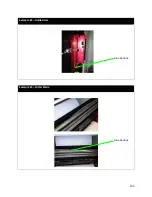
Page 100: ...Example 2 Guide Arms Example 3 Cutter Blade Glue Residue Glue Residue 100 ...
Page 108: ...STEP 21 Close the Guide Door and the system is ready to print 108 ...


