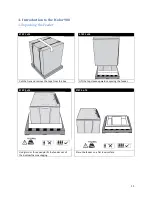

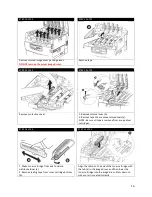


Open the Guide Channels. Feed the media under the
orange Tension Swing as shown.
Place the paper evenly between the Guide
Channels and hold it steady with one hand.
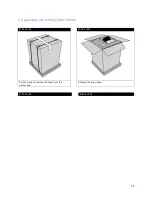
STEP 5 of 7
STEP 6 of 7
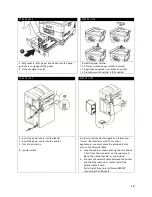
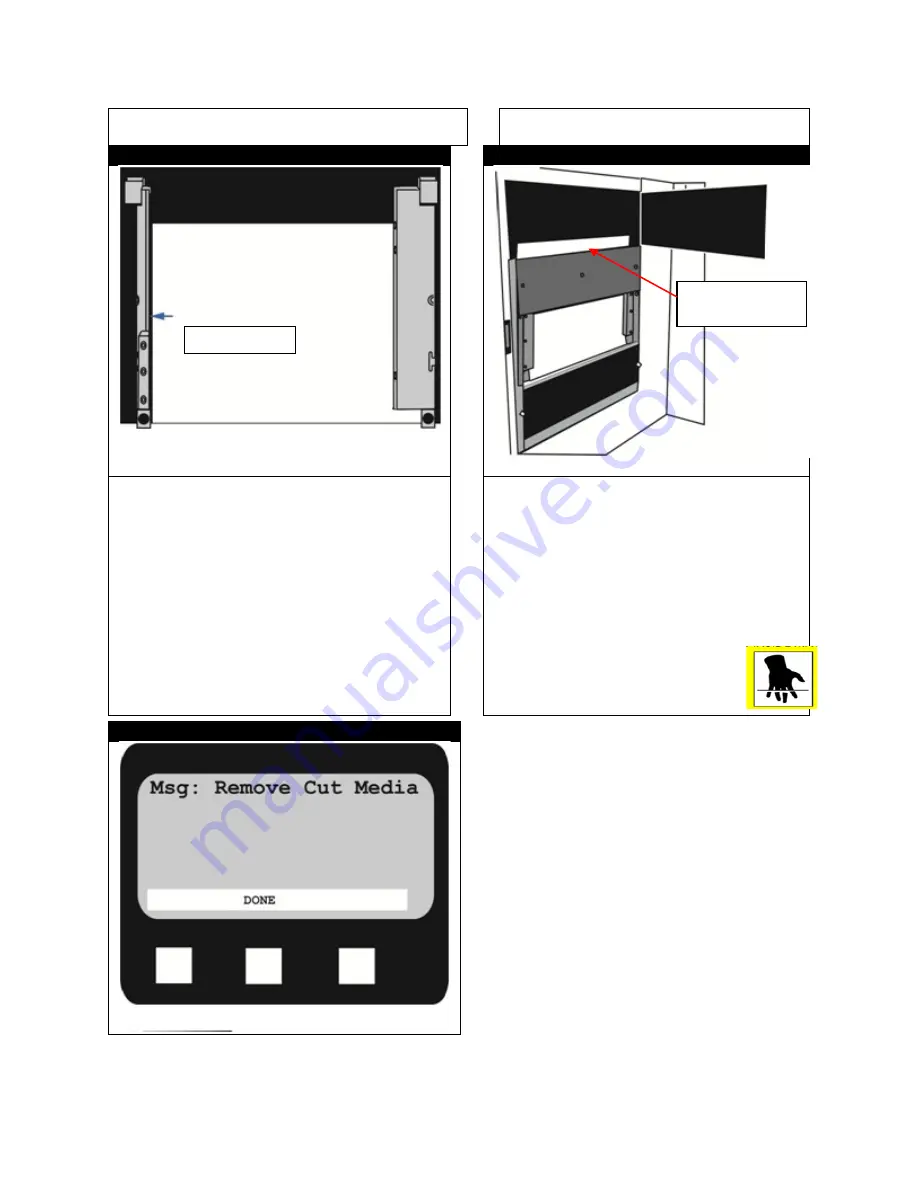
Ensure the Channel Gap (the distance between the
edge of the paper and the Guide Channel) is less than
0.5mm on each side and the paper aligned with the
right side Guide Channel.
Make sure the Channel Gap is not too small so that
the paper does not fit between the Guide Channels.
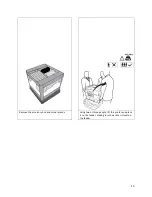
The paper should lay flat against the back of the
feeder. If the media does not fit, re-measure the
width of the roll and use the software to send the
width to the printer.
Close the Guide Channels and Load Door.
Press the Load button to load the media.
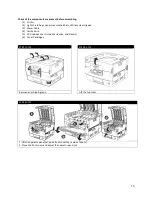
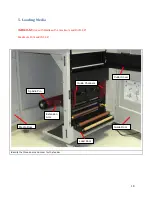
The roll will begin to load and cut off a section for
proper alignment. Using caution, open the cutter
door and carefully remove the piece of cut paper.
Close the cutter door.
Note: Depending on the type of media being
used, the paper may fall inside the feeder. Use
caution when retrieving cut media.
STEP 7 of 7
Channel Gap
Remove cut
piece of media.
21
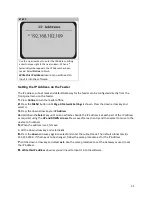
Summary of Contents for iCOLOR 900
Page 1: ...iCOLOR 900 APEX2Print Installation and User Guide ...
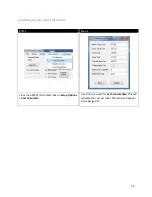
Page 23: ...Navigate to the 2 Install RIP vR2 Folder Run the Prepare_Uninet_RIP_v2 1 exe file 23 ...
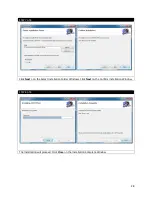
Page 24: ...STEP 3 of 8 The KEYLOK and Sentinel Drivers will install 24 ...
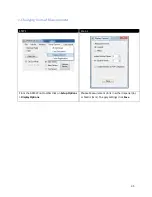
Page 26: ...STEP 5 of 8 Click Done STEP 6 of 8 26 ...
Page 27: ...Navigate to the 3 Install APEX2Print folder Run the APEX2Print_Install msi file Click Next 27 ...
Page 53: ...Appendix 53 ...
Page 57: ...57 ...
Page 59: ...PAGE 3 59 ...
Page 68: ...STEP 2 of 4 The Creating a New User Media Entry window will display Click Edit STEP 3 of 4 68 ...
Page 80: ...STEP 7 of 10 The job is ready for printing Click Print Nesting 80 ...
Page 87: ...STEP 3 The Preview Screen will display the scaled object 87 ...
Page 100: ...Example 2 Guide Arms Example 3 Cutter Blade Glue Residue Glue Residue 100 ...
Page 108: ...STEP 21 Close the Guide Door and the system is ready to print 108 ...


