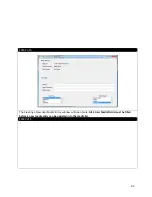


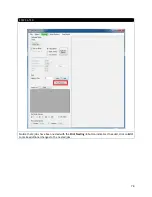


STEP 6 of 10
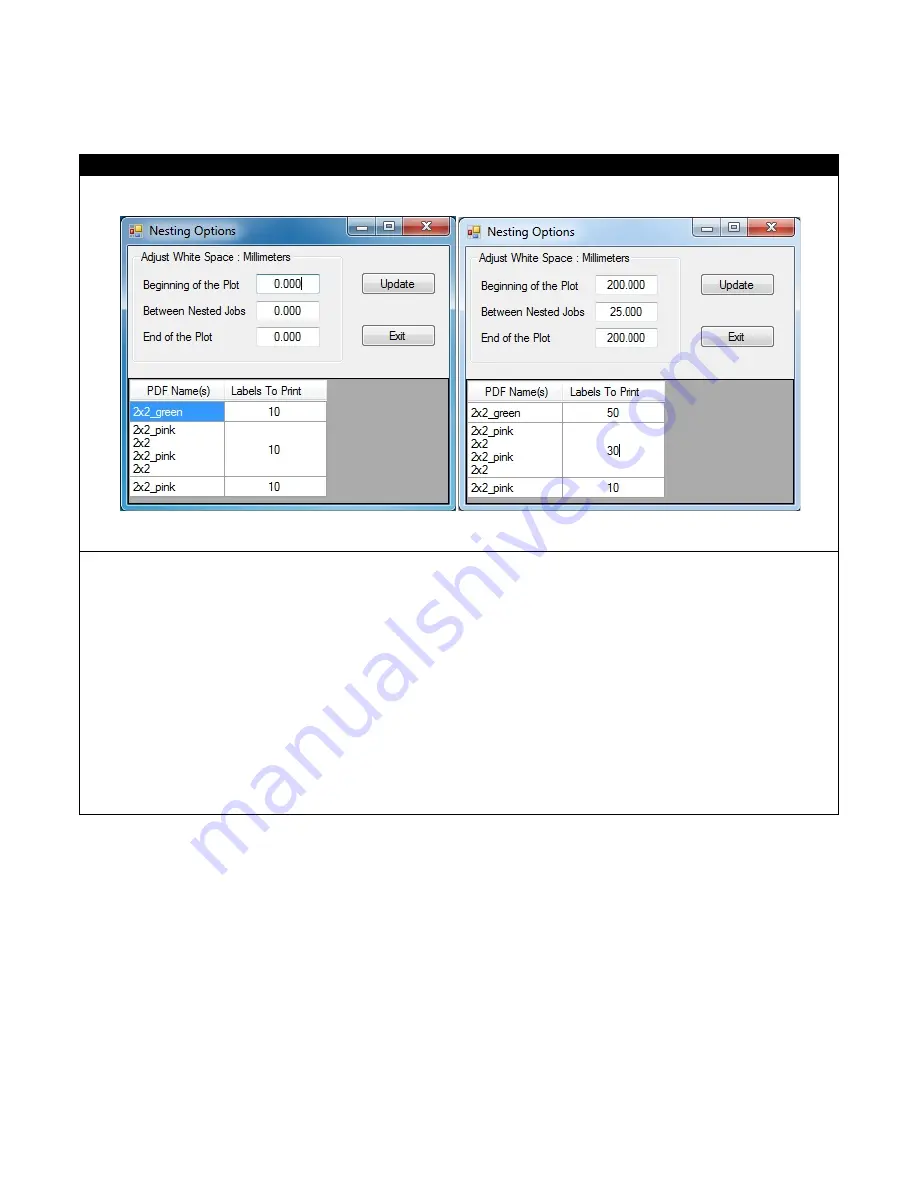
The Nesting Options Window will open. Notice that adjustments can be made to impact the white space of a
label, controlling where on the label that jobs are printed. The quantity of labels can also be adjusted across
each nested job. Once the necessary changes have been made click Update> Click Exit.
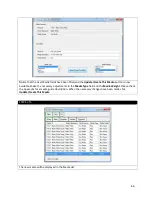
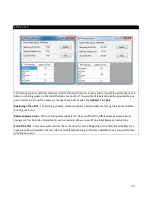
Beginning of the Plot - For finishing printers, media must pass a certain distance through the printer before
printing can occur.
Between Nested Jobs - When printing nested jobs it can be very difficult to differentiate between similar
images such as barcodes. Adjustments can be made to allow a space of one label between nested jobs.
End of the Plot - This value will remain as the same value from the Beginning of the Plot; this will allow for a
new job to be printed after the last job has completed resetting to the same distance that is required before
printing can occur.
79
Summary of Contents for iCOLOR 900
Page 1: ...iCOLOR 900 APEX2Print Installation and User Guide ...
Page 23: ...Navigate to the 2 Install RIP vR2 Folder Run the Prepare_Uninet_RIP_v2 1 exe file 23 ...
Page 24: ...STEP 3 of 8 The KEYLOK and Sentinel Drivers will install 24 ...
Page 26: ...STEP 5 of 8 Click Done STEP 6 of 8 26 ...
Page 27: ...Navigate to the 3 Install APEX2Print folder Run the APEX2Print_Install msi file Click Next 27 ...
Page 53: ...Appendix 53 ...
Page 57: ...57 ...
Page 59: ...PAGE 3 59 ...
Page 68: ...STEP 2 of 4 The Creating a New User Media Entry window will display Click Edit STEP 3 of 4 68 ...
Page 80: ...STEP 7 of 10 The job is ready for printing Click Print Nesting 80 ...
Page 87: ...STEP 3 The Preview Screen will display the scaled object 87 ...
Page 100: ...Example 2 Guide Arms Example 3 Cutter Blade Glue Residue Glue Residue 100 ...
Page 108: ...STEP 21 Close the Guide Door and the system is ready to print 108 ...


