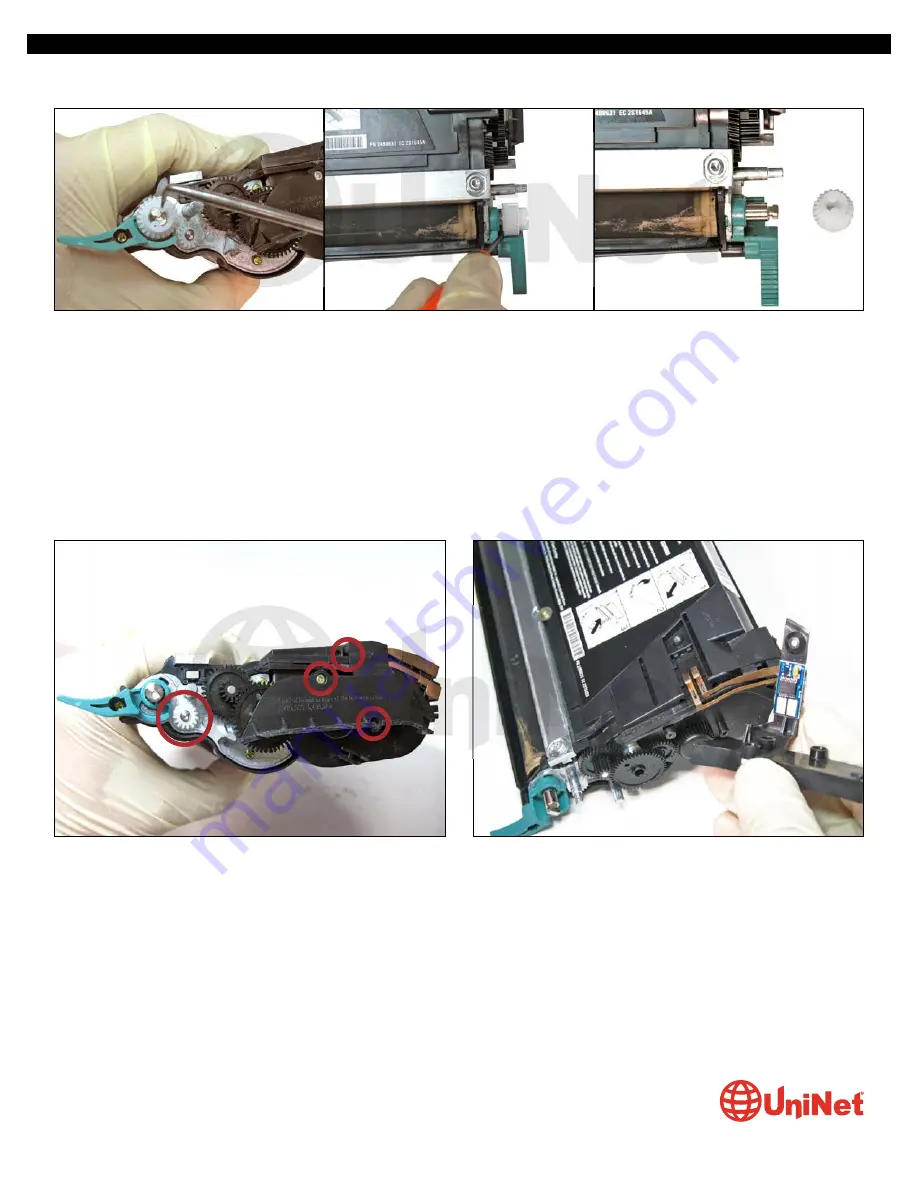
2. Remove the developer roller gear shown by first rotating the gear clock wise until it stops.
Wedge a small flathead screwdriver between the gear and the roller support to push the gear out.
The gear has a minimal amount of pressure so there is no risk of using this technique.
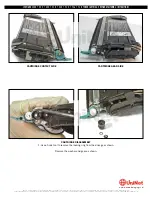
3. Carefully remove the supply roller gear shown.
Use extreme caution as it is very fragile and might break if removed forcefully.
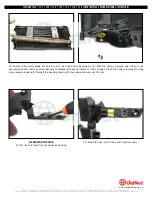
Continue by removing the three screws and smartchip holder as shown to access the drive train gears inside.
LEXMARK C520
•
522
•
524
•
530
•
534
•
734
•
736
•
738 TONER CARTRIDGE REMANUFACTURING INSTRUCTIONS
© 2010 UniNet Imaging Inc. All trademark names and artwork are property of their respective owners. Product brand names mentioned are intended to show compatibility only.
UniNet Imaging does not warrant downloaded information. Unauthorized sale, reproduction or distribution of this article is prohibited. For additional support, please contact techsupport@uninetimaging.com
www.
uninet
imaging.com


