9. With the PCR cleaner assembly removed, the drum can
easily be removed by lifting it out. Clean out any remaining
toner from the cartridge.
10. Press in on the bottom tab of the developer roller plate
(right gear side) to release it.
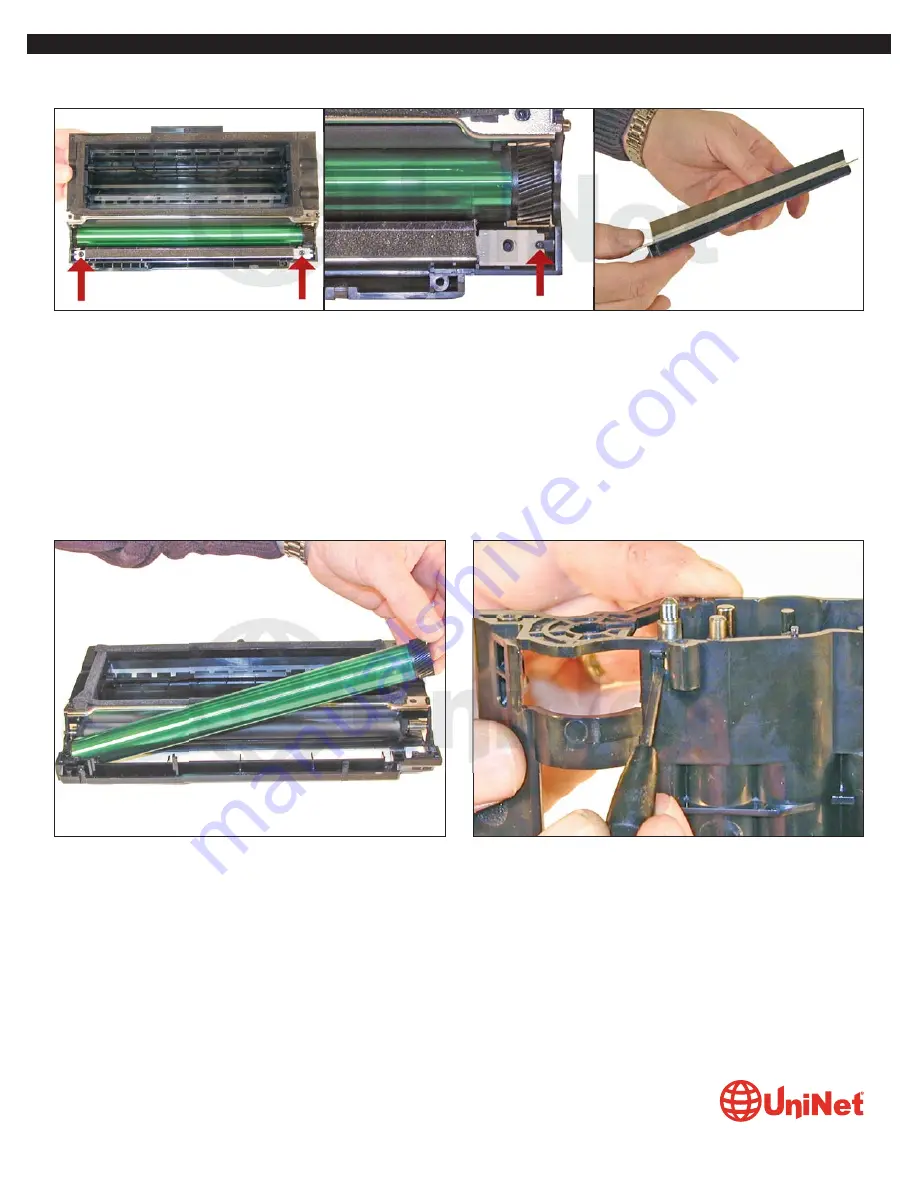
8. There are two screws on the PCR cleaner assembly. Remove them and gently pry the blade up. Be careful not to damage the
alignment pins. This PCR cleaner also has what can be considered a wiper blade. It is a very flimsy blade attached to the metal
bar. Wipe this blade down with a clean lint free cloth before re-installing. It is very important that the PCR cleaner be cleaned.
Vacuum or blow off any residual toner from the foam/felt.
XEROX WORKCENTRE PE120
•
CARTRIDGE REMANUFACTURING INSTRUCTIONS
© 2010 UniNet Imaging Inc. All trademark names and artwork are property of their respective owners. Product brand names mentioned are intended to show compatibility only.
UniNet Imaging does not warrant downloaded information. Unauthorized sale, reproduction or distribution of this article is prohibited. For additional support, please contact techsupport@uninetimaging.com
www.
uninet
imaging.com


