background image

5

SAFETY RULES

SAFETY RULES

SAFETY RULES

SAFETY RULES

SAFETY RULES

1.

Before putting the machine described in this manual
into service, carefully read the instructions.  The starting
of each machine is only permitted after taking notice
of the instructions and by qualified operators.

IMPORTANT!

IMPORTANT!

IMPORTANT!

IMPORTANT!

IMPORTANT!  Before putting the machine into service,
also read the safety rules and instructions from the
motor supplier.

2.

Observe the national safety rules valid for your country.

3.

The sewing machine described in this instruction
manual is prohibited from being put into service until
it  has been ascertained that the sewing units which
these sewing machines will be built into, have
conformed with the provisions of EC Machinery
Directive 2006/42/EC, Annex II B, No. 1B.

The machine is only allowed to be used as foreseen.
The foreseen use of the particular machine is described
in paragraph STYLE OF MACHINE of this instruction
manual.  Another use, going beyond the description,
is not as foreseen.

4.

All safety devices must be in position when the machine
is ready for work or in operation.  Operation of the
machine without the appertaining safety devices is
prohibited.

5.

Wear safety glasses.

6.

In case of machine conversions and all valid safety
rules must  be considered.  Conversions and changes
are made at your own risk.

7.

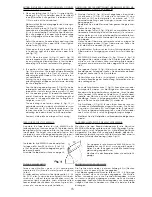
The warning hints in the instructions are marked with
one of  these two symbols.

8.

When doing the following machine has to be
disconnected from the power supply by turning off the
main switch or by pulling out the main plug.
8.1

When threading needle(s), looper, spreader
etc.

8.2

When replacing any parts such as needle(s),
presser foot, throat plate, looper, spreader,
feed dog, needle guard, folder, fabric guide
etc.

8.3

When leaving the workplace and when the
work place is unattended.

8.4

When doing maintenance work.

8.5

When using clutch motors without actuation
lock, wait until motor is stopped totally.

9.

Maintenance, repair and conversion work (see item
8) must be done only by trained technicians or special
skilled personnel under consideration of the instructions.
Only genuine spare parts approved by Union Special
have to be used for repairs.

10. Any work on the electrical equipment must be done

by an electrician or under direction and supervision
of special skilled personnel.

11. Work on parts and equipment under electrical power

is not permitted.  Permissible exceptions are described
in the applicable section of standard sheet EN 50110
/ VDE 0105.

12. Before doing maintenance and repair work on the

pneumatic equipment, the machine has to be
disconnected from the compressed air  supply.  In case
of existing residual air pressure after disconnecting
from compressed air supply (e.g. pneumatic
equipment with air tank), the pressure has to be
removed by bleeding. Exceptions are only allowed for
adjusting work and function checks done by special
skilled personnel.

SICHERHEITSHINWEISE

SICHERHEITSHINWEISE

SICHERHEITSHINWEISE

SICHERHEITSHINWEISE

SICHERHEITSHINWEISE

1.

Lesen Sie vor Inbetriebnahme der in diesem Katalog
beschriebenen Maschine die

Betriebsanleitung sorg-

fältig.  Jede Maschine darf erst  nach Kenntnisnahme der
Betriebsanleitung und nur durch entsprechend unter-wiesene
Bedienungspersonen betätigt werden.

WICHTIG:

WICHTIG:

WICHTIG:

WICHTIG:

WICHTIG:  Lesen Sie vor Inbetriebnahme auch die
Sicherheitshinweise und die Betriebsanleitung des Motor-
herstellers.

2.

Beachten Sie die für Ihr Land geltenden nationalen
Unfallverhütungsvorschriften.

3.

Die Inbetriebnahme der in dieser Betriebsanleitung
beschriebenen Nähmaschine ist solange untersagt, bis
festgestellt wurde, daß die Näheinheiten bzw.  Nähanlagen,
in die diese Nähmaschine eingebaut werden soll, den
Bestimmungen der EG-Richtlinie 2006/42/EG, Anhang II B, Nr.
1B entsprechen.

Jede Maschine darf nur ihrer Bestimmung gemäß ver-wendet
werden.  Der bestimmungsmäßige

Gebrauch der

einzelnen Maschine ist im Abschnitt  MASCHINENTYP der
Betriebsanleitung beschrieben.  Eine andere, darüber
hinausgehende Benutzung ist nicht bestimmungsgemäß.

4.

Bei betriebsbereiter oder in Betrieb befindlicher Maschine
müssen alle Schutzeinrichtungen montiert sein.  Ohne
zugehörige Schutzeinrichtungen ist der Betrieb nicht erlaubt.

5.

Tragen Sie eine Schutzbrille.

6.

Umbauten und Veränderungen der Maschine dürfen nur
unter Beachtung der gültigen Sicherheitsvorschriften
vorgenommen werden.  Umbauten und Veränderungen
erfolgen auf eigene Verantwortung.

7.

Überall da, wo die Betriebsanleitung Warnhinweise enthält,

sind diese durch eines der beiden Symbole
gekennzeichnet.

8.

Bei folgendem ist die Maschine durch Ausschalten am
Hauptschalter oder  durch Herausziehen des Netzsteckers
vom Netz zu trennen:
8.1

Zum Einfädeln von Nadel(n), Greifer, Leger usw.

8.2

Zum Auswechseln von Nähwerkzeugen, wie
Nadel, Drückerfuß, Stichplatte, Greifer, Leger,
Transporteur, Nadelanschlag, Apparat, Näh-
gutführung usw.

8.3

Beim Verlassen des Arbeitsplatzes und bei
unbeaufsichtigtem Arbeitsplatz.

8.4

Für Wartungsarbeiten.

8.5

Bei mechanisch betätigten Kupplungsmotoren
ohne Betätigungssperre ist der Stillstand des
Motors abzuwarten.

9.

Wartungs-, Reparatur- und Umbauarbeiten (siehe Punkt 8)
dürfen nur von Fachkräften oder entsprechend
unterwiesenen Personen unter Beachtung der
Betriebsanleitung durchgeführt  werden.
Für Reparaturen sind nur die von Union Special freigege-
benen Original-Ersatzteile zu verwenden.

10. Arbeiten an der elekrischen Ausrüstung dürfen nur

v o n

Elektrofachkräften oder unter Leitung und Aufsicht von
entsprechend unterwiesenen Personen durchgeführt
werden.

11. Arbeiten an unter Spannung stehenden Teilen und

Einrichtungen sind nicht erlaubt.  Ausnahmen regeln die
zutreffenden Teile der EN50110 / VDE 0105.

12. Vor  Wartungs- und Reparaturarbeiten an pneumatischen

Einrichtungen  ist  die  Maschine vom pneumatischen
Versorgungsnetz zu trennen.  Wenn nach der Trennung vom
pneumatischen Versorgungsnetz noch Restenergie ansteht
(z. B. bei pneumatischen Einrichtungen mit  Windkessel), ist
diese durch

Entlüften abzubauen. Ausnahmen  sind

nur bei Einstellarbeiten und Funktionsprüfungen durch
entsprechend unterwiesene Fachkräfte zulässig.

Summary of Contents for 80800

Page 1: ...CLASS 80800 SEWING MACHINES FOR CLOSING CLASS 80800 SEWING MACHINES FOR CLOSING CLASS 80800 SEWING MACHINES FOR CLOSING CLASS 80800 SEWING MACHINES FOR CLOSING CLASS 80800 SEWING MACHINES FOR CLOSING...

Page 2: ...ise auswirken Die nachfolgenden Seiten beinhalten die bildlichen Darstellungen und Beschreibungen der Betriebs anleitung und der Teile Ihrer Maschine Neben der Betriebsanleitung und den im Verwen derl...

Page 3: ...AND H NADELSTANGE NADELHEBEL KOMPLETT F R MACHINEN 80800E UND H THREAD CHAIN CUTTER KNIVES AND CHAIN CUTTER KNIFE DRIVE FOR STYLES 80800C D AND E FADENKETTEN ABSCHNEIDMESSER UND KETTEN ABSCHNEIDMESSER...

Page 4: ...r tape widths from 2 1 8 to 2 1 2 in 54 to 63 mm BEZEICHNUNG DER MASCHINEN BEZEICHNUNG DER MASCHINEN BEZEICHNUNG DER MASCHINEN BEZEICHNUNG DER MASCHINEN BEZEICHNUNG DER MASCHINEN Jede UNION SPECIAL Ma...

Page 5: ...ISE SICHERHEITSHINWEISE SICHERHEITSHINWEISE SICHERHEITSHINWEISE 1 Lesen Sie vor Inbetriebnahme der in diesem Katalog beschriebenen Maschine die Betriebsanleitung sorg f ltig Jede Maschine darf erst na...

Page 6: ...821 C 6 3 at 1400 RPM and 50 duty cycle OILINGDIAGRAM OILINGDIAGRAM OILINGDIAGRAM OILINGDIAGRAM OILINGDIAGRAM GER USCHEMISSION GER USCHEMISSION GER USCHEMISSION GER USCHEMISSION GER USCHEMISSION Arbei...

Page 7: ...RIEBNAHME SCHMIERUNG UND INBETRIEBNAHME SCHMIERUNG UND INBETRIEBNAHME SCHMIERUNG UND INBETRIEBNAHME SCHMIERUNG UND INBETRIEBNAHME Die Maschinen der Klasse 80800 m ssen zweimal t glich vor der Inbetrie...

Page 8: ...TELL UND EINF DELANLEITUNG F R DIE FADEN F HRUNGSTEILE Bei richtiger Einstellung der Fadenf hrungen und Faden abz ge entsteht eine feste Naht und somit auch ein dichter Verschlu des zugen hten Sackes...

Page 9: ...ANLEITUNG EINSTELLANLEITUNG EINSTELLANLEITUNG EINSTELLANLEITUNG EINSTELLANLEITUNG BEACHTEN SIE BEACHTEN SIE BEACHTEN SIE BEACHTEN SIE BEACHTEN SIE Hinweise auf Richtung und Lage wie rechts links vorne...

Page 10: ...er an und montieren Sie den Stirndeckel EINSTELLUNG DES TRANSPORTEURS Im h chsten Punkt der Transporteurbewegung sollen die hinteren Z hne des Transporteurs B Fig 6 eine volle Zahnh he ber die Stichpl...

Page 11: ...the upper stop collar E Fig 9 on the left presser bar When the needle is in its lowest position and the presser foot is lifted with presser foot bottom tilted up the needle bar respec tively needle cl...

Page 12: ...s secured by screw F GREIFERFADENAUFNEHMER Bei den Zweifaden Doppelkettenstichmaschinen wird die H he des Greiferfadenaufnehmers A Fig 11 so eingestellt da der Greiferfadenabzugshaken C den Greiferfad...

Page 13: ...7 Schieben Sie den Schaltschuh Q Fig 15 nach rechts so da die Spitze der Schaltnase R am u ersten rechten Ende des Schaltschuhes aufliegt Das polierte Ende des Schaltschuhes mu rechts sein und die Spi...

Page 14: ...14...

Page 15: ...ein und legen Sie die Anschlagschrauben O am Obermesser an Ziehen Sie jetzt die Klemmschrauben N gut an In ge ffnetem Zustand soll rechts am F hrungszapfen des Obermessers ein Durchgang von etwa 4 8...

Page 16: ...AME AND STYLE OF MACHINE FOR WHICH PART IS ORDERED BESTELLUNG VON VERSCHLEISS UND ERSA BESTELLUNG VON VERSCHLEISS UND ERSA BESTELLUNG VON VERSCHLEISS UND ERSA BESTELLUNG VON VERSCHLEISS UND ERSA BESTE...

Page 17: ...IPTION OF P DESCRIPTION OF P DESCRIPTION OF P DESCRIPTION OF PAR AR AR AR ARTS TS TS TS TS EXPLOSIONSZEICHNUNGEN EXPLOSIONSZEICHNUNGEN EXPLOSIONSZEICHNUNGEN EXPLOSIONSZEICHNUNGEN EXPLOSIONSZEICHNUNGEN...

Page 18: ...18...

Page 19: ...haftdurchmesser 5 mm Kugel ler Schaftdurchmesser 6 mm Typenschild Halbrundkerbnagel Nadelfadenschmierung f r Maschine 80800E Sechskantschraube Scheibe 1 1 1 1 1 1 2 2 2 2 4 2 3 3 1 1 1 3 1 1 2 1 1 1 2...

Page 20: ...20...

Page 21: ...Screw Tape Cutter Housing for Styles 80800H and HA Screw Face Cover Screw End Cover for Styles 80800C D and E End Cover for Styles 80800H and HA Shoulder Screw Spring Washer Guard Screw Hinge Pin Hin...

Page 22: ...22...

Page 23: ...5C 88 80865QX 136A 80865MX 88 80865NX 80865PX 22894AD 80673CB Needle Thread Guide Set Screw Pin for Tension Discs Tension Post Tension Post Ferrule Tension Disc Tension Sleeve Spring for needle thread...

Page 24: ...24...

Page 25: ...k Screw Pulley Hub Collar Screw Woodruff Key Looper Drive Eccentric Assembly Connection Screw Oil Wick Pin for oil wick Eccentric Spot Screw headless Set Screw Guide Fork Screw Ball Stud Looper Avoid...

Page 26: ...26...

Page 27: ...55 HS52B 22560 HA1286B 12964C 81086C 81093 HS100D 80669 80676 HA58C HA58F HA58D 80046 21111 22743 HA54B 51134Y 666 260 80615A 22894Y BP108 96653 22894 22894K Needle Lever Assembly for Styles 80800E an...

Page 28: ...28...

Page 29: ...et Screw Looper Shaft Wick Yarn length 0 6 m 2 please specify length when ordering Looper Drive Lever Rocker Shaft Looper Thread Cast off Assembly Bracket Thread Eyelet Set Screw Cast off Hook Counter...

Page 30: ...30...

Page 31: ...ating stud Feed Lift Eccentric for Styles 80800C D and E Feed Lift Eccentric for Styles 80800H and HA Spot Screw headless Screw Transporteurtr ger f r Maschinen 80800C D und E Gewindestift St tzschrau...

Page 32: ...32...

Page 33: ...RFUSS LIFTER ANGEN UND DR CKERFUSS LIFTER ANGEN UND DR CKERFUSS LIFTER ANGEN UND DR CKERFUSS LIFTER ANGEN UND DR CKERFUSS LIFTERTEILE TEILE TEILE TEILE TEILE Ref No Pos Nr Part No Teil Nr Description...

Page 34: ...34...

Page 35: ...ew for tension spring Nut Stop Screw Stop Stop Screw Block Screw Actuating Lever Tension Spring Rest Shaft Screw Fibre Washer Actuating Shoe for Style 80800HA Actuating Shoe for Style 80800H Screw for...

Page 36: ...36...

Page 37: ...D Feed Dog for Styles 80800C D option Presser Foot for Style 80800E Presser Foot Shank Set Screw to align presser foot Nut Screw for adjustment of presser foot bottom Nut Screw Set Screw Hinge Screw...

Page 38: ...38...

Page 39: ...INE FASTENING SCREWS ASTENING SCREWS ASTENING SCREWS ASTENING SCREWS ASTENING SCREWS BANDEINF BANDEINF BANDEINF BANDEINF BANDEINFASSAPP ASSAPP ASSAPP ASSAPP ASSAPPARA ARA ARA ARA ARAT F R DIE MASCHINE...

Page 40: ...40...

Page 41: ...96203 G11683E 90861KD175 95293 90862KD 90821KE 95152 6042A 21171M 95054 Hex Socket Head Wrench size 5 mm for Styles 80800H and HA Single Jawed Wrench size 9 32 7 2 mm Single Jawed Wrench size 3 8 9 5...

Page 42: ...9099S 31 29132S 27 29132U 35 29442N 25 29476WM 31 29479 29 29480XR 39 29774E 27 29916REB 19 29916REE 19 29925 35 35733B 21 420 33 460 27 459 27 482C 29 31 33 51134V 25 35 51134Y 27 57WD 35 6040A 29 60...

Page 43: ...X 23 80885 19 80885A 19 80885B 19 80885C 19 80887A 21 80888 21 80897 21 80898A 19 81086C 27 81093 27 81239 21 81256A 23 81399 25 8372A 27 85 29 8564 21 88 19 23 27 29 35 37 88D 27 88F 25 89 19 21 31 3...

Page 44: ...pecial LLC One Union Special Plaza Huntley IL 60142 Phone US 800 344 9698 Phone 847 669 4200 Fax 847 669 4355 E mail bag unionspecial com www unionspecial com European Distribution Center Corporate Of...

Reviews: