4
5
01.10.2019
DE
U S E R M A N U A L
EN
2.
Mondfilter - dient zur Zusammenarbeit mit dem
Okular des Teleskops, reduziert die Lichtmenge,
die durch das optische System durch die
Polarisationsfilter gelangt.
Achtung: Linsen und Filter sind im Okular auf
der dem Auge gegenüberliegenden Seite zu
installieren.
REINIGUNG UND WARTUNG
a) Verwenden Sie zur Reinigung der Oberfläche
ausschließlich Mittel ohne ätzende Inhaltsstoffe.
b) Bewahren Sie das Gerät an einem trockenen,
kühlen, vor Feuchtigkeit und direkter
Sonneneinstrahlung geschütztem Ort auf.
c) Verwenden Sie zur Reinigung ein weiches,
staubfreies und fusselfreies Tuch
d)
Lagern Sie das Produkt an einem Ort, der keinen
hohen oder niedrigen Temperaturen, Staub und
chemischen Mitteln ausgesetzt ist.
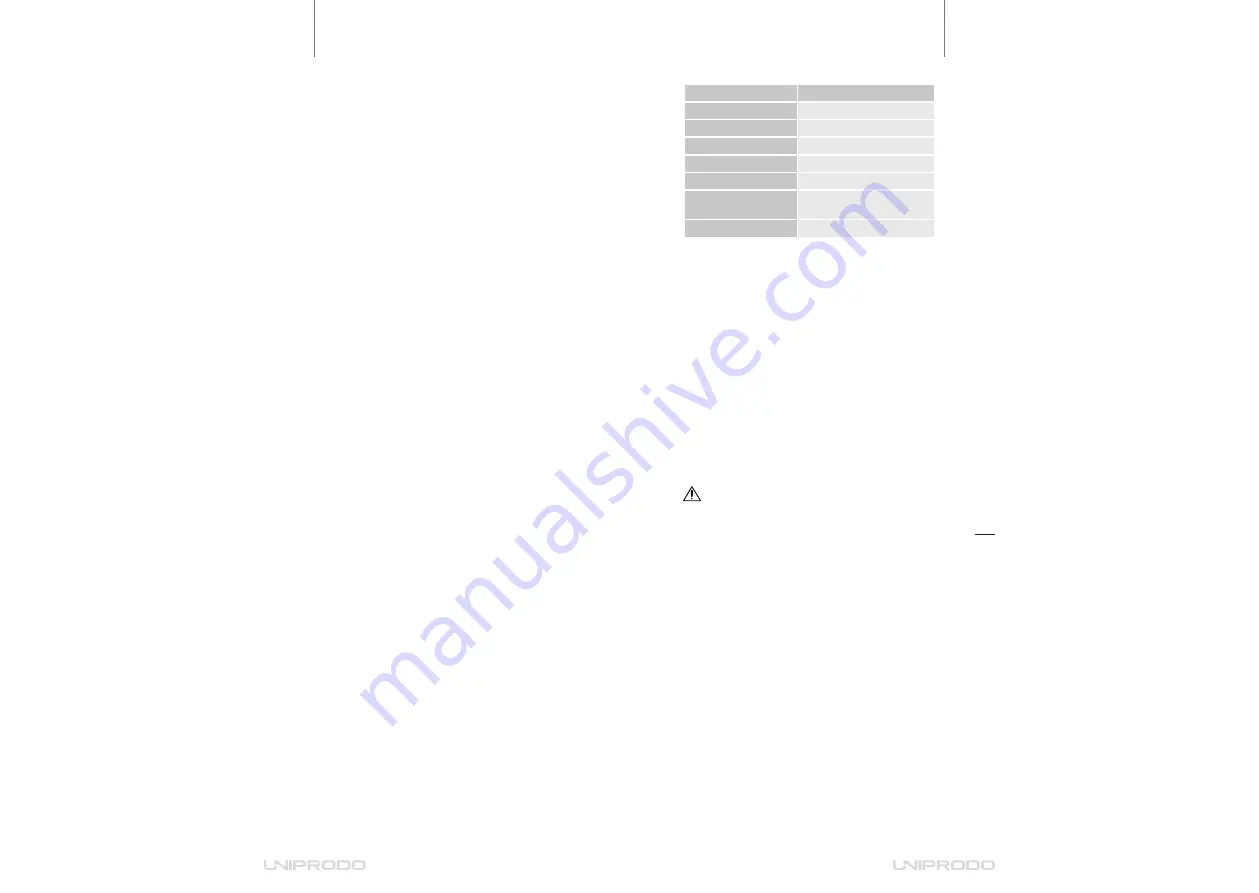
TECHNICAL DATA
Parameter description
Parameter value
Product name
Telescope
Model
UNI_TELESCOPE_10
Aperture [mm]
76
Focal length
900
Finder
5x24
Dimensions [mm]
872x840x1650
(vertical position)
Weight [kg]
7,70
a)
Do not look directly or through the lens on the
light source. This can cause eye damage and
epileptic seizures.
b) Do not leave the magnifying lens unattended in
places with direct sunlight as this creates a fire
hazard. After finishing work, remember to close
the lens cover.
c)
It is forbidden to direct the focused light beam
towards people or animals. It may cause burns.
d)
To avoid eye damage, do not use the product in
places where shocks can occur.
USE GUIDELINES
The product is intended for observing objects located
at a considerable distance from the user and for
astronomical observations.
The user is liable for any damage resulting from
unintended use of the device.
DEVICE DESCRIPTION
P= A
B
1.
Smaller shield
2.
Bigger shield
3.
Secondary mirror
4. Hole
5.
Focus tube
6.
Finder bracket locking screw
7. Finder
8.
Finder bracket
9.
Finder eyepiece
10. Main tube
11. Main mirror
12. Adjusting screw
13. Eyepiece
14. Focus ring
15. Screw
16. Declination axis ring
17. Right ascension ring
18. Right ascension adjustment knob
19. Counterweight
20. Eyepiece
21. Declination adjustment knob
22. Polar axis clamping screw
23. Latitude scale
24. Assembly
25. Horizontal axis clamping screw
26. Tripod
27. Accessories shelf
28. Tripod adjustment clamping screws
ASSEMBLY
1. Loosen the tripod adjustment clamping screws
[28], set up the tripod as desired, secure the setup
with adjustment screws.
2.
Install the fitting [24] on the tripod, secure with
screws.
3.
Install the accessories shelf [27].
4.
Prepare the telescope main body [10], loosen the
mounting screws [15] and install the body on the
fitting.
5. Fit the counterweight shaft together with the
counterweight [19] in the mounting hole, then
move the counterweight along the shaft until the
structure is balanced.
6.
Install the declination adjustment knob [21] and
the elevation adjustment knob [18].
FOCUSING THE TELESCOPE AND ADJUSTING THE
FINDER
1.
Mount the eyepiece [20] on the adapter and secure
with the screw. Adjust the focus tube [5] relative
to the observed object in the distance, then adjust
the focus with the declination adjustment knob
[21].
2.
Sharpen the image seen in the finder eyepiece [9].
If the observed object is not in the finder's sight:
a)
Loosen or tighten the finder bracket screws [8] so
that the finder can move.
b) When the object's image is in the centre of the
finder, it means that the finder has been adjusted.
c) Repeat these actions with the other telescope
glasses.
EYEPIECE AND MAGNIFICATION
The telescope is equipped with several types of
eyepieces. The power of each eyepiece depends on the
focal length of the main mirror.
P.
telescope magnification
A.
focal length of the main mirror
B.
focal length of the eyepiece
FUNCTIONS AND ACCESSORIES
1. Barlow lens. When used with the telescope
eyepiece it extends the telescope's focal length
and, as a result, further enlarges the image of the
observed object.
2. Moon filter. Used with the telescope eyepiece
it reduces the light passing through the optical
system by means of polarizing filters.
Note: The lenses and filters should be installed in
the eyepiece on the side opposite the eye.
CLEANING AND MAINTENANCE
a) Use only non-corrosive cleaners to clean the
surface.
b) Store the unit in a dry, cool place, free from
moisture and direct exposure to sunlight.
c)
Use a soft, dust-free and lint-free cloth to clean the
telescope.
d)
Store the product in a place not exposed to high or
low temperatures, dust and/or chemical agents.
ATTENTION!
This product‘s view can be found on the
last pages of the operating instructions (pp. 17).


