background image

User Manual 


August 2011 

©Unique Perspectives 


www.click2go.ie   


Page 21 of 35 

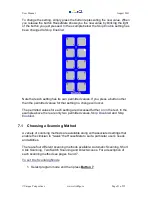
To change the setting, simply press the button representing the new value. When 
you release the button HouseMate shows you the new value by blinking the light 
of the button you just pressed. In the example below the 

Skip Enable

 setting has 

been changed to 

Skip Enabled


Note that each setting has its own permitted values. If you press a button other 
than the permitted values for that setting no change will occur. 
 
The permitted values for each setting are discussed further on in the text. In the 
example above there are only two permitted values, 

Skip Disabled

 and 

Skip 

Enabled


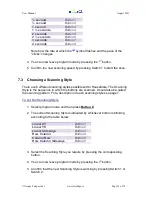
7.1    Choosing a Scanning Method 


A variety of scanning methods are available along with associated settings that 
enable the clinician to “tweak” the HouseMate to suit a particular user‟s needs 
and abilities.  
 
There are four different scanning methods available: Automatic Scanning, Short 
Click Scanning, Two Switch Scanning and Direct Access. For a description of 
each scanning method see pages 6 and 7. 
 

To set the Scanning Mode 


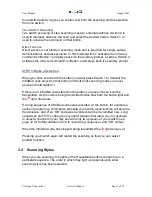
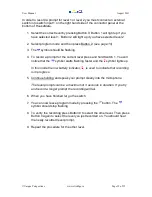
1.  Select program mode and then press 

Button 7

.  


Summary of Contents for HouseMate

Page 1: ...mable scanning options to suit user needs Bright LED display with slide in pocket for custom made labels Battery powered easy to mount attractive robust enclosure Important Notes 1 Read this manual carefully before installing or operating your HouseMate 2 Due to continuos product improvement Unique Perspectives reserves the right to update this Manual This Manual supersedes all previous issues whi...

Page 2: ... on Level 2 11 11 12 13 15 6 Recording Auditory Prompts 6 1 Recording Button Prompts 6 2 Recording Level Prompts 16 16 17 7 HouseMate Settings 7 1 Choosing a Scanning Method 7 2 Setting the Scanning Speed 7 3 Choosing a Scanning Style 7 4 Skipping empty Buttons 7 5 Selecting the type of Auditory Feedback 7 6 Adjusting the Switch Acceptance Time 7 7 Enabling the Volume Control 7 8 Opening Level 2 1...

Page 3: ...0 ºC Storage temperature range 25 70 ºC Operating and storage humidity 0 90 RH The HouseMate is not designed for outdoor use Intended Use The HouseMate is an Infra red remote control designed to enable those individuals who cannot use a standard remote control the ability to operate entertainment equipment and environmental control equipment in their home or place of work study The HouseMate is fo...

Page 4: ...ommands can be recorded by enabling a second level It is possible to record a series of commands on each button Each series can be up to 20 seconds long and stops when the user presses their switch This is very useful for scanning television channels or adjusting the volume The built in microphone and speaker deliver good quality speech output in scanning mode with 5 seconds record time per comman...

Page 5: ... of recorded messages prompts and system sounds Infra Red output Powerful IR output ensures that user does not have to point the device Switch 2 input Step switch in two switch scanning mode or changes level Switch 1 input Switch input for scanning modes and select switch in two switch mode Buttons 10 light action buttons for easy direct access Label Insert Lift up flap to insert a custom designed...

Page 6: ... Started STEP 1 Connect your switches The switch connectors are standard 3 5mm jack sockets located at the bottom of the unit The socket on the right is switch 1 the socket on the left is switch 2 STEP 2 Start scanning How you operate HouseMate depends on which scanning method has been selected There are four different scanning methods Automatic Scanning This is a single switch mode in which the b...

Page 7: ...t Click scanning mode you must press and hold Switch 1 If there is an InfraRed code stored on the button you have chosen it will be transmitted As the code is being transmitted notice how both the button light and the light illuminate If a long sequence of InfraRed codes was recorded on the button for example a series of program up commands pressing your switch a second time will stop the transmis...

Page 8: ...tyle the buttons of HouseMate are scanned two at a time or row by row Pressing the switch selects the desired row Then the buttons within the row are scanned one by one Press the switch again to select the desired button This style enables you to quickly reach the desired command Although it is possible to have auditory clicks for each row it is not possible to have auditory prompts Column Row In ...

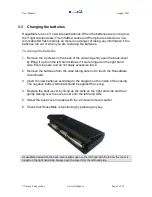
Page 9: ...t were hinged on the right hand side Exercise care and do not apply excessive force 2 Remove the batteries from the case taking care not to touch the HouseMate circuit board 3 Insert the new batteries according to the diagram on the inside of the casing The negative battery terminal should be against the spring 4 Replace the back cover by lining up the slots on the right and side and then gently c...

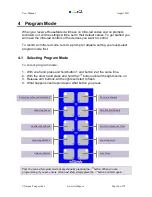
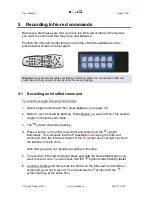
Page 10: ...ogram Mode To select program mode 1 With one hand press and hold button 1 and button 2 at the same time 2 With the other hand press and hold the button until all the lights come on 3 Release all 3 buttons All the lights will start to flash 4 What happens next depend upon what button you press Tip You can exit program mode at any stage by pressing the button When you are programming if you are unsu...

Page 11: ...ram mode and then press Button 1 see page 10 2 Button 1 and 2 should be flashing Press Button 1 a second time This selects single command record mode 3 The symbol should be flashing 4 Press a button on the Infra red control and notice how the symbol illuminates This indicates that the HouseMate is receiving the Infra red command from the Infra red control If the symbol does not light up check the ...

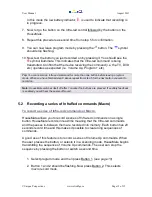
Page 12: ...step 5 for the next button you want to record on Note HouseMate switches itself off after 1 minute if no buttons are pressed If auditory feedback is enabled you will hear the power off sound 5 2 Recording a series of InfraRed commands Macro To record a series of Infra red commands or Macro HouseMate allows you to record a series of Infra red commands on a single button HouseMate records in real ti...

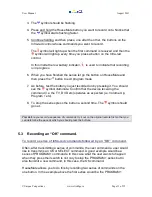
Page 13: ...uld see the symbol illuminate Confirm that the device receiving the command i e the TV DVD etc operates as expected i e Volume Up Program etc 8 To stop the series press the button a second time The symbol should go out Tip Before you record a sequence of commands try it out on the original remote first so that you can determine the pace at which you should press the buttons 5 3 Recording an OK com...

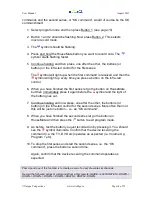
Page 14: ... immediately press it again before the symbol and the light of the button goes out 7 Continue holding and now press one after the other the buttons or button on the Infra red control for the second series More often than not this will be just one button i e an OK command 8 When you have finished the second series let go the button on HouseMate and then press the button to exit program mode 9 As be...

Page 15: ...els will take place on the TV Furthermore when they press their switch a second time the highlighted channel will be selected When creating a series like this it is important to leave enough of a pause between pressing the GUIDE button the FAVOURITES button and the first DOWN button This is because the time it takes to load the Guide and the Favorites varies from Tv to Tv and from time to time ...

Page 16: ...n 0 To record an Infra red command on a button in level 2 1 Select the correct level by pressing Button 0 Button 1 will light up if you have selected level 1 Button 2 will light up if you have selected level 2 In this instance you want to select level 2 Notice that when you release Button 0 the current level is indicated by blinking the light in the relevant button i e Button 1 or Button 2 HouseMa...

Page 17: ...e set to Prompts or Prompts and Clicks By default it is set to Prompts See page 23 for adjusting this setting 6 1 Recording Button Prompts To record a prompt 1 Select program mode and then press Button 2 see page 10 2 The symbol should be flashing 3 To record a prompt press and hold the button you want to record onto You will notice that the symbol starts flashing faster and the symbol lights up I...

Page 18: ...l light up if you have selected level 2 In this instance you want to select level 2 Notice that when you release Button 0 the current level is indicated by blinking the light in the relevant button i e Button 1 or Button 2 HouseMate stops doing this once you start using it but if no buttons are pressed for a few seconds it will return to blinking the current level for a few moments before it switc...

Page 19: ... press and hold Switch 1 You will notice that the symbol starts flashing faster and the symbol lights up In this mode the low battery indicator is used to indicate that recording is in progress 5 Continue holding and speak your prompt clearly into the microphone The level prompts can be a maximum of 3 seconds in duration If you try and record a longer prompt the recording will fail 6 When you have...

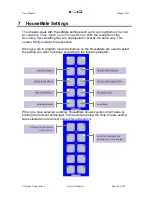
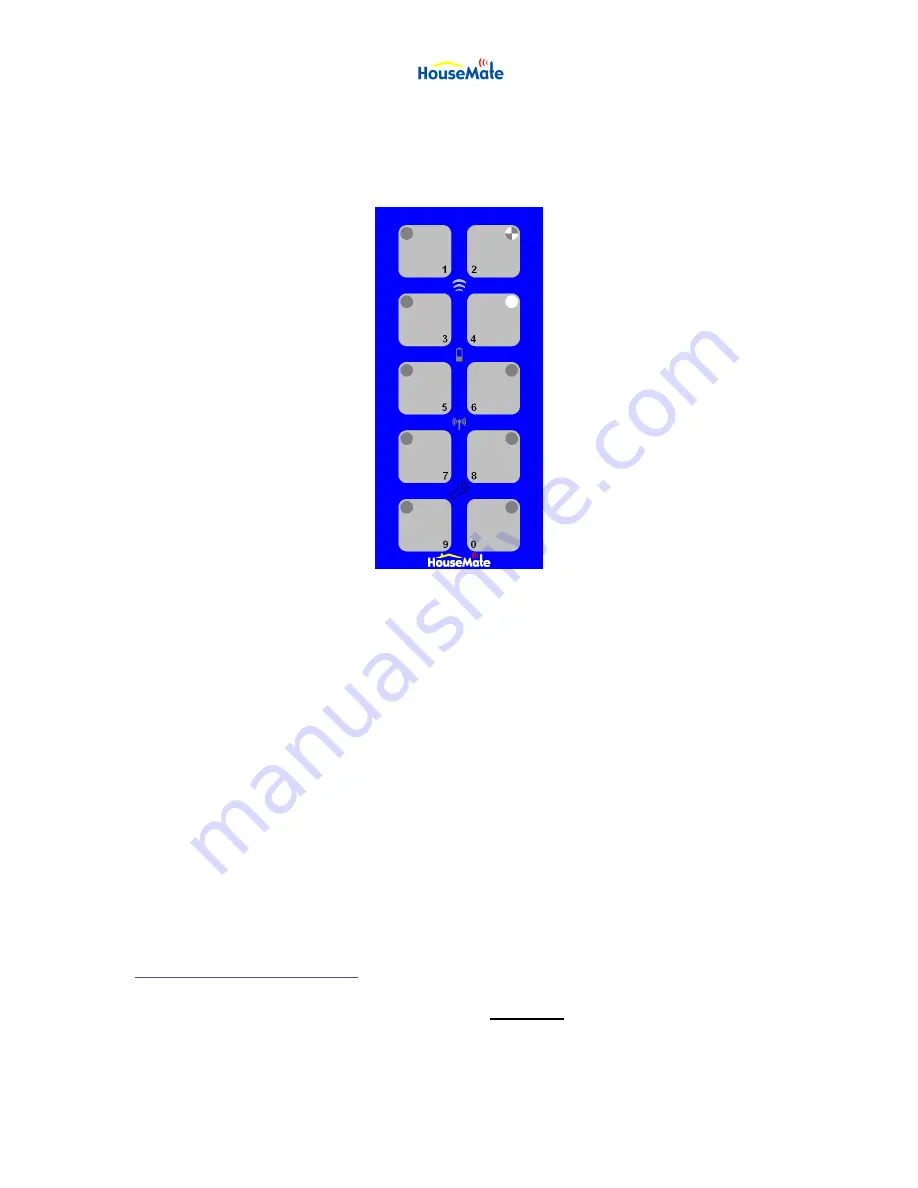
Page 20: ... are in program mode the buttons on the HouseMate are used to select the setting you want to change according to the following diagram When you have selected a setting HouseMate shows you its current value by blinking the relevant button light In the example below the Skip Enable setting was selected and its current value is Skip Disabled Skip Enable Disable Switch Acceptance Time Scanning Style L...

Page 21: ... setting no change will occur The permitted values for each setting are discussed further on in the text In the example above there are only two permitted values Skip Disabled and Skip Enabled 7 1 Choosing a Scanning Method A variety of scanning methods are available along with associated settings that enable the clinician to tweak the HouseMate to suit a particular user s needs and abilities Ther...

Page 22: ... the scan advances from one button to the next If you have recorded prompts however it is the length of time or pause that occurs between the playback of each prompt In Short Click Scanning the Scanning Speed is the length of time which defines a short click If Switch 1 is released within this time then the scan advances to the next button If Switch 1 is held for longer than this time then it is c...

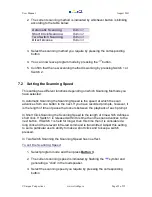
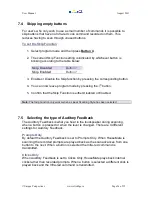
Page 23: ...e within HouseMate The Scanning Style is the sequence in which the buttons are scanned It could also be called the scanning pattern For a description of each scanning style see page 7 To set the Scanning Style 1 Select program mode and then press Button 8 2 The current Scanning Style is indicated by whichever button is blinking according to the table below Linear XY Button 1 Linear YX Button 2 Lin...

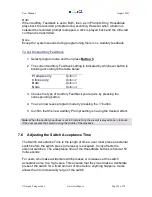
Page 24: ...e button 5 Confirm that the Skip Function is either Disabled or Enabled Note The Skip Function only works when a Linear Scanning Style has been selected 7 5 Selecting the type of Auditory Feedback The Auditory Feedback is what you hear in the loudspeaker during scanning when a button is pressed or when the level is changed There are 4 different settings for Auditory Feedback Prompts Only By defaul...

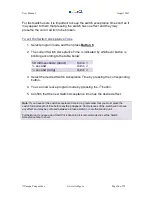
Page 25: ...k you require by pressing the corresponding button 4 You can now leave program mode by pressing the button 5 Confirm that the new Auditory Prompt setting is having the desired effect Note When the Auditory Feedback is set to Prompts Only the prompt is played back in full even if the user presses their switch during the middle of the playback 7 6 Adjusting the Switch Acceptance Time The Switch Acce...

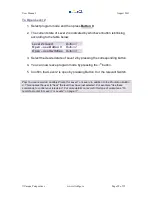
Page 26: ...below 50 milli seconds short Button 1 second Button 2 second long Button 3 3 Select the desired Switch Acceptance Time by pressing the corresponding button 4 You can now leave program mode by pressing the button 5 Confirm that the new Switch Acceptance time has the desired effect Note If you have set the switch acceptance time to long remember that you must press the switch for that length of time...

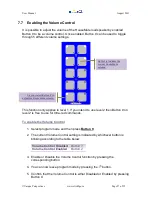
Page 27: ...or Infra red commands To enable the Volume Control 1 Select program mode and then press Button 9 2 The current Volume Control setting is indicated by whichever button is blinking according to the table below Volume Control Disabled Button 1 Volume Control Enabled Button 2 3 Enable or Disable the Volume Control function by pressing the corresponding button 4 You can now leave program mode by pressi...

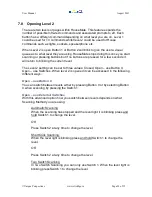
Page 28: ...nt level The Level 2 setting can be set to three values Closed Open use Button 0 Open use Switches When level 2 is opened it can be accessed in the following different ways Open use Button 0 You can switch between levels either by pressing Button 0 or by selecting Button 0 when scanning by pressing the Switch 1 Open use External Switches With this advanced option how you switch between levels depe...

Page 29: ...ct the desired state of Level 2 by pressing the corresponding button 4 You can now leave program mode by pressing the button 5 Confirm that Level 2 is open by pressing Button 0 or the relevant Switch Tip You can record an Auditory Prompt for Level 1 or Level 2 in addition to the Prompt on Button 0 This enables the user to hear the level they have just selected For example Use these commands to con...

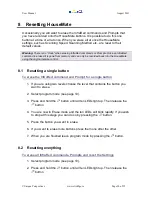
Page 30: ...ontrol 8 1 Resetting a single button To erase the InfraRed command and Prompt for a single button 1 If you are using two levels choose the level that contains the button you want to erase 2 Select program mode see page 10 3 Press and hold the button until all ten LEDs light up Then release the button 4 You are now in Erase mode and the ten LEDs will blink rapidly If you wish to stop at this stage ...

Page 31: ...n 4 With one hand press and hold button 3 and button 4 at the same time With the other hand press and hold the button until all the lights come on 5 Release all 3 buttons All the InfraRed commands and Prompts will be erased for each button one after the other and all the HouseMate settings will be reset to their default values 6 HouseMate will automatically leave program mode and return to normal ...

Page 32: ...e that they function correctly The HouseMate should be kept free of dust dirt and liquids If necessary wipe with a cloth dampened with warm water or alcohol Do not use solvents or abrasive cleaners Where any doubt exists consult your nearest Service Centre or Agent There are no user serviceable parts within the HouseMate Do not attempt to open the case In accordance with the requirements of CE mar...

Page 33: ... period No connector pins should be touched as contamination or damage due to electrostatic discharge may result HouseMate is not designed to resist water penetration If a spillage occurs Turn the unit off disconnect all cables and consult your service agent Once turned off any spillage over the HouseMate should be wiped dry without delay The HouseMate may not be used outdoors Most electronic equi...

Page 34: ...nty is subject to the conditions that the equipment Has been used solely in accordance with this manual Has not been subjected to misuse or accident or been modified or repaired by any person other than someone authorised by Unique Perspectives Ltd Has been used solely for the use of alternative Infra red control For Sales and Service advice or in case of any difficulty please contact Unique Persp...

Page 35: ...User Manual August 2011 Unique Perspectives www click2go ie Page 35 of 35 12 Appendix A Blank Labels ...

Reviews: