background image

- 10 -


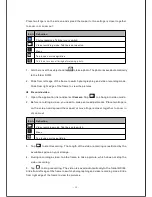
Create and send email


1.


Open 

Email

application.

2.


Tap 

.

3.


In 

To

 field, enter the recipient's email addresses manually and separate them with a 

comma. Add more recipients by tapping 

Cc/Bcc.

.

4.


To insert attachments,tap the option button at the upper right and select 

Attach file

.

5.


Enter the subject and the text.

6.


Tap 

SEND

 to send the email. 


Gmail


You can retrieve new email messages from the Google Mail webmail service to your inbox.

Before you can send or receive mail on your device, you need to set up a Gmail account.


Create a Gmail account


If you don’t have a Google Account, tap New, please follow the on-screen instructions to 


create a new one.


Set up a Gmail account

If  you  want  to  add  an  existing  account,  tap  Existing,  enter  your  email  address  and

password,  and  then  select  Next,  when  you  are  finished  setting  up  the  email  account, 

the email messages are downloaded to your device.

View email messages

1. When you open  the email account, the amount of unread email messages is displayed

at the title bar and the unread email messages are displayed in bold. 

2. To view  an email message, tap it.

3. To mark an important email message, tap the star icon below the date. To cancel the

mark, tap the star icon again.

Create and send an email

1. Tap 

.

2. In 

To

 field, enter the recipient's email addresses manually and separate them with a 

comma. Add more recipients by tapping 

Cc/Bcc

.

3. To insert attachments, tap the option button at the upper right and select 

Attach file

.

4. Enter the subject and the text.

Summary of Contents for USFT51L10BLK

Page 1: ...MODEL USFT51L10BLK...

Page 2: ...eas Do not drop shake or knock the device Rough handling can break the device Do not leave the device into a car with all windows closed Do not leave the device into a bed when charging Please adjust...

Page 3: ...status bar 6 Auto rotation 7 Lock unlock the screen 7 Text input 7 Customize your device 8 Manage applications 8 Security 8 Reset tablet 8 Web 9 Email 9 Gmail 10 Browser 11 Play Store 11 Entertainmen...

Page 4: ...hen nished if your device is off Warning Use only original batteries and chargers Unapproved chargers or cables can cause batteries to explode or damage your device Install the memory card To store ad...

Page 5: ...n ight mode Tap Settings WIRELESS NETWORKS More Airplane mode from application list to create a checkmark BACK 3 2 1 4 5 6 7 9 8 10 Device layout Power Lock Reset Press and hold for 2 seconds to turn...

Page 6: ...1 Indicator icons 2 Open the search bar 3 Scroll left or right to the other panels 4 Access the application list and widget screen 5 Task bar Add items to the home screen Tap the application icon to a...

Page 7: ...een 4 View the applications you have accessed recently 5 Adjust the device volume to higher Noti cation status bar It is located at the top of the screen It displays battery power level wi signal stre...

Page 8: ...automatically rotate as well To prevent the interface from rotating drag the right area of the status bar downward and then deactivate the auto rotation feature Lock unlock the screen To unlock the s...

Page 9: ...lock To set a screen lock tapSettings Security Screen lock from application list None Deactivate the screen lock Slide Slide to unlock the screen PIN Enter a numeric PIN to unlock When prompted enter...

Page 10: ...device is compliant with applicable internet standards for POP3 IMAP Exchange Before you can send or receive mail on your device you need to set up an email account and de ne the email settings corre...

Page 11: ...one Set up a Gmail account If you want to add an existing account tap Existing enter your email address and password and then select Next when you are nished setting up the email account the email me...

Page 12: ...r 2 To open up a window tap the title of the window 3 To close the window tap at the title bar Set homepage 1 Tap the option button at the upper right 2 Select Settings General Set homepage 3 Enter th...

Page 13: ...er devices and set pictures as wallpapers select Gallery from application list Note It takes a few more minutes to enter this application if you store more les Supported le formats Type Format Image J...

Page 14: ...red location To add or subtract from the selection border of the crop box drag the crop box to the desired size When you are nished tap Save 2 To edit pictures and apply various effects tap the option...

Page 15: ...button on the upper left and then select Playlists 2 Tap the MENU button next to the playlist you want to delete and select Delete More features Tap the MENU button on the upper right and then follow...

Page 16: ...n the application list and select Camera Tap to change to video mode 2 Before recording a video you need to make some adjustments Place two ngers on the screen and spread them apart or move ngers clos...

Page 17: ...hen you are nished tapOK Tap set alarm details when you are nished tap Tap the time to change alarm time To activate a preset alarm set the alarm to ON To cancel an alarm set the alarm to OFF 2 When t...

Page 18: ...o a PC and use it as a removable disk which allows you access the le directory 1 If you want to transfer les from or to a memory card insert a mem ory card into the device 2 With a USB cable connect y...

Page 19: ...t Connect Wireless display On the application screen tap Settings Display Cast screen Use this feature to connect your tablet to a large screen with a miracast dongle and then share your contents Note...

Page 20: ...Pacemaker manufacturers recommend that a minimum separation of 8 inches be maintained between a wireless device and a pacemaker to avoid potential interference with the pacemaker Operation of any radi...

Page 21: ...vice dry Humidity and all types of liquids may damage device parts or electronic circuits Do not use or store the device in dusty dirty areas Do not store the device in hot or cold areas Do not store...

Page 22: ...h Storage 8 GB Audio port 3 5 earphones USB port 1 x 5pin micro USB port support USB host and OTG Micro SD Micro SD card OTG por t Same with USB port Button Power back reset Speaker 1 0W Frequency res...

Page 23: ......

Reviews: