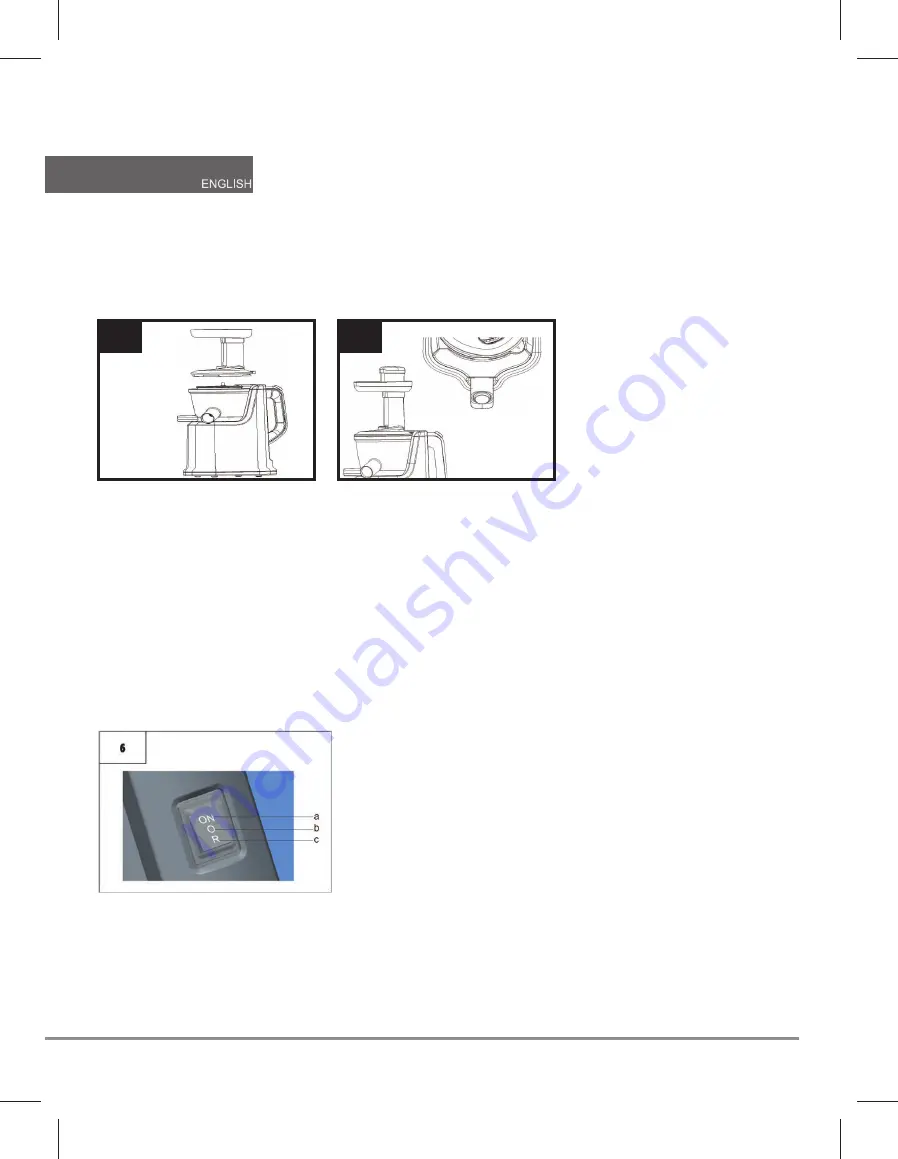
4. Place the Food Chute onto the bowl.
a. Make sure the tilt-out triangle of the Food Chute is aligned with the unlocked sign on the bowl. (Figure 4)
b. Turn the Food Chute clockwise until the lid clicks into the locked position.
(The arrow on the Food Chute will line up with word CLOSED on the motor base. (Figure 5)
Using the Slow Juicer
1. Once all parts are securely in place, connect the power cord to an approved power source.
2. Place one of the collectors under the pulp ejector, and either a glass or the other collector under the juice spout.
3. The Slow Juicer has 3 settings (Figure 6)
a. ON- this starts the motor for juicing.
b. OFF- this stops operation.
c. REV- this moves the Auger in the opposite direction.
4. Before placing food in the Slow Juicer, make sure all foods have been thoroughly washed, if food has to be
peeled, there is no need to wash. Also make sure to cut all foods to an appropriate size so it easily fits into the Food
Chute, we recommend no more than 3-inch pieces.
*Please, make sure to remove any hard seeds or pits, such as cherry or plum pits, as it will not process in the juicer
Slow juicer / Шнековая соковыжималка | 5
6
4
5
Summary of Contents for UCJ-421
Page 1: ...Slow juicer Instruction manual UCJ 421...
Page 4: ...Slow Juicer Components Slow juicer 3...
Page 10: ...10 10 11 12 12 13 14 15 15 15...
Page 11: ...20 20 10 Slow juicer...
Page 12: ...Slow juicer 11...
Page 13: ...2 1 1 a b 2 2 a 3 3 a 12 Slow juicer 2...
Page 14: ...4 4 a b 5 1 2 3 3 6 a ON b OFF c REV 4 Slow juicer 13 6 6...
Page 15: ...7 14 Slow juicer 5 6 7 8 7 7...
Page 16: ...1 2 3 4 a b c d e 5 6 a b c 7 1 2 3 230 50 150 65 Slow juicer 15...
Page 17: ...1180 131 3905 8 5 80 16 Slow juicer...
Page 18: ......


