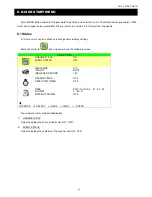
ADVANCED MENU
~
28
~
7.3.2 HDD Info
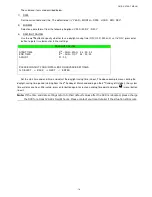
In this menu list, you can view the remaining capacity of all the connected HDDs in this device.
Move the cursor to “HDD INFO”, and press ENTER button. You will see a similar screen as the following:
HDD INFO
HDD NUM
HDD SIZE (GB)
HDD NUM
HDD SIZE (GB)
HDD–MASTER–1
236.000
HDD–SLAVE–1
NO HDD
PLEASE CONSULT YOUR INSTALLER FOR ADVANCE SETTINGS
SELECT
BACK
NEXT
ENTER
7.3.3 Event Log
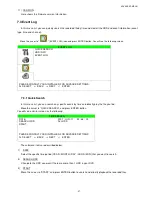
In this menu list, you can view all the event information (event type, time and channel) or clear all log records.
Move the cursor to “EVENT LOG”, and press ENTER button. You will see a similar screen as the following:
EVENT LOG
EVENT
TIME
COMMENT
POWER ON
2007 / MAY / 30 20:27:49
16
VLOSS
2007 / MAY / 30 20:05:05
06
VLOSS
2007 / MAY / 30 20:00:11
09
VLOSS
2007 / MAY / 30 16:00:08
14
VLOSS
2007 / MAY / 30 15:09:32
13
VLOSS
2007 / MAY / 30 11:00:08
12
VLOSS
2007 / MAY / 30 10:27:33
11
VLOSS
2007 / MAY / 30 08:05:55
10
DEFAULT
2007 / MAY / 30 08:05:26
09
POWER ON
2007 / MAY / 30 08:00:22
08
PREV
NEXT
CLEAN
PLEASE CONSULT YOUR INSTALLER FOR ADVANCE SETTINGS
SELECT
BACK
NEXT
ENTER
Note:
A new log will be added in the system log when the HDD data is overwritten or the recording starts
after DVR reboots.
7.4 Backup
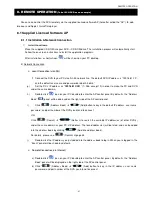
In this menu list, you can choose to make a copy for a specified period time to a compatible USB flash drive for your
own purpose.
The backup file can be played directly in your PC via the supplied licensed software AP. For detailed AP playback,
please refer to the section “Playback” at page 53.
Note:
If you want to make a video backup with audio, please connect audio cameras to the channels which
support the audio function
For 16CH & 8CH DVR, the audio channels are CH1, CH2, CH3 and CH4.

