Chapter 1
Getting Started
5
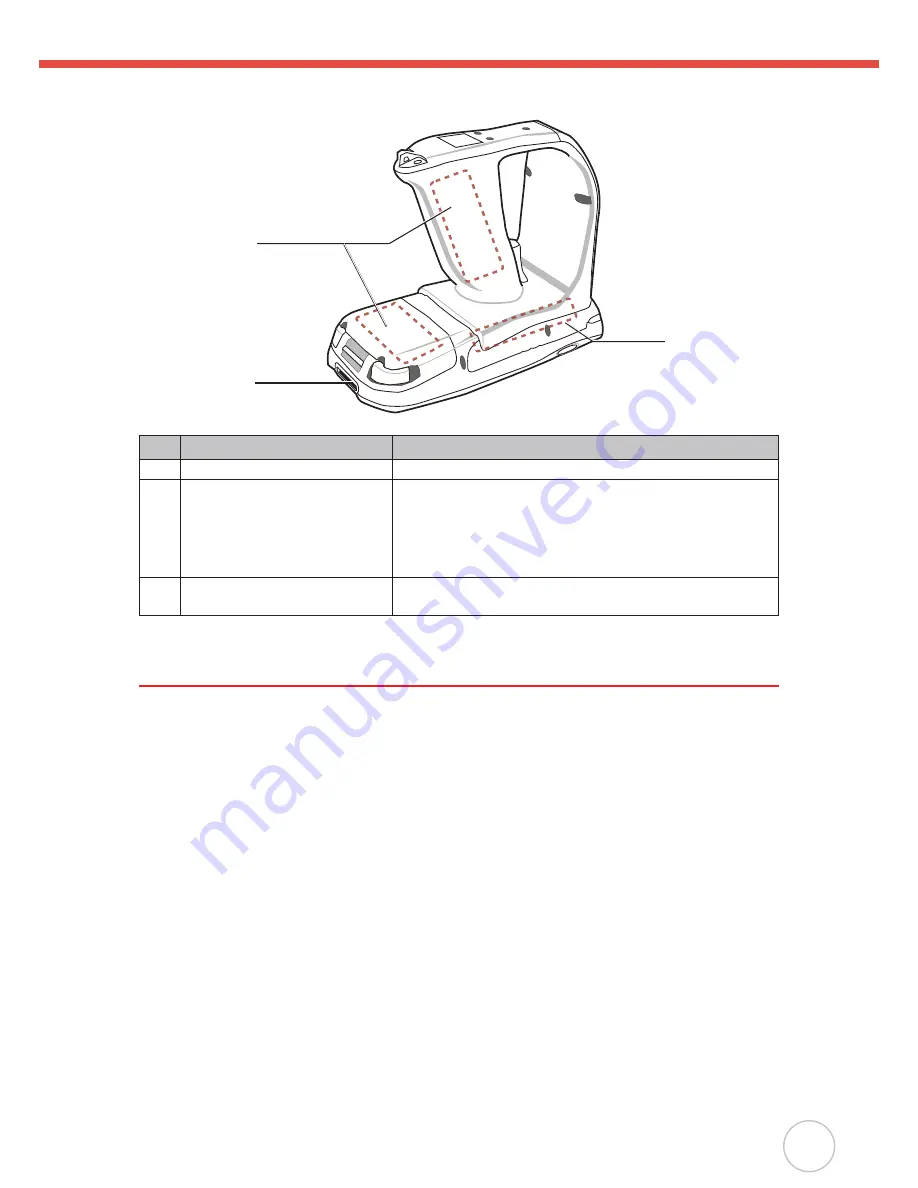
Bottom View
17
18
19
No. Component
Description
17. Battery Pack
Houses the rechargeable lithium-ion battery pack
18. Universal connector
Connects your device to a synchronization power cable,
which in turn connects to the computer’s USB port and
through the AC adapter to an electrical outlet.
This allows you to recharge your device and perform an
ActiveSync operation.
19. PCMCIA compartment
Open this compartment to access the PCMCIA slot.
(HF model only, preloaded before shipment as optional)
Setting up the RH767
This section explains how to install and charge the battery, how to check battery status, how
to connect the RH767 to a PC, how to turn on the RH767 for the first time, how to install an
optional Wireless Local Area Network PCMCIA card, and how to calibrate the screen.
Installing the Battery
WARNING!
There is a risk of fire and burns if the battery pack is handled improperly. DO
NOT disassemble, crush, puncture, short external contacts, or dispose the
battery pack in fire or water. DO NOT attempt to open or service the battery pack.
Dispose of used batteries according to local recycling guidelines in your area.
A backup battery cell is embedded into your device to prevent data loss in instances when
the removable battery pack is removed or completely discharged. This backup battery cell
will only support the system for a maximum of 72 hours.
NOTE:
To enable the internal battery cell to provide backup power supply, charge your device
with the main battery pack for at least 16 hours.
The first time you use the RH767, you must turn on the backup battery switch.
See turn
on the backup battery & grip battery switch on page 6 for more information.
The first time you use the RH767, you must activate the LCD heater switch. When
activated, LCD heater will turn on automatically when the temperature is lower than -10°C.
●
●
●


