Installation, Operation and Maintenance Manual
VariCool EZ-Fit
12
Subject to change without notice.
40.20-IM (0118)
Evaporator Section
Start by locating the evaporator section first. Set each section
as needed, making sure that in dual module applications the
evaporator sections are placed correctly as left hand and
right hand�
Gasket Material
Gasket material has been factory supplied for field
installation between each unit section� The gasket material
must be installed to minimize air leakage and to help reduce
transmission of noise�
Before applying any gasket material make sure the surface
is clean and dry�
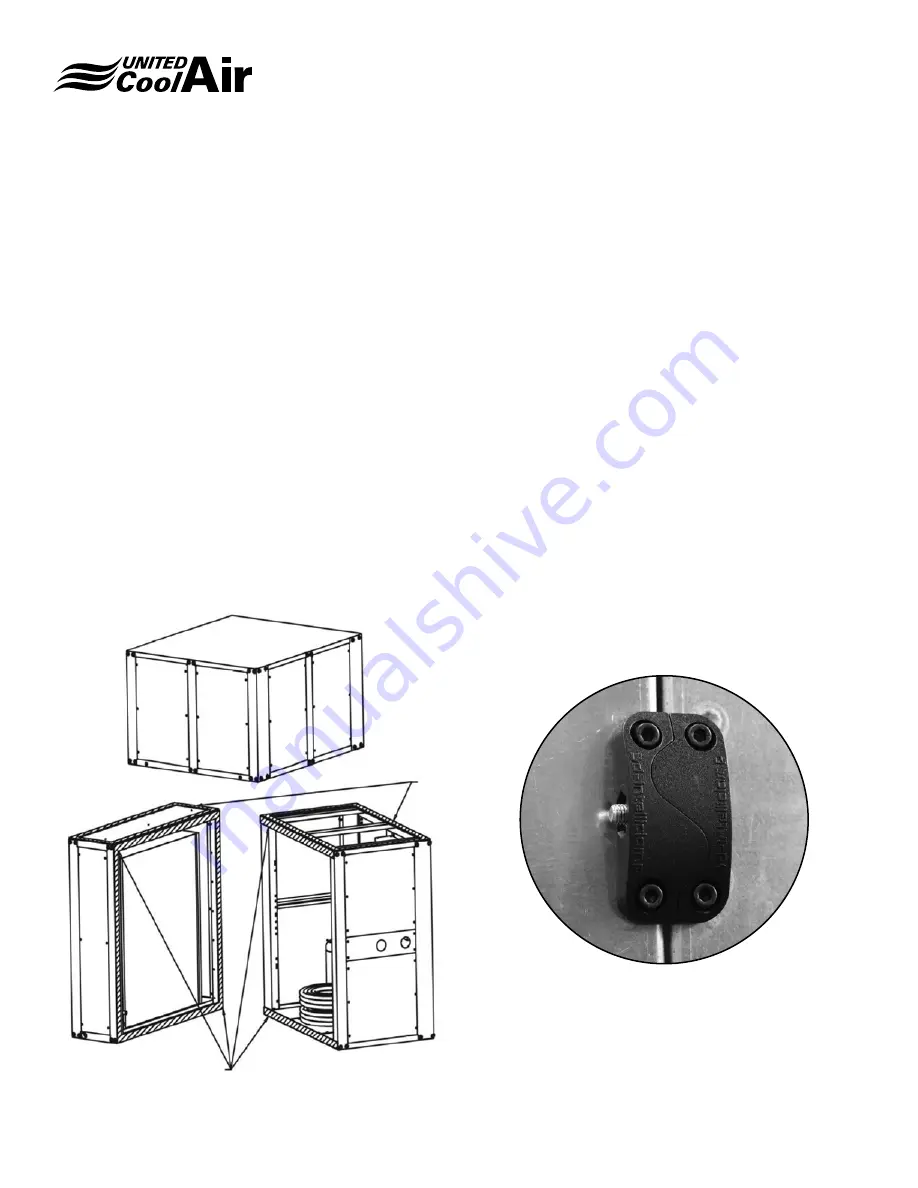
Gasket material, 3” wide, should be applied to those surfaces
identified as “3” in Figure 4 (evaporator and compressor /
condensing section)�
Gasket material, 2” wide, should be applied to those surfaces
identified as “2” in Figure 4 (evaporator and compressor /
condensing section)�
Compressor / Condenser Section
Next, locate the compressor / condenser section(s)� Again,
make sure the labels align properly for either the single or
dual module applications�
On the refrigerant resealable fittings, apply a few drops of
refrigerant oil to the male coupling halves before starting the
assembly (Ref� to Figure 6)�
3D-Intelliclamps
Each section of a single module is furnished with
3D-Intelliclamps to facilitate connection to the adjacent
section� These have been installed at the factory during
production and consist of two interlocking halves that mate
and are then bolted together� Once tightened, they ensure
perfect alignment of the mating section surfaces�
Once adjacent sections have been put into place, use the
included hardware to pull sections together until the curved
surfaces of the 3D-Intelliclamps are completely mated�
Blower
Section
2
3
Condensing
Section
Evaporator
Section
Figure 4 - Gasket Material
3D-Intelliclamp
Summary of Contents for VariCool EZ-Fit 12
Page 2: ......


