background image

CHIMNEY SPECIFICATIONS

This appliance must be connected to a listed Stainless Steel 

Liner, that meets UL1777, which extends from the collar to the 

chimney cap according to the specifications listed on the previ

-

ous pages. Take into account the chimney’s location to insure 

it is not too close to neighbors or in a valley which may cause 

unhealthy or nuisance conditions.

Chimneys perform two functions:

1.  As a means of exhausting smoke and flue gases which are 

the result of fuel combustion.

2.  The chimney provides “draft,” which allows oxygen to be con-

tinuously introduced into the appliance, so that proper com-

bustion is possible. This stove relies on natural draft to oper-

ate.

NOTICE: 

Always provide a source of fresh air into the room 

where the stove is located. Failure to do so may result in air star-

vation of other fuel burning appliances and the possible develop-

ment of hazardous conditions, fire, or death.

Your appliance itself does not create draft. Draft is provided by 

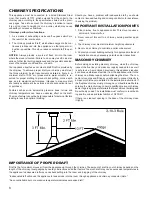
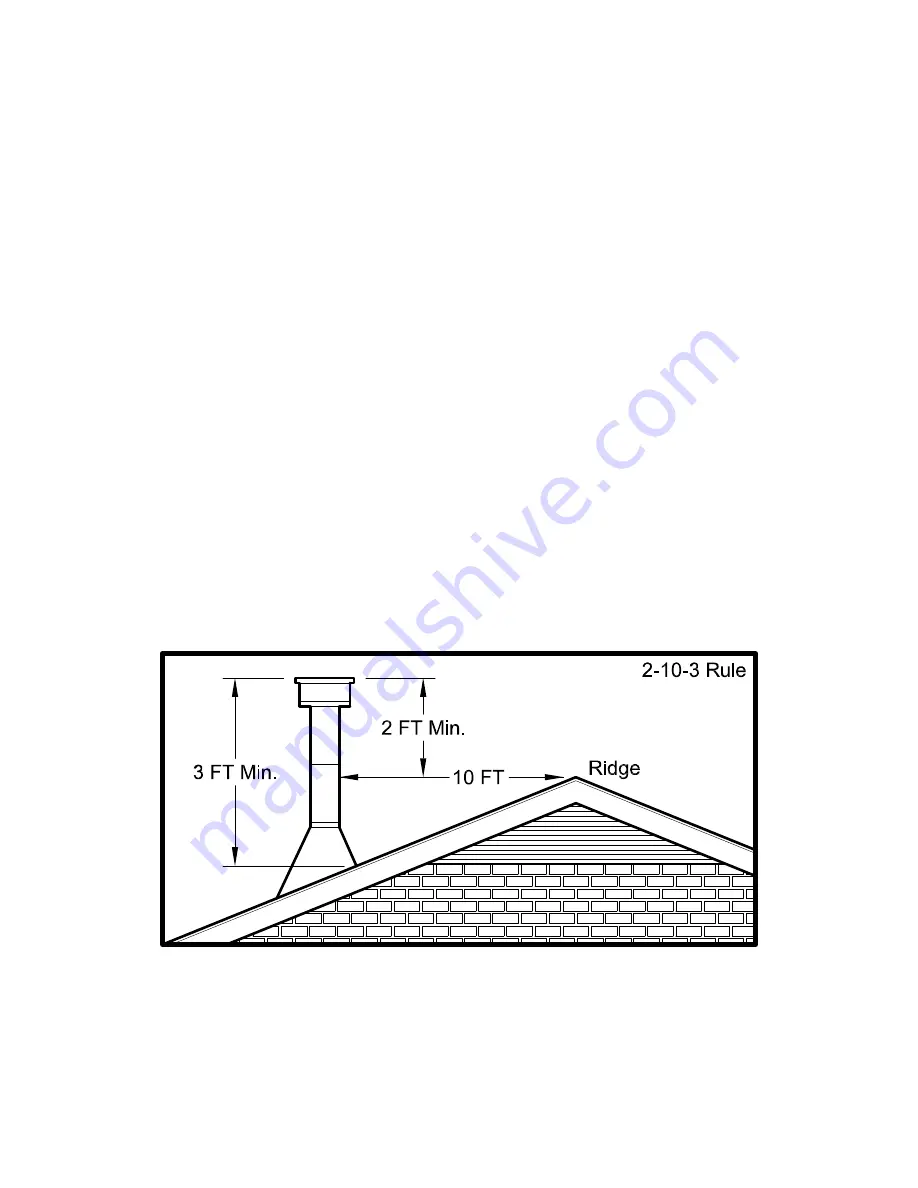
the chimney. To achieve proper draft your chimney must meet 

the  three  minimum  height  requirements  detailed  in  figure  8. A 

minimum draft of 0.05 w.c. (measured in water column) is re-

quired for proper drafting to prevent back puffing, smoke spill

-

age, and to maximize performance. (Gauges to measure draft 

are readily available at stove stores and are economical to rent 

or purchase.)
Factors such as wind, barometric pressure, trees, terrain and 

chimney temperature can have an adverse effect on the draft. 

The manufacturer cannot be held responsible for external factors 

leading to less than optimal drafting.

Should  you  have  a  problem  with  inadequate  draft,  you  should 

contact a licensed heating and cooling contractor for assistance 
in solving the problem.

IMPORTANT INSTALLATION POINTS

1. Size chimney flue to appliance collar. This stove requires a 

minimum 6” diameter flue.

2. Never connect this unit to a chimney serving another appli-

ance.

3. The chimney must meet all minimum height requirements.

4. Never use a chimney to ventilate a cellar or basement.
5. Contact your local building authority for approved methods of 

installation and any necessary permits and/or inspections.

MASONRY CHIMNEY

Before using an existing masonry chimney, clean the chimney, 

inspect the flue liner, and make any repairs needed to be sure it 

is safe to use. As mentioned previously, this appliance requires 

a continuous stainless steel liner from the appliance collar to the 

chimney cap. Make repairs before attaching the stove. The con-

nector stove pipe and fittings you will need to connect directly to 

a masonry chimney are detailed in the installation instructions. If 

the fireplace chimney must go through a combustible wall before 

entering the main chimney, consult a qualified mason or chimney 

dealer regarding proper materials that meet all local building and 

fire authority codes. The installation must conform to local build

-

ing and fire codes and latest edition of NFPA 211.

If there is a cleanout opening in the base of the chimney, close 

it tightly.

IMPORTANCE OF PROPER DRAFT

‘Draft is the force which moves air from the appliance up through the chimney. The amount of draft in your chimney depends on the 

length of the chimney, local geography, nearby obstructions and other factors. Too much draft may cause excessive temperatures in 

the appliance. Inadequate draft may cause backpuffing into the room and ‘plugging’ of the chimney.
“Inadequate draft will cause the appliance to leak smoke into the room through appliance and chimney connector joints.”

“An uncontrollable burn or excessive temperature indicates excessive draft.”

Summary of Contents for Country Hearth 2200IE

Page 1: ...E REFERENCE 852497 4805E MODEL 2200IE Fireplace Insert Masonry Fireplace Insert or Zero Clearance metal Fireplace Insert French version is available for download from the United States Stove Company w...

Page 2: ...sary 13 In the event of a chimney fire turn the air controls to the closed position leave the building and CALL THE FIRE DEPART MENT IMMEDIATELY 14 To prevent injury do not allow anyone to use this ap...

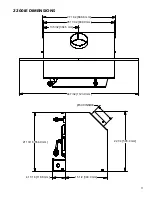
Page 3: ...3 2200IE DIMENSIONS 26 11 32 669 0 mm 13 5 32 334 5 mm 27 1 32 686 6 mm 21 13 16 554 0 mm 22 1 4 565 0 mm 15 1 2 394 0 mm 4 11 16 118 8 mm 44 7 32 1123 0 mm 6 00 INSIDE...

Page 4: ...for replacement if the appliance is ever removed The removal of any parts that render the fireplace unusable for burning solid fuel requires a permanent label to be affixed by the in staller that sta...

Page 5: ...chimney is required A stainless steel adapter is recommended for fastening the stainless steel liner to the flue collar The male or crimped end of the adapter must be installed inside the flue collar...

Page 6: ...l packing materials and any items stored in the firebox 5 WARNING Any fireplace which has had parts re moved or modified to accommodate the installation of this appliance MUST have a warning plate per...

Page 7: ...rick extends the life of your stove and radiates heat more evenly If firebricks were removed to posi tion appliance replace them before firing appliance See figure 7 for proper orientation and positio...

Page 8: ...for assistance in solving the problem IMPORTANT INSTALLATION POINTS 1 Size chimney flue to appliance collar This stove requires a minimum 6 diameter flue 2 Never connect this unit to a chimney servin...

Page 9: ...er to make the best possible choice It is EXTREMELY IMPORTANT that you use DRY WOOD only in your wood stove The wood should have dried for 9 to 15 months such that the humidity content in weight is re...

Page 10: ...wood is soaked or freshly cut green Do not use this wood in your stove Large amounts of creosote could be deposited in your chimney creating potential conditions for a chimney fire This appliance is...

Page 11: ...TO MEDIUM BURNS TO FULLY CURE FOR DURABILITY AND A LIFETIME OF SERVICE Proper curing of the high temp paint requires a series of three initial burns The appliance should be allowed to cool off be twee...

Page 12: ...nd establish a good coal bed be fore adjusting to a low burn rate this may take 30 minutes or more depending on your wood Use smaller pieces of wood during start up and a high burn rate to increase th...

Page 13: ...inlet control wide open for 15 20 minutes every time you apply fresh wood This allows wood to achieve the charcoal stage faster and burns wood vapors which might otherwise be depos ited within the hea...

Page 14: ...ances which can ignite explosively in the unit Even small explosions in confined areas can blow out the glass Gasket and Glass cleaning products are available at local retail home centers Manufacturer...

Page 15: ...Tube 1 Secondary Comb 2 15 86670 Tube 2 Secondary Comb 1 Key Part No Description Qty 16 891990 Retainer Tube 3 17 88158 Fiber Board Front 1 18 88159 Fiber Board Rear 1 19 88160 Fiber Blanket 1 20 8059...

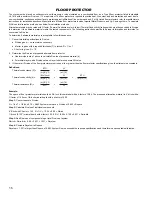
Page 16: ...equired thickness T in inches R 1 k x T c C factor is given R 1 C 2 Determine the R value of proposed alternate floor protector a Use formulas in step 1 above to calculate R value of proposed material...

Page 17: ...17 NOTES...
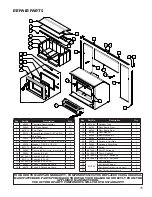
Page 18: ...ULL MODEL NUMBER WHICH IS ON THE NAMEPLATE ATTACHED TO THE HEATER WHEN ORDERING REPAIR PARTS ALWAYS GIVE THE FOLLOWING INFORMATION AS SHOWN IN THIS LIST 1 THE PART NUMBER 2 THE PART DESCRIPTION 3 THE...

Page 19: ...ase qAlternative Heat qMain Heat Source qDecoration qCost qOther _________________________ What was the determining factor for purchasing your new appliance _______ I have read the owner s manual that...

Page 20: ...CUT HERE CUT HERE Fold Here Fold Here United States Stove Company P O Box 151 South Pittsburg TN 37380 USA Fold Here PLACE STAMP HERE...

Reviews: