


6
© 2021 United States Stove Company
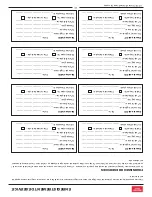
CLEARANCES TO COMBUSTIBLES
WARNING: RISK OF FIRE
OBSERVE THE MINIMUM CLEARANCES TO
COMBUSTIBLES STATED IN THIS MANUAL AND
ON THE LABELS ATTACHED TO THE APPLIANCE.
DO NOT STORE WOOD, ANY TYPE OF FLAMMABLE
VAPORS OR LIQUIDS, PLACE FURNITURE, RUGS,
CARPET, CLOTHING OR OTHER COMBUSTIBLE
OBJECTS WITHIN THE CLEARANCE AREA.
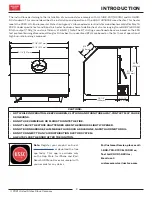
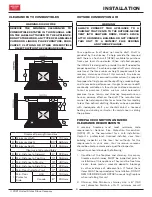
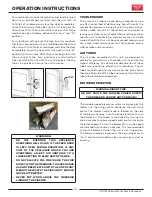
Fireplace Opening Dimensions
A Minimum Width
29” 737 mm
B Minimum Height
23” 585 mm
C Minimum Depth
14” 356 mm
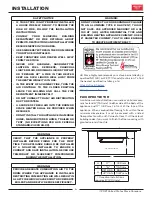
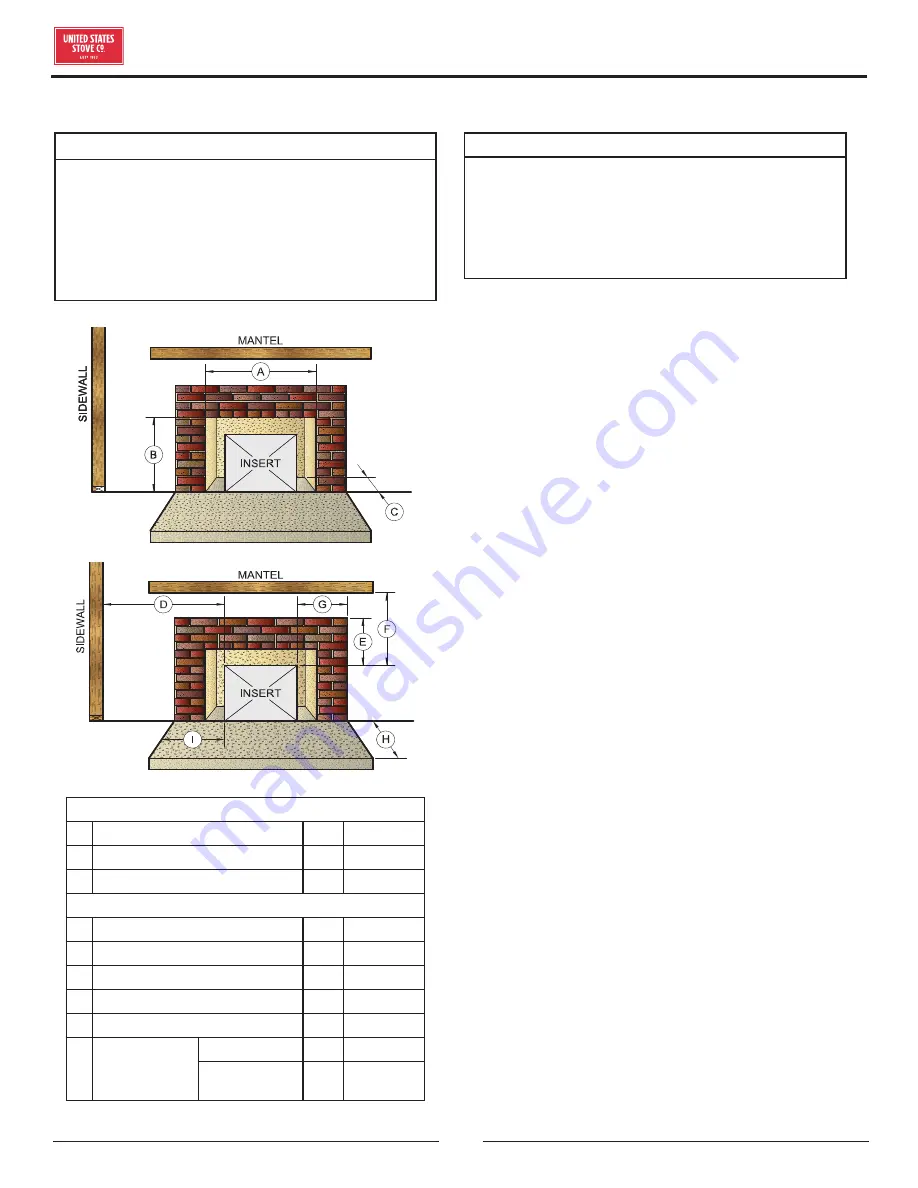
Clearance to Combustibles
D Min. Distance to Sidewall
9”
229 mm
E Min. Distance to Top Trim
14” 356 mm
F Min. Distance to Mantle
19” 483 mm
G Min. Distance to Side Trim
9”
229 mm
H Min. Floor Protector Front
17”
432 mm
I
Min. Floor
Protector
Side
USA
6”
153 mm
Canada
8”
204 mm
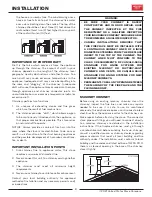
OUTSIDE COMBUSTION AIR
WARNING:
ALWAYS CONNECT THIS APPLIANCE TO A
CHIMNEY THAT VENTS TO THE OUTSIDE. NEVER
VENT INTO ANOTHER ROOM, CRAWL SPACE,
ATTIC, OR INSIDE A BUILDING. DO NOT CONNECT
THIS UNIT TO A CHIMNEY FLUE SERVING
ANOTHER APPLIANCE.
Your appliance itself does not create draft. Draft is
provided by the chimney. To help provide the required
draft there is a fresh air kit (4FAK) available for purchase
from your local stove dealer. When installed properly
the 4FAK kit is designed to provide the draft needed for
proper operation. To achieve proper draft your chimney
must meet the three minimum height requirements (see
masonry chimney section of this manual). A minimum
draft of 0.05 w.c. (measured in water column) is required
for proper drafting to prevent back puffing, smoke spillage,
and to maximize performance. Gauges to measure draft
are readily available at stove stores and are economical
to rent or purchase. Factors such as wind, barometric
pressure, trees, terrain and chimney temperature can
have an adverse effect on the draft. The manufacturer
cannot be held responsible for external factors leading
to less than optimal drafting. Should you have a problem
with inadequate draft, you should contact a licensed
heating and cooling contractor for assistance in solving
the problem.
FIREPLACE CONDITION AND ZERO
CLEARANCE REQUIREMENTS
A masonry fireplace must meet minimum code
requirements, National Fire Protection Association,
(NFPA) 211, or the equivalent for a safe installation.
Contact a professional, licensed installer, your local
building inspector or the local fire authority for the
requirements in your area. Your insurance company
should be able to recommend a qualified inspector.
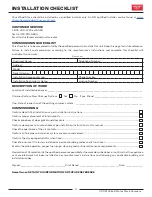
Inspections should include the following:
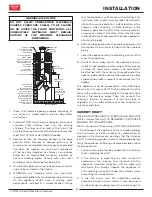
1. Condition of the fireplace and chimney. A masonry
fireplace and chimney MUST be inspected prior to
installation of this appliance. They must be free from
cracks, loose mortar, creosote deposits, blockage
or other evidence of deterioration. If found, these
items MUST be repaired prior to installation. DO NOT
REMOVE BRICKS or MORTAR from existing fireplace
when installing this unit.
2. Chimney Size. Minimum chimney size is 6” (153
mm) diameter. Maintain a 15 ft. minimum overall
INSTALLATION


