


© 2021 United States Stove Company
9
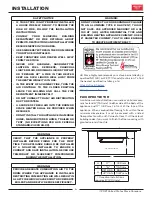
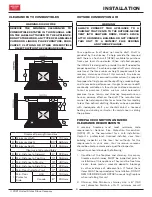
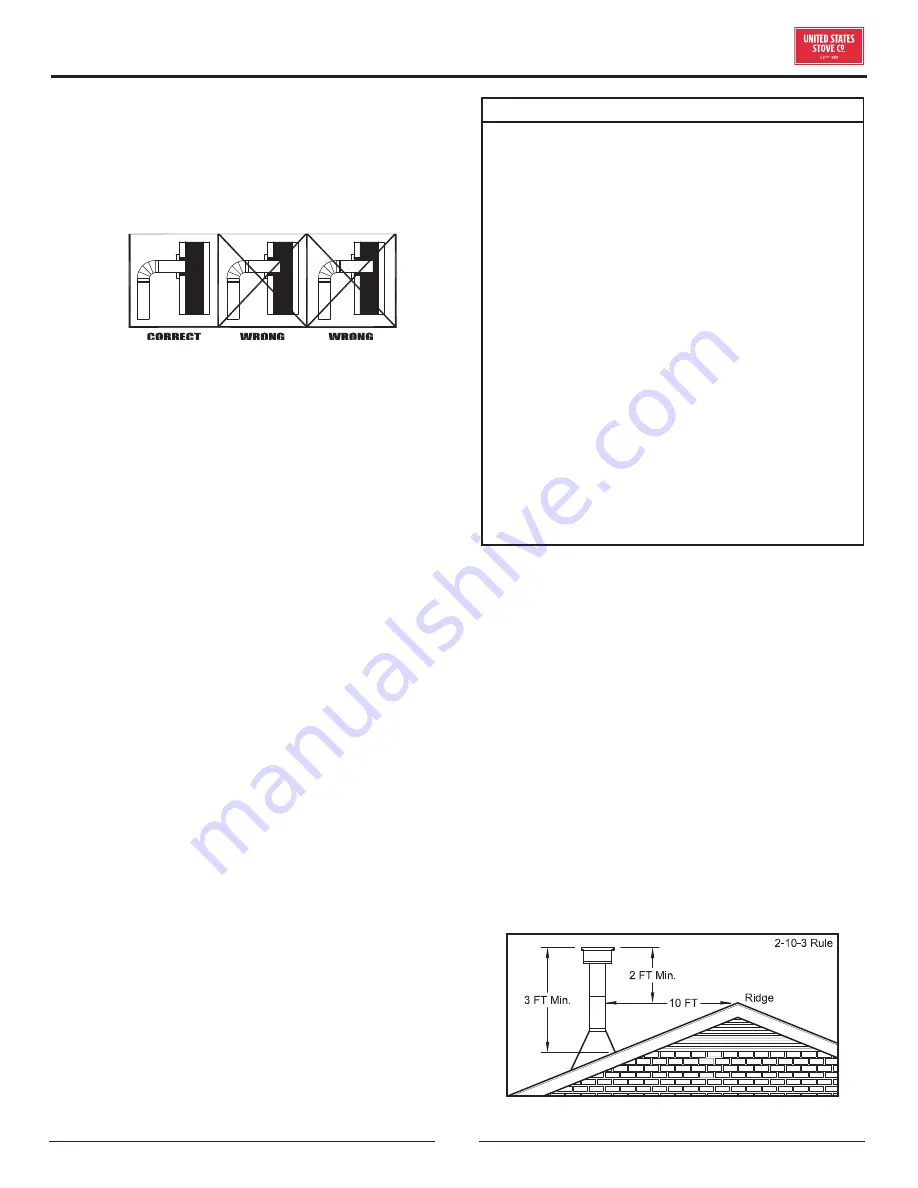
the house or a nearby tree. The wind blowing over a
house or tree falls on top of the chimney like water
over a dam, beating down the smoke. The top of the
chimney should be at least three (3) feet above the
roof and be at least two (2) feet higher than any point
of the roof within ten (10) feet.
IMPORTANCE OF PROPER DRAFT
Draft is the force which moves air from the appliance
up through the chimney. The amount of draft in your
chimney depends on the length of the chimney, local
geography, nearby obstructions and other factors. Too
much draft may cause excessive temperatures in the
appliance. Inadequate draft may cause backpuffing into
the room and “plugging” of the chimney. Inadequate
draft will cause the appliance to leak smoke into the room
through appliance and chimney connector joints. An
uncontrollable burn or excessive temperature indicates
excessive draft.
Chimneys perform two functions:
1. As a means of exhausting smoke and flue gases
which are the result of fuel combustion.
2. The chimney provides “draft,” which allows oxygen
to be continuously introduced into the appliance, so
that proper combustion is possible. This stove relies
on natural draft to operate.
NOTICE: Always provide a source of fresh air into the
room where the stove is located. Failure to do so may
result in air starvation of other fuel burning appliances
and the possible development of hazardous conditions,
fire, or death.
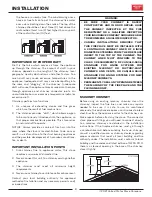
IMPORTANT INSTALLATION POINTS
1. Size chimney flue to appliance collar. This stove
requires a minimum 6” diameter flue.
2. Never connect this unit to a chimney serving another
appliance.
3. The chimney must meet all minimum height
requirements.
4. Never use a chimney to ventilate a cellar or basement.
Contact your local building authority for approved
methods of installation and any necessary permits and/
or inspections.
WARNING:
• BE SURE YOUR CHIMNEY IS SAFELY
CONSTRUCTED AND IN GOOD REPAIR. HAVE
THE CHIMNEY INSPECTED BY THE FIRE
DEPARTMENT OR A QUALIFIED INSPECTOR.
YOUR INSURANCE COMPANY SHOULD BE ABLE
TO RECOMMEND A QUALIFIED INSPECTOR.
• CANADA INSTALLATIONS REQUIRES THAT
THIS FIREPLACE MUST BE INSTALLED WITH
A CONTINUOUS CHIMNEY LINER OF 6 INCH
DIAMETER EXTENDING FROM THE FIREPLACE
INSERT TO THE TOP OF THE CHIMNEY. THE
CHIMNEY LINER MUST CONFORM TO THE
CLASS 3 REQUIREMENTS OF CAN/ULC-S635,
STANDARD FOR LINING SYSTEMS FOR
EXISTING MASONRY OR FACTORY-BUILT
CHIMNEYS AND VENTS, OR CAN/ULC-S640,
STANDARD FOR LINING SYSTEMS FOR NEW
MASONRY CHIMNEYS.
• PERMANENTLY SEAL ANY OPENING BETWEEN
THE MASONRY OF THE FIREPLACE AND THE
FACING MASONRY.
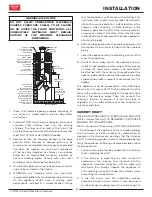
MASONRY CHIMNEY
Before using an existing masonry chimney, clean the
chimney, inspect the flue liner, and make any repairs
needed to be sure it is safe to use. As mentioned
previously, this appliance requires a continuous stainless
steel liner from the appliance collar to the chimney cap.
Make repairs before attaching the stove. The connector
stove pipe and fittings you will need to connect directly
to a masonry chimney are detailed in the installation
instructions. If the fireplace chimney must go through
a combustible wall before entering the main chimney,
consult a qualified mason or chimney dealer regarding
proper materials that meet all local building and fire
authority codes. The installation must conform to local
building and fire codes and latest edition of NFPA 211. If
there is a cleanout opening in the base of the chimney,
close it tightly.
INSTALLATION


