

© 2023 United States Stove Company
17
this occurs as this may indicate a more serious problem.
A service call may be required.
2. If the combustion blower fails, an air pressure switch
will automatically shut down the auger.
NOTE: Opening the stove door for more than 30 seconds
during operation will cause enough pressure change to
activate the air switch, shutting the fuel feed off. The stove
will shut down and show “E2” on the two digit display.
The stove has to fully shut down before restarting.
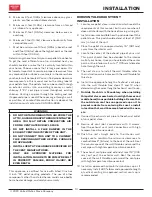
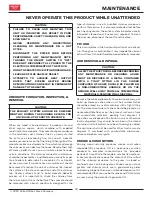
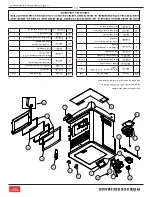
INTERIOR CHAMBERS
•
Burn Pot -
Periodically remove and clean the burn pot
and the area inside the burn pot housing. In particular,
it is advisable to clean out the holes in the burn pot to
remove any build up that may prevent air from moving
through the burn pot freely.
•
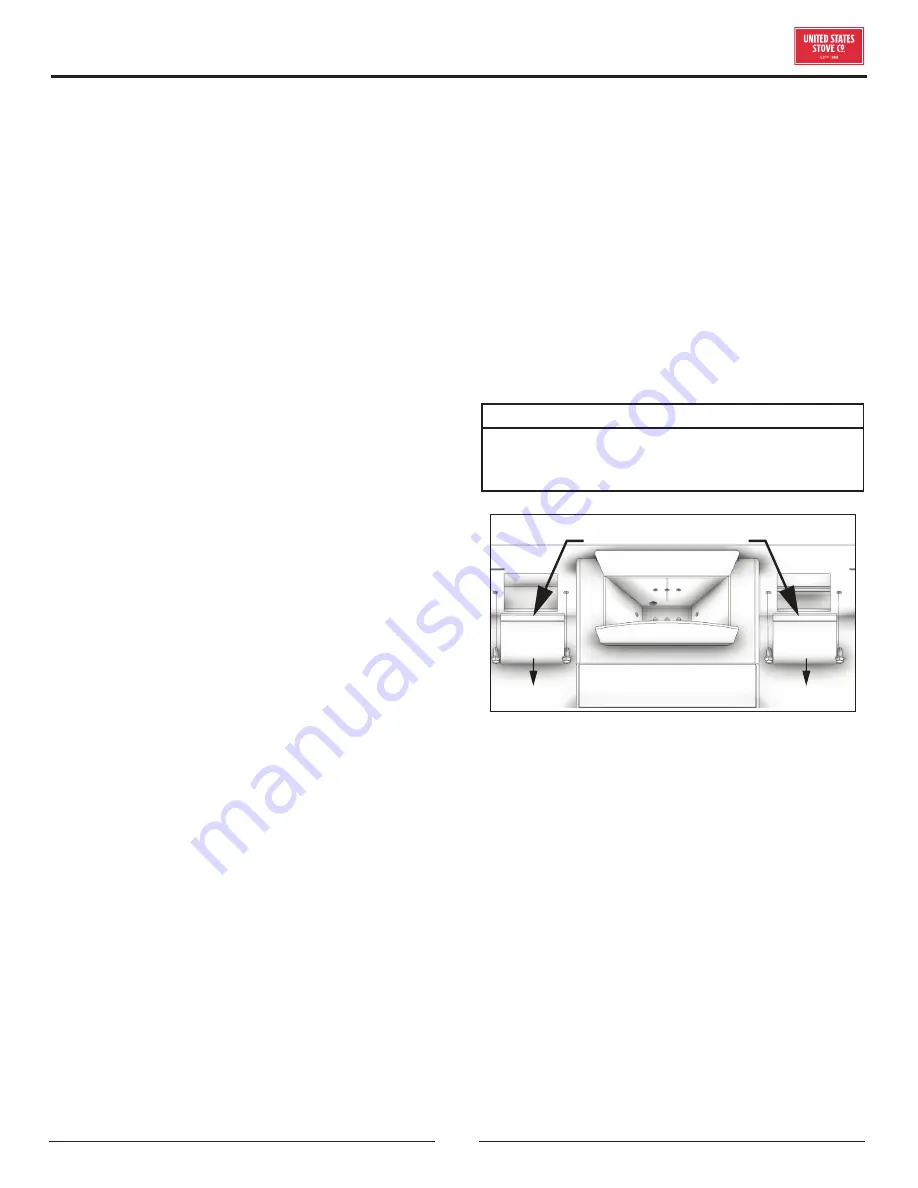
Heat Exchanger -
There are two clean out plates
that need to be removed in order to clean the fly ash
out of the heat exchanger. Open the door to access
the cleanouts located inside the firebox, one on each
side of the burnpot. The clean outs are secured to the
firebox with (2) 5/16” screws each. Remove the clean
outs and vacuum out any accumulated ash. This should
be done at least once per month or more frequently if
large amounts of ash are noticed while cleaning or if the
stove does not seem to be burning properly.
Over time ash or dust may accumulate on the blades
of the circulation & exhaust fans. The fans should be
inspected, periodically, and if any accumulation is
present vacuumed clean as the ash or dust can impede
the fans performance. It is also possible that creosote
may accumulate in the exhaust fan therefore, this must
be brushed clean. The exhaust fan can be found behind
the left side panel (facing the front of the heater), the
circulation fan can be found behind the right side panel.
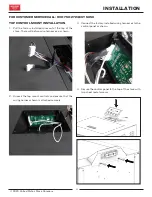
To access the igniter, remove the air inlet tube and cover
(2 screws). The auger motor is located in the center rear
of the unit. Note: When cleaning, take care not to damage
the fan blades.
If a vacuum is used to clean your stove, we suggest
using the AV15E AshVac vacuum. The AV15E AshVac is
designed for ash removal. Some regular vacuum cleaner
(i.e. shop vacs) may leak ash into the room.
DO NOT VACUUM HOT ASH.
WARNING:
FAILURE TO PROPERLY MAINTENANCE THE CLEAN
OUTS WILL RESULT IN POOR PERFORMANCE OF
THIS STOVE.
Clean-Out Plates
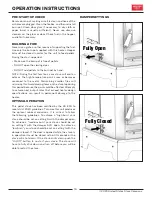
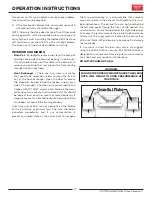
OPERATION INSTRUCTIONS


