6
19
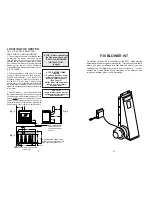
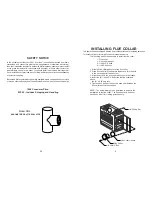
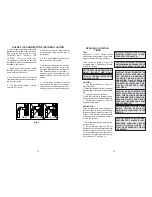
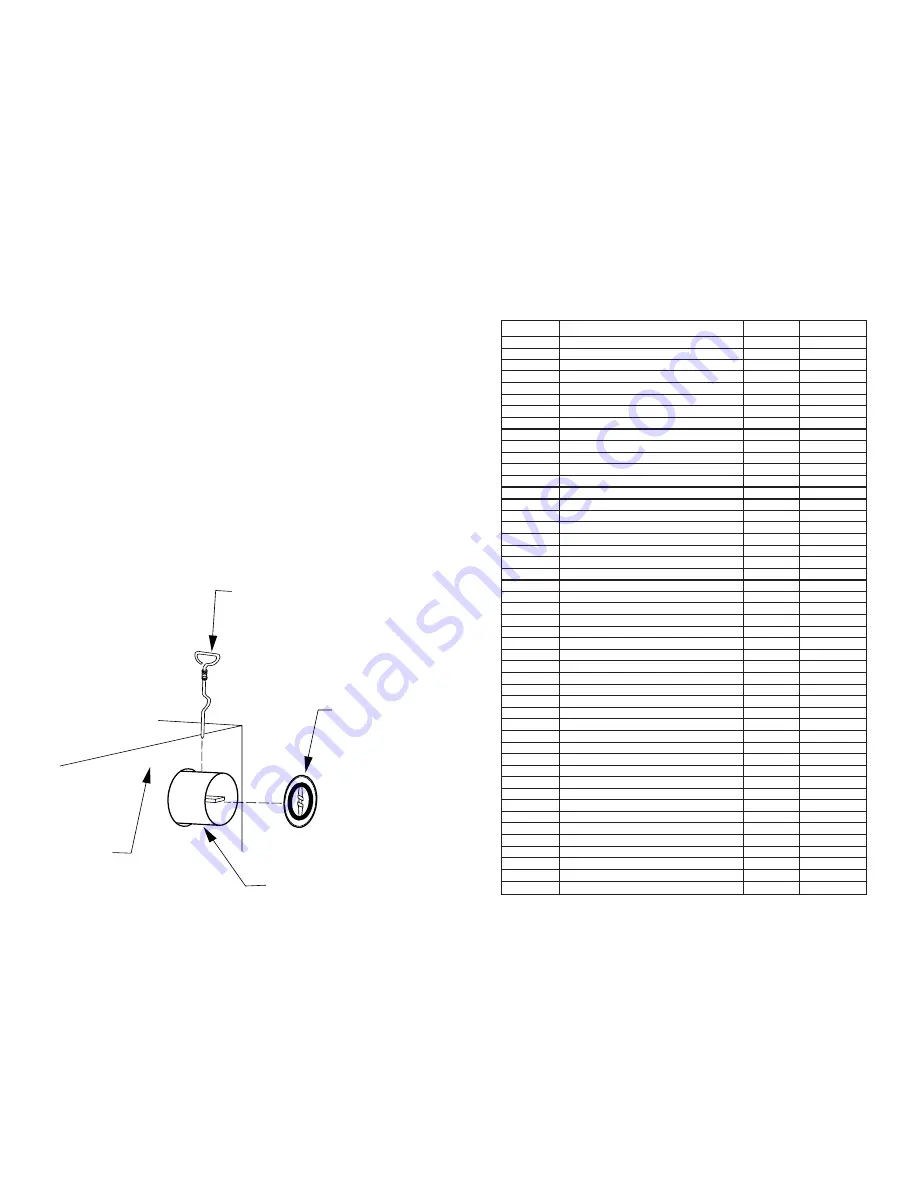
This unit comes equipped with a solid flue damper which is intended to be
installed into the flue collar. The following instructions will help guide you in
installing the solid flue damper.
1.
Before you connect the 6" flue pipe to the flue
collar, place the solid damper inside of the flue
collar on an angle to permit the damper to slide
between to two stops that are welded into the
flue collar.
2.
Place the damper rod into the hole on one side
of the flue collar, aligning it with the flue damper.
Twist the damper rod back and forth as you
slide the damper rod through the flue collar and
solid damper.
3.
Once the damper rod is completely through the
flue collar, lock the damper rod into the solid
damper by pressing in firmly on the damper rod
and twisting. At this point the Damper rod should
be able to open and close the solid damper.
NOTE: This unit has been tested with the cast iron stops in the flue collar to meet
EPA requirements.
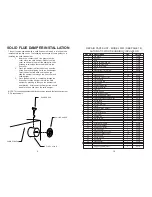
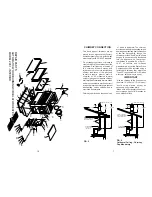
SOLID FLUE DAMPER INSTALLATION
REPAIR PARTS LIST - MODEL 2931 (SEE PAGE 18)
AUTOMATIC WOOD BURNING CIRCULATOR
Key No.
Description
Qty.
Part No.
1
Fire Grate
2
40076
2
Ash Pan
1
67444
3
Base
1
67859
4
Draft Damper Hinge Pin
1
17200
5
Draft Damper Frame
1
40075
6
Draft Control Plate
1
23476
7
Clip
2
83818
8
Glass Brass Trim (LH/RH)
2
89382
9
Glass Brass Trim (TOP/BOTTOM)
2
89381
10
Glass Frame
1
68452
11
Glass Gasket
66"
88047
12
Glass (20 1/2"x12 1/2")
1
89409
13
Left Half Brick
1
23782
14
Front Coal Grate
1
40283
15
Flue Collar
1
40343
16
Fire Box Weldment
1
68693
17
Firebrick Retainer
1
40132
18
Firebrick
7
89066
19
Door Hinge Pin
1
83114
20
Feed Door Assembly
1
67775
21
Feed Door Rope Gasket
44"
88033
22
Thermostat
1
67743
23
Thermostat linkage adjustment
1
86191
24
Door Handle
2
40091
25
Flat Washer
1
83045
26
Hex Nut (1/4-20)
2
83250
27
Latch
1
22108
28
Ash Door Rope Gasket
29"
88033
29
Ash Door
1
67781
30
Thermostat Knob
1
89687
31
Front Liner
1
40100
32
Heat Shield
1
23703
33
Draft Damper
1
40282
34
Rear Half Brick
1
23785
35
Left Top Brick Retainer
1
23145
36
Second Heat Shield
1
22030
37
Flue Collar Gasket
1
88032
38
Air Wash Deflector
1
23547
*
Grate Support
2
22536
*
Corner Key (Brass Trim)
10
89419
*
Blank Key (Brass Trim)
10
89420
39
Wood Handle
1
89523
40
Door Hinge Pin
1
23441
41
Door Latch
1
21047
42
Latch Spacer
1
21467
43
Smoke Curtain
1
22090
44
Heat Shield
1
23474
*
Smoke Curtain Bracket
2
22171
*
NOT SHOWN
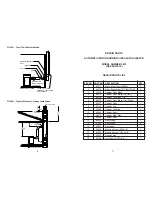
C
A
S
T
IR
O
N
DAMPE
R
C
A
S
T
IO
R
N
DA
MP
E
R
6
I N CH
SOLID DAMPER
FLUE COLLAR
DAMPER ROD
CABINET BACK


