


11
EN
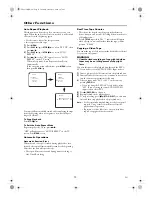
Manual Recording
Recording
1)
Insert a cassette tape with its erase-prevention tab in place.
(If necessary, rewind or fast forward the tape to the point
at which you want to begin recording.)
2)
Press the
number buttons
or
PROG +/-
to select the
channel to be recorded.
3)
Press
RECORD
to begin recording.
•The RECORD indicator on the front panel comes on.
4)
Press
STOP
C
/
p
to stop recording.
Skipping Unwanted Programme Material During
Recording
1)
Press
PAUSE
when you want to temporarily halt
recording.
•The RECORD indicator on the front panel flashes fast
in the Pause mode.
•After 5 minutes, the unit will automatically switch to the
Stop mode to prevent tape damage.
2)
Press
PAUSE
or
RECORD
to resume recording.
OTR (One Touch Recording)
This function enables you to set the duration of a recording
simply by pressing
RECORD
.
1)
Follow steps
1)
to
2)
in “Recording” section.
2)
Press
RECORD
repeatedly until the desired recording
length appears in the upper left corner of the TV screen.
Recording stops when 0:00 is reached.
• To check time remaining during an OTR
Press
STATUS
.
• To change the recording length during an OTR
Press
RECORD
repeatedly until the desired length appears.
• To stop an OTR before recording is finished
Press
STOP
C
/
p
.
• To cancel the OTR but continue recording
Press
RECORD
repeatedly until “
I
” appears without the
recording length.
Assemble Function
When you add a further recording to a cassette, which already
has a recording on it, a short blank (flicker) can appear
between the old and the new recording or the picture itself can
flicker. To help reduce these from occurring, proceed as
follows:
1)
Insert a pre-recorded tape. Press
PLAY
B
/
K
to start
playback.
2)
Press
PAUSE
at the desired point on the tape.
3)
Press
RECORD
. The unit will be in the Recording Pause
mode.
•The RECORD indicator on the front panel flashes fast.
4)
Press
PROG +/-
to select the channel to be recorded.
5)
Press
RECORD
or
PAUSE
. The recording will begin.
•The RECORD indicator on the front panel comes on.
6)
Press
STOP
C
/
p
to stop a recording.
Selecting the Recording Speed (SP
or LP)
LP allows to double the recording duration on tape (for
example 6 hours instead of 3 hours on a E180 cassette).
1)
Press
MENU
.
2)
Press
PLAY
B
/
K
or
STOP
C
/
p
to select “SET UP”
.
3)
Press
PLAY
B
/
K
or
STOP
C
/
p
to select “RECORD
SPEED”
.
4)
Press
D
/
B
to select the required recording speed.
5)
Press
MENU
to exit.
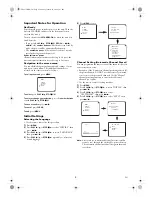
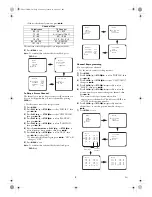
I
I
(0:30)
I
(1:00)...
I
(7:30)
I
(8:00)
(Normal (OTR:
recording) 30 minutes)
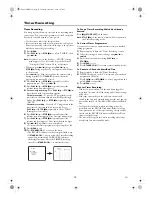
SET UP
AUTO REPEAT
[OFF]
RECORD SPEED
[SP]
T6627SH(EN).fm Page 11 Thursday, January 22, 2004 1:27 PM


