


12
EN
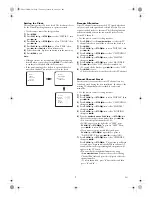
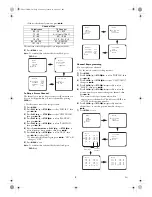
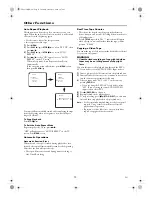
Timer Recording
Timer Recording
You may program the unit to start and end a recording while
you are away. You can set 8 programmes to record on specific
days, daily or weekly within a 1 year period.
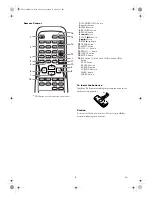
• Use the remote control for this procedure.
• Insert a cassette tape with its erase-prevention tab in place.
(If necessary, rewind or fast forward the tape to the point at
which you want to begin recording.)
1)
Press
MENU
.
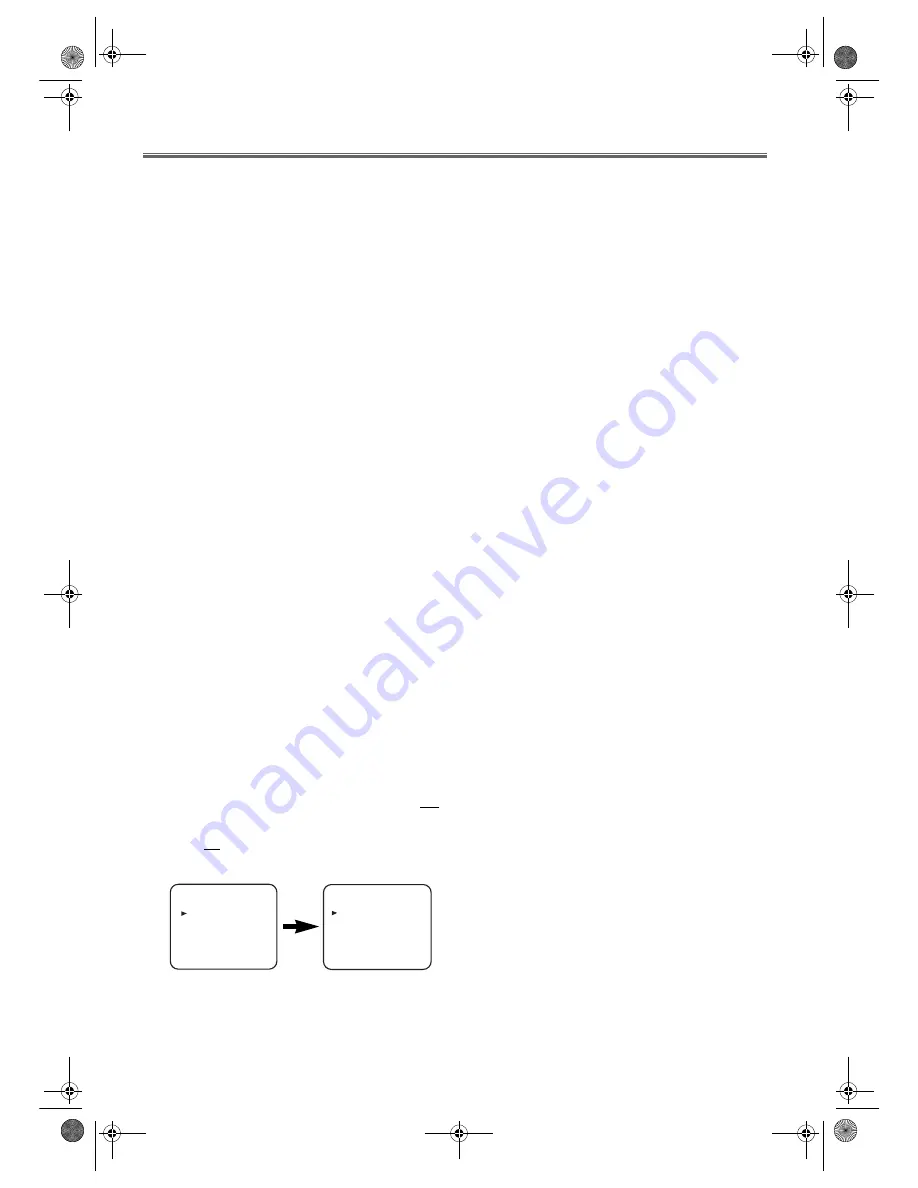
2)
Press
PLAY
B
/
K
or
STOP
C
/
p
to select “TIMER”, then
press
D
/
B
.
Note:
If you have not set the clock yet, “CLOCK” setting
menu appears. If so, follow the steps outlined in the
“Setting the Clock” section. Then, set the timer.
• When you press
D
/
B
after pressing
PLAY
B
/
K
or
STOP
C
/
p
during steps
3)
to
7)
, the input mode will move
to the next step.
• Press
h
/
s
to go back one step from the current setting
during steps
4)
to
7)
. If
CLEAR
is pressed, the entire
programme contents will be erased.
3)
Press
PLAY
B
/
K
or
STOP
C
/
p
repeatedly to select a
programme row. Then, press
D
/
B
.
4)
Press
PLAY
B
/
K
or
STOP
C
/
p
repeatedly until the
relevant channel number appears.
5)
For once-only recording
: Press
PLAY
B
/
K
or
STOP
C
/
p
repeatedly until the relevant date appears.
For daily recording
: To record a TV programme at the
same time on the same channel from Monday through
Friday. Press
PLAY
B
/
K
or
STOP
C
/
p
repeatedly to select
“MO-FR”.
For weekly recording
: To record a TV programme at the
same time on the same channel every week. Press
PLAY
B
/
K
or
STOP
C
/
p
repeatedly to select “W-MO”
(Example: every monday).
6)
Press
PLAY
B
/
K
or
STOP
C
/
p
repeatedly until the
relevant start hour appears. Next, enter the minute digit.
7)
Press
PLAY
B
/
K
or
STOP
C
/
p
repeatedly until the
relevant end hour appears. Next, enter the minute digit.
8)
Press
D
/
B
. Programme is now completed.
•To set another timer programme, repeat steps
3)
to
8)
.
9)
Press
MENU
to exit.
10)
Press
STANDBY-ON
/
y
to activate the timer.
•The RECORD indicator on the front panel flashes
slow
.
•If
STANDBY-ON
/
y
is not pressed, the Timer Recording
cannot be performed and the RECORD indicator
flashes
fast
2 minutes before the TIMER Recording
starts. Press
STANDBY-ON
/
y
to activate the timer.
To Stop a Timer Recording Which Has Already
Started
Press
C
/
A
(
STOP
/
EJECT
)
on the unit.
Note: STOP
C
/
p
on the remote control will not function in
the Timer Recording mode.
To Correct Timer Programmes
If you want to correct an automatic timer after you finished
setting programme,
1)
Repeat steps
1)
to
3)
in the “Timer Recording” section.
2)
Select the setting you want to change using
D
/
B
or
h
/
s
.
3)
Enter the correct numbers using
PLAY
B
/
K
or
STOP
C
/
p
.
4)
Press
MENU
to exit.
5)
Press
STANDBY-ON
/
y
to return to timer standby mode.
To Cancel or Check the Start/End Time
1)
Repeat steps
1)
to
2)
in the “Timer Recording”.
2)
TIMER list appears on the TV screen and you can check
programmes on the list.
Press
PLAY
B
/
o
or
STOP
C
/
L
to select a programme and
press
CLEAR
to
cancel that.
3)
Press
MENU
to exit.
Hint for Timer Recording
• If there is a power failure or if the unit is unplugged for
more than 1 minute, the clock setting and all timer settings
will be lost.
• If the tape runs out before the end time, the unit will
switch to the Stop mode immediately, eject the tape and the
unit will be turned off. The RECORD indicator will flash
fast.
• If a tape is not in the unit, timer recording cannot be
performed and the RECORD indicator flashes fast. If an
erase-prevention tab of the tape is missing, the tape will be
ejected and the RECORD indicator will flash fast. Please
insert a recordable tape.
• The unit will only perform a timer recording after it has
been placed into timer standby mode.
-- --/-- -- --:-- --:--
-- --/-- -- --:-- --:--
-- --/-- -- --:-- --:--
-- --/-- -- --:-- --:--
-- --/-- -- --:-- --:--
-- --/-- -- --:-- --:--
-- --/-- -- --:-- --:--
-- --/-- -- --:-- --:--
P DATE BEGIN END
TIMER
MENU
TIMER
SET UP
PICTURE
INITIAL
T6627SH(EN).fm Page 12 Thursday, January 22, 2004 1:27 PM


