background image

15

EN

Troubleshooting Guide

If you have followed the instructions contained in this manual and have difficulty in operating your unit, locate the SYMPTOM 
in the left column below. Check the corresponding cell CORRECTIVE ACTION columns to remedy the problem.

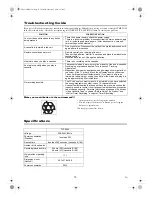
Make your contribution to the environment!!!

• Spent batteries do not belong in the dustbin.
• You can dispose of them at a collection point for spent 

batteries or special waste.

Contact your council for details.

Specifications

SYMPTOM

CORRECTIVE ACTION

Your unit does not respond to any button 

being pressed.

• There is no power supply: check the power supply.

• There is a technical problem: disconnect from the mains power supply 

for 5  minutes then power-up again. (After disconnection, time and 

timer settings will be cleared.)

A cassette is jammed in the unit.

• Do not use force. Disconnect the set from the mains and reconnect it 

again after a few seconds.

Remote control does not work.

• Remote control is not pointed at the unit.

• Take out the batteries,  wait for 10 seconds and place them back in the 

remote control.

• Batteries have run out. Change the batteries.

No picture when you play a cassette.

• There is no recording on the cassette.

Poor picture quality when you play a 

cassette.

• The cassette is badly worn-out or of poor quality. Use a new cassette.

• Tracking is not properly adjusted. Turn to section 

Tracking 

Adjustment”.

• Magnetism from nearby appliances and geo-magnetism might affect 

the colour of the TV picture. Move the unit away from such sources. 

The unit will readjust itself automatically. If you want to initiate an 

immediate readjustment, unplug the unit from the mains and plug it in 

again approximately 30 minutes later. 

No recording possible.

• The TV channel you want to record is not stored or you have selected 

the wrong programme number: check TV channels stored.

• A cassette was inserted that does not have the erase-prevention tab 

(cannot be used to record): Insert a cassette with the erase-prevention 

tab or change cassette. For more information, please see the section 

“Video Cassette Tape” in chapter “Before Using This Product” and 

“Hint for Timer Recording” in chapter “Timer Recording”.

TVC5044 

Voltage

220-240V/50Hz

Power consumption 

(Standby)

 less than 5W

Rewind time

 less than 260 seconds (cassette E-180)

Number of video heads 

 2

Recording/playback time


3 hours (SP) (cassette E-180)

6 hours (LP) (cassette E-180)

Weight without packing 

in kg

 11.1

Dimensions in cm 

(HxWxD)

40.1x37.9x38.0

Power consumption 

 52W

T6627SH(EN).fm  Page 15  Thursday, January 22, 2004  1:27 PM

Summary of Contents for TVC5044

Page 1: ...r use of broadcast television programming video tape film or other copyrighted material may violate applicable copyright laws We do not take responsibility for the unauthorised duplication use or othe...

Page 2: ...ed from a cold place to a warm place after heating up a cold room or under conditions of high humidity Do not use the unit for at least 2 hours until it is dry inside Before Using This Product Video C...

Page 3: ...RD button 14 RECORD indicator 15 HEADPHONE jack Rear Panel 1 EXT1 AV1 scart socket 2 Power cord 3 AERIAL socket Caution If you power off by pressing the main power switch TIMER recordings are IMPOSSIB...

Page 4: ...ton Blue button TEXT button REVEAL button EXPAND button SUBCODE button HOLD button INDEX button To insert the batteries Install two R6 batteries matching the polarity indicated inside the battery comp...

Page 5: ...can connect an additional device such as decoder satellite receiver camcorder etc to the EXT1 AV1 scart socket The scart socket to be connected is usually marked AV or TV on the decoder or satellite...

Page 6: ...K or STOP C p to select INITIAL then press D B 3 Press PLAY B K or STOP C p to select LANGUAGE then press D B 4 Press PLAY B K or STOP C p repeatedly to select your desired language 5 Press MENU to ex...

Page 7: ...ch off the decoder press D B to select OFF 8 Press MENU to exit The decoder has now been allocated to this TV channel Manual Channel Preset In some cases it can occur that some TV channels are not fou...

Page 8: ...or STOP C p to select CH TUNING then press D B 4 Press PLAY B K or STOP C p repeatedly to select MOVE then press D B 5 Press PLAY B K or STOP C p repeatedly to select the position number you want to...

Page 9: ...t PICTURE then press D B 3 Press PLAY B K or STOP C p to select an item and then modify with h s or D B 4 Press MENU to exit TINT appears only when receiving NTSC signals from an additional device con...

Page 10: ...igh speed in either a forward or reverse direction In this mode the sound will be muted 2 Press the button again the unit will now search in super high speed This function will not operate for a casse...

Page 11: ...length appears To stop an OTR before recording is finished Press STOP C p To cancel the OTR but continue recording Press RECORD repeatedly until I appears without the recording length Assemble Functi...

Page 12: ...t another timer programme repeat steps 3 to 8 9 Press MENU to exit 10 Press STANDBY ON y to activate the timer The RECORD indicator on the front panel flashes slow If STANDBY ON y is not pressed the T...

Page 13: ...ing or playback time in hours minutes and seconds Nothing is shown in the case of blank portion Press STATUS repeatedly The indication will appear when the tape is rewound further than the tape counte...

Page 14: ...blurred or interrupted even if the TV programme received is clear This does not mean that the recorded programme has been erased This problem is caused by dirt accumulated on the head after long peri...

Page 15: ...ording on the cassette Poor picture quality when you play a cassette The cassette is badly worn out or of poor quality Use a new cassette Tracking is not properly adjusted Turn to section Tracking Adj...

Page 16: ...cherstrasse 11 22767 Hamburg Germany declare that the TV Video Combi TVC5044 are in compliance with following norms EN 55013 2001 EN 55020 2002 EN 61000 3 2 2000 EN 61000 3 3 1995 A1 2001 EN 60065 199...

Reviews: