


CHAPTER 3: OPERATING INSTRUCTIONS
9100 SERIES REFLOW SOLDERING SYSTEM
3-2
990-606
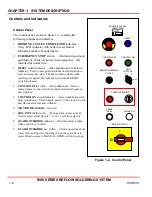
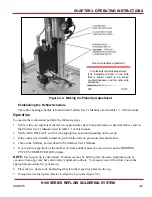
Turning the Equipment On
NOTE:
Be sure all shields are closed prior to applying power.
To apply power to the unit, perform the following steps. If any of the indicators do not light or go out, as
described, contact your Unitek Precision Systems representative.
1
At the bottom of the control panel, turn the red MAIN ISOLATOR switch fully clockwise to the 1
position. Observe that the white MAINS ON indicator lights.
2
Press the green CONTROL ON pushbutton near the top of the control panel. The green CONTROL ON
and blue RESET indicators will light.
3
Press and hold the blue RESET pushbutton until the rotary table begins to turn. The blue RESET
indicator will go out, and the rotating table will turn until it finds the appropriate jig position (as set by
the JIGS IN PLACE switch). If all conditions are correct, the Uniflow will also turn on at this time.
(See Uniflow manual for conditions that would keep it from turning on.) The workstation is now ready
for set-up adjustments.
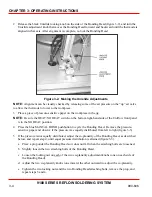
Section III: Operation
Set-Up
WARNING:
Set-up is done with the safety guards open. It should only be done by a trained individual
wearing safety glasses and no loose clothing or jewelry.
Set-up consists of three actions: installing the necessary jigs, aligning the Bonding Head and thermode to
the correct bonding position, and establishing the reflow schedule on the Uniflow.
To perform set-up, use the key to turn the GUARD OVERRIDE key switch clockwise. Verify the red
GUARD OVERRIDE indicator lights.
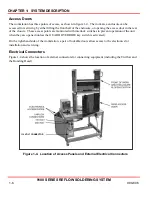
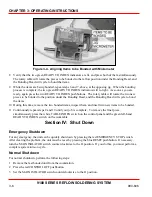
Installing the Jigs
The workstation rotary table can hold three pairs of jigs, allowing quick changeover from one operation
to another. After determining what jigs will be used, mount a pair of jigs in opposing jig mounts.
To mount a jig, perform the following steps:
1 Set the JIGS IN PLACE switch to the appropriate position, depending on what your jig set-up will
be.
2
Turn on the unit power, as described above.
NOTE:
Any time the position of the JIGS IN PLACE switch is changed, you must reset the unit.
This is done by pressing and holding the blue RESET pushbutton until the rotary table begins to
turn.
3
Simultaneously press the white TABLE INDEX pushbutton and the left-hand green READY TO
INDEX pushbutton. The rotary table will move to the next position, as determined by the setting of
the JIGS IN PLACE switch. Continue to do this until the position at which you will be mounting the
first jig is in front of you.
Summary of Contents for 9100 Series
Page 14: ......
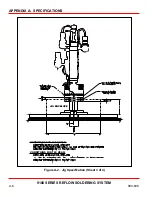
Page 25: ...9100 SERIES REFLOW SOLDERING SYSTEM 990 606 A 1 APPENDIX A SPECIFICATIONS...
Page 32: ......