background image

16

 English

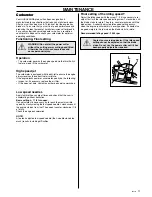
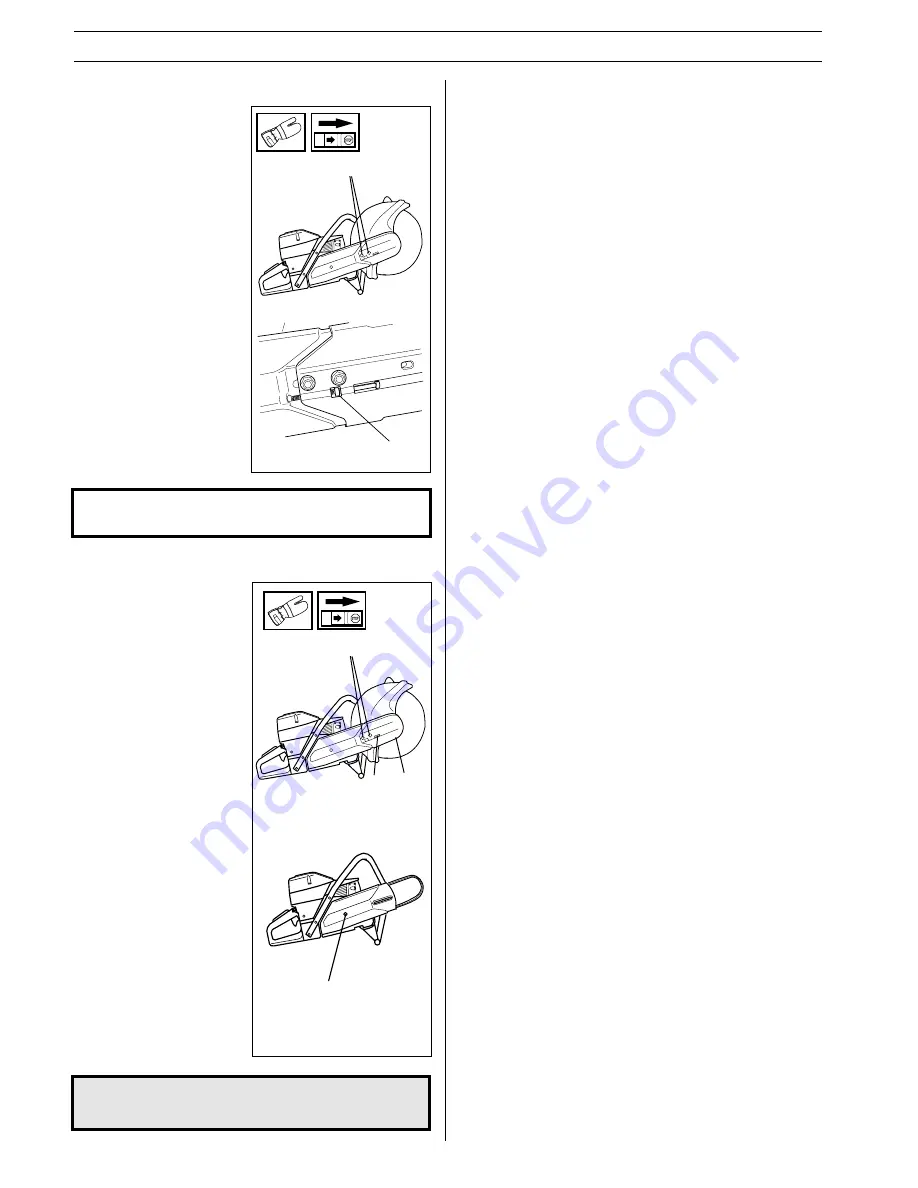
Changing the drive belt

Loosen the two bolts (A).

Turn the tensioning

screw(B) until the tension

has been released.

Remove the two bolts (A).

Remove the front belt cover

(C).

Remove the belt from the

pulley.

Dismantle the cutting head.

Remove the nut (D).

Remove the side cover.

Replace the drive belt.

To assemble reverse the

procedure for dismantling.

Check the blade guard for

signs of cracking or other

damage. Replace it if

damaged.

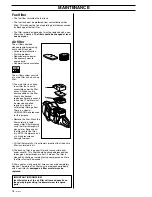
Adjusting the drive belt

The drive belt is fully

enclosed and well protected

from dust, dirt and

mechanical effects during

the cutting process.

To tension the drive belt,

slightly loosen the bolts (A),

which secure the cutting

head and belt guard.

Turn the tensioning screw

so that the nut (B) is located

directly under the arrow on

the cover. Shake the head

to ensure the spring can

tension the belt. The belt

now automatically has the

right tension.

Tighten the bolts that hold

the cutting head.

IMPORTANT INFORMATION! A new drive belt should be

tensioned after using one or two tanks of fuel.

MAINTENANCE

!

WARNING! Never use a power cutter without a

blade guard over the cutting blade.

B

A

A

C

B

D

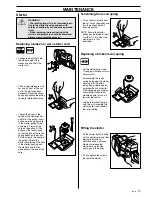
Belt pulley and clutch

Never start the engine when the belt pulley and clutch are

removed for maintenance.

Summary of Contents for PS-COS1479

Page 1: ...PS COS1479 PS COS1679 Saw Manual 3924 E Trent Ave Spokane WA 99202 509 535 7746 FAX 509 535 9064 1 800 745 3282 ...

Page 2: ...bols in the Operator s Manual Warning Sparks from the cutting blade can cause fire in combustible materials such as petrol gas wood dry grass etc WARNING Some dust created by power sanding sawing grinding drilling and other construction activities contains chemicals known to the State of California to cause cancer birth defects or other reproductive harm Some examples of these chemicals are Lead f...

Page 3: ...S ENGINE CONFORMS TO 1997 U S EPA EMISSION REGULATION FOR SMALL NONROAD ENGINES REFER TO OPERATOR S MANUAL FOR MAINTENANCE SPECIFICATIONS AND ADJUSTMENTS WARNING 3120K 119cc VHV119UB25RB Before using your new Power cutter Read the Operator s Manual carefully Check the assembly and adjustment of the cutting blade see chapter Assembly Start the engine and check the carburettor settings See chapter M...

Page 4: ...AGAINST SPARKS AND CUTTING FRAGMENTS ANTI SLIP BOOTS WITH STEEL TOE CAPS FIRST AID KIT SHOULD ALWAYS BE ON HAND THE POWER CUTTER S SAFETY EQUIPMENT This section describes the power cutter s safety equipment its function and how checks and maintenance are carried out to ensure that it operates correctly See the chapter What is what to locate where this equipment is positioned on your power cutter W...

Page 5: ...e instructions for checking maintaining and servicing the muffler are followed see the section Control maintenance and service of the power cutter s safety equipment 4 Blade guard for the cutting blade WARNING Always check that the blade guard is correctly fitted before starting the machine The blade guard is mounted above the cutting blade and prevents cutting fragments from being thrown towards ...

Page 6: ...e body GENERAL SAFETY INSTRUCTIONS IMPORTANT INFORMATION Do not use the power cutter until you have read the entire contents of this Operator s Manual All servicing in addition to the points listed in the section Control maintenance and service of the power cutter s safety equipment should be carried out by trained service specialists Use the equipment recommended in the chapter Personal safety eq...

Page 7: ...orking area Do not start to work with the power cutter before the working area is clear and you have a firm foothold Start cutting with the engine at full throttle Always hold the power cutter firmly with both hands Hold the machine so that the thumb and fingers grip around the handle Cutting Only use the machine in areas with good ventilation Neglect can result in serious injury or death Fuel saf...

Page 8: ...power cutters and when cutting concrete cools the cutting blade and increases its service life as well as reduce dust formation see the section Abrasive blades Among the disadvantages are difficulties at very low temperatures the risk of damaging the floor and other sections of the building and risk for slippage Sharpening diamond blades Blades can become dull when the wrong feeding pressure is us...

Page 9: ... on the unit Care and storage General Husqvarna s power cutters are robust and durable However as they are used for high speed operations all servicing should be carried out on time and as specified so that the power cutter always works effectively and safely Read this Operator s Manual to determine which service routines you can carry out and ensure that all other service work is carried out by a...

Page 10: ... diamond blades WARNING A cutting blade may burst and cause injury to the operator High speed portable tools Cutting blades of the make Husqvarna are manufactured for portable high speed power cutters If other makes of cutting blades are used ensure the blades comply with all the directives and requirements attributed to the specific type of power cutter WARNING Never exceed the maximum working sp...

Page 11: ...uns free of the guard Plastic reducing bushes may only be used with abrasive blades Do not use reducing bushes with diamond blades or tungsten carbide tipped blades We recommend that the spindle is replaced so that it fits the blades to be used rather than using a reducing bush Contact your service workshop for details Guard Check that the guard is not cracked or shows signs of any other damage Cl...

Page 12: ...anual Only trained and qualified personnel shall operate this cutter Only use high speed reinforced wheels approved for free hand cutting and for the maximum speed rating of cutter Before each use check wheel and guard for any damage Use ear eye head and hand protectors protective clothing and protective footwear Keep all bystanders well away from the operating area Adjust guard to keep rear secti...

Page 13: ... it fits in the flange hub The cutting blade is tightened using the socket spanner 501 69 17 02 The shaft can be locked using a screwdriver steel pin or the like This is slid in as far as possible The blade is tighte ned clockwise Tightening torque for the bolt holding the blade is 15 25 Nm 130 215 in lb A B WARNING 16 inch blade and blade guard should only be used on power cutters originally equi...

Page 14: ...ly affect the ratio of the mixture Always provide for good ventilation when handling fuel Fuelmix Gasoline This engine is certified to operate on unleaded gasoline Use good quality unleaded gasoline The lowest recommended octane rating is 87 If you run the engine on lower octane rating than 87 so called knocking can occur This leads to an increased engine temperature which can result in a serious ...

Page 15: ...er cutter When the engine starts quickly apply full throttle and the starter throttle catch will automatically disengage WARNING The cutting blade can rotate when the engine starts Make sure it can rotate freely Starting a warm engine Use the same procedure as for starting cold engine but without choke Fast idle is recived by first set the choke control in choke position and then back again Stop T...

Page 16: ...om dust dirt and mechanical effects during the cutting process To tension the drive belt slightly loosen the bolts A which secure the cutting head and belt guard Turn the tensioning screw so that the nut B is located directly under the arrow on the cover Shake the head to ensure the spring can tension the belt The belt now automatically has the right tension Tighten the bolts that hold the cutting...

Page 17: ... T clockwise until the blade starts to rotate Then turn counter clockwise until the blade stops A correctly adjusted idle speed setting occurs when the engine runs smoothly in every position It should also be good margin to the rpm when the blade starts to rotate Recommended idling speed 2 500 rpm L T Operation The carburetor governs the engine speed via the throttle Air fuel are mixed in the carb...

Page 18: ... be cleaned and oiled regularly to obtain a satisfactory filtering effect There is a special HUSQVARNA oil produced for this purpose Remove the filter Wash the filter carefully in tepid soapy water After cleaning rinse the filter thoroughly in clean water Squeeze out the filter and let the filter dry NOTE Compressed air at a high pressure can damage the foam Oil the filter carefully It is extremel...

Page 19: ...ckwise NOTE Ensure the starter pulley can be turned at least a further 1 2 turn when the starter cord is fully extended Replacing a broken recoil spring Lift the starter pulley see Changing a broken or worn starter cord Disassemble the recoil spring by tapping the starter housing with its inside facing down lightly against a working bench or similar If the spring pops out when assembling it should...

Page 20: ...tor The exhaust gases are hot and can contain sparks which may cause fire if directed against dry and combustible material Never use a saw with a clogged or defective muffler Spark plug The condition of the spark plug is affected by An incorrect carburetor setting An incorrect fuel mixture too much oil A dirty air filter These factors cause deposits on the spark plug electrode that may result in m...

Page 21: ...lutch drum drive pulley and clutch springs with regard to wear 17 Clean the outside of the carburetor 18 Check the fuel filter fuel hose change if necessary 19 Clean the inside of the fuel tank 20 Check all cables and connections Daily maintenance 1 Check that throttle components work correctly from a safety view point throttle and starter throttle catch 2 Clean the main filter 3 Check the tension...

Page 22: ...lug Electrode gap mm inch Fuel and lubrication system Manufacturer Carburettor type Fuel capacity litre US Pint Weight Without fuel and cutting blade kg Lbs 14 350 mm 16 400 mm 119 7 25 60 2 3 42 1 65 2 500 9 750 250 5 8 FHP Champion RCJ 7Y NGK BPMR 7A 0 5 020 Walbro WG9 1 25 2 65 13 2 29 1 14 0 30 9 Cutting equipment Cutting blade Gear ratio Max peripherical speed 14 0 51 100 m s 16 0 47 100 m s ...

Page 23: ......

Reviews: