Installation & Set-up Guide
14
Your laser system will have arrived in a wooden crate. After the top and sides have been removed
from the crate, the laser system must be detached from its shipping palette and lifted onto the floor as
follows:
Note:
If you need to move the laser machine through a doorway smaller than the laser system, please
contact your local Customer Service at 480-609-0297 (USA), +43 1 402 22 50 (Austria), +81 (45) 224-2270
(Japan) or e-mail us at support@ulsinc.com for further instructions.
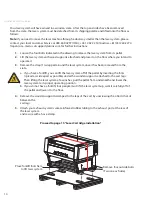
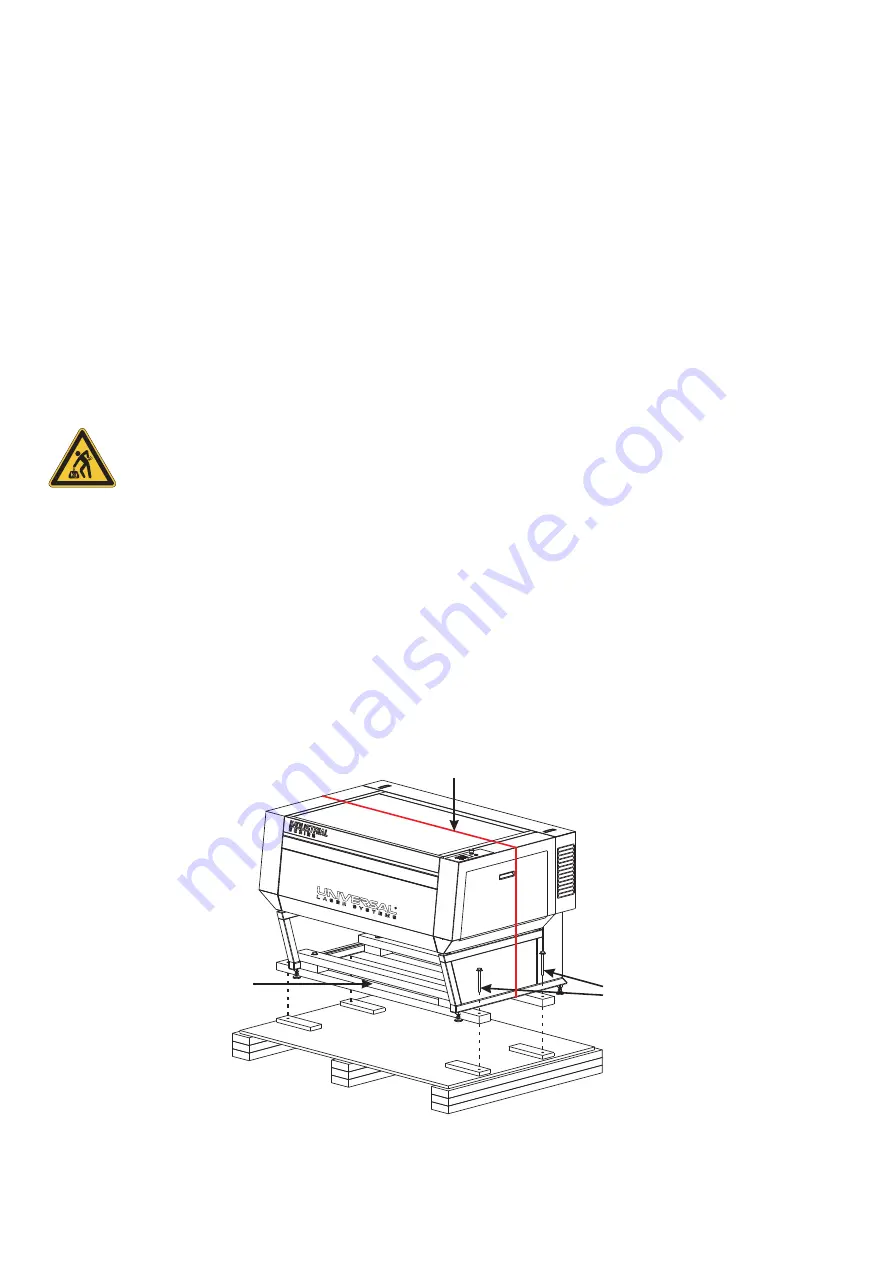
Loosen the four bolts indicated in the drawing to release the laser system from its pallet.
1.
Lift the laser system with wood supports attached and place it on the floor where you intend to
2.
operate it.
Remove the strap (1) wrapped around the laser system once it has been removed from the
3.
crate.
If you have a forklift, you can lift the laser system off of the pallet by inserting the forks
a.
(spread as wide apart as possible) under the wooden supports attached to the cart legs.
Then lifting the laser system a few inches, pull the pallet from underneath and lower the
laser system to its proper operating position.
If you do not have a forklift, four people must lift the laser system up, walk it carefully off of
b.
the pallet and lower it to the floor.
Remove the wooden supports clamped to the legs of the cart by unscrewing the 4 bolts that sit
4.
between the
cart legs.
Attach your exhaust system’s wire-reinforced rubber tubing to the exhaust port at the rear of
5.
the laser system
and secure with a hose clamp.
Proceed to page 15 “Laser Cartridge Installation.”
Remove four outside bolts
(Two on each side)
Place forklift forks here
to lift laser system
Summary of Contents for Industrial ILS12.150D
Page 1: ...www ulsinc com Installation Set up Guide ILS9 75 ILS9 150D ILS12 75 ILS12 150D...
Page 2: ......
Page 8: ......
Page 28: ......
Page 32: ...Notes...
Page 33: ...Notes...
Page 35: ......

