background image


Appendix C – Troubleshooting Guide 


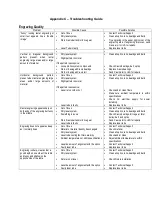
Engraving Quality 

Problem 

Possible Cause 

Possible Solution 

“Fuzzy”  looking  raster  engraving  or 
small  text  appears  like  a  “double 
image” 


Out of focus 


Dirty laser system 


Worn X-axis belt and/or drive gear


Laser Tube is faulty 


Contact Technical Support 


Clean all optics, rails, bearings and belts 


Try engraving in the upper right corner of the 
engraving  area.  If  engraving  improves,  send 
X-axis arm to ULS for repairs. 


Replace laser tube 


Vertical  or  diagonal  background 
pattern 

present 

when 

raster 

engraving  large  areas  and/or  large 
amounts of material 


Dirty laser system 


Slight pattern is normal 

 
If the pattern is excessive: 


Loose motion system components 


Worn or damaged X-axis bearings 


Worn or damaged X-axis rail 


Clean all optics, rails, bearings and belts 


Check X-axis bearings, belt, optics 


Replace X-axis bearings 


Send X-axis arm to ULS for repairs 

Horizontal 

background 

pattern 

present when raster engraving large 
areas  and/or  large  amounts  of 
material 


Out of focus 


Dirty laser system 


Slight pattern is normal 

 
If the pattern is excessive: 


Laser is too cold or hot 


Laser tube is faulty 


Contact Technical Support 


Clean all optics, rails, bearings and belts 


Check and/or clean filters 


Make  sure  ambient  temperature  is  within 
specifications 


Check  AC  electrical  supply  for  power 
instability 


Replace laser tube 

Raster engraving appears sharp on 
both ends of the engraving but fuzzy 
in the middle 


Out of focus 


Dirty laser system 


Something is loose 


Worn X-axis belt and/or drive gear 


Laser tube is faulty 


Contact Technical Support 


Clean all optics, rails, bearings and belts 


Check X-axis bearings, drive gear, idler 
pulley, belt, and optics 


Send X-axis arm to ULS for repairs 


Replace laser tube 

Engraving does not appear as deep 
as it normally does 


Out of focus 


Material or material density has changed 


Dirty laser system 


Laser tube cooling fan filters are dirty 


Ambient temperature not within specifications 


Laser beam out of alignment with the optics 


Faulty laser tube 


Contact Technical Support  


Check material 


Clean all optics, rails, bearings and belts 


Check and/or clean 


Adjust ambient temperature to within 
specifications 


Contact Technical Support 


Replace laser tube 

Engraving is sharp, clear and at a 
good depth on one side of the table 
and fuzzy and shallow on the 
opposite side of the table 


Out of focus 


Dirty laser system 


Fixture is not level 


Laser beam out of alignment with the optics 


Faulty laser tube 


Contact Technical Support 


Clean all optics, rails, bearings and belts 


Check Fixture installation 


Contact Technical Support 


Replace laser tube 


Summary of Contents for LaserKiosk

Page 1: ...aving and Cutting System Operation Manual Manufactured by Universal Laser Systems Inc 16008 North 81st Street Scottsdale AZ 85260 USA Phone 480 315 3600 Fax 480 315 3601 Web Based Email Support www ul...

Page 2: ...ied transmitted or distributed in any form or by any means radio electronic mechanical photocopying scanning facsimile or otherwise or for any other purpose without the prior written permission of ULS...

Page 3: ...exactly what the problem is Refer to the Troubleshooting Guide at the end of this manual for a possible solution Step 2 Try to recreate the problem and write down the circumstances in which the proble...

Page 4: ...ce 1 6 SECTION 2 Installation and Assembly Operating Environment 2 1 Electrical Requirements 2 1 Laser Module Cooling Requirements 2 2 System Assembly 2 2 Laser Cartridge Installation 2 4 Computer Mod...

Page 5: ...the Engraving Process 4 2 Material Removing 4 3 Material and Machine Usage Tracking 4 3 SECTION 5 Maintenance Suggested Cleaning and Maintenance Supplies 5 1 System Cleaning 5 3 Optics Cleaning 5 3 Z...

Page 6: ...and can cause severe eye damage Proper use and care of this system are essential to safe operation Never operate the laser system without constant supervision of the cutting and engraving process Expo...

Page 7: ...rons in the infrared spectrum For your protection this enclosure has been designed to completely contain the CO2 laser beam However the intense light that appears during the engraving or cutting proce...

Page 8: ...221 0012 0 221 0015 0 221 0016 0 DANGER INVISIBLE AND VISIBLE LASER RADIATION WHEN OPEN AVOID EYE OR SKIN EXPOSURE TO DIRECT OR SCATTERED RADIATION 221 0017 0 221 0018 0 WARNING TURN THE LASER SYSTEM...

Page 9: ...0 INPUT POWER 220 VAC 50 60 Hz 10 A 221 0018 0 221 0004 0 221 0012 0 221 0015 0 221 0022 0 221 0036 0 221 0016 0 221 0016 0 221 0020 0 221 0021 0 221 0016 0 221 0007 0 221 0031 0 221 0017 0 221 0044 0...

Page 10: ...tive 89 392 EEC Machinery Directive based on the standards listed Standards Used Safety EN 60950 1995 EN 60825 1994 Class IIIa EMC EN 55022 1995 Class A EN 50082 1 1992 EN 60801 2 1993 6kV CD 8kV AD E...

Page 11: ...les These limits are designed to provide reasonable protection against harmful interference when the equipment is operated in a commercial environment This equipment generates uses and can radiate rad...

Page 12: ...ts that can damage the laser system Also keep the laser system isolated from any type of sandblasting sanding grinding milling sawing or any other machinery that produces airborne particles or caustic...

Page 13: ...le uses fans to keep the Laser Cartridge and electronics cooled during operation Maintaining the proper ambient temperature as outlined previously in the Operating Environment section is essential to...

Page 14: ...the mounting plate 4 that the Computer Module will attach to Gently place the Computer Module upside down on a clean surface Lift the support plate up 1 until it stops Locate the two pins on the side...

Page 15: ...s not pointing straight up Close the door and secure the latches Laser Cartridge Installation With your finger press the circular button on the latch and it will pop out Gently fold the rear cover up...

Page 16: ...g plate of the Alignment Fork Slowly rotate the Laser Cartridge making sure that the Alignment Plate is centered in the small gap of the Alignment Fork And the Laser Latch clicks and locks the cartrid...

Page 17: ...ule The Computer Module consists of a laptop computer attached to a removable platform The computer is pre loaded with the software needed to run the LaserKiosk When you power ON the computer the Lase...

Page 18: ...puter Module The Computer Module consists of a laptop computer attached to a removable platform The computer is pre loaded with the software needed to run the LaserKiosk When you power ON the computer...

Page 19: ...ing a file Flashing File is being downloaded to system ON Entire file is in memory indicating that transfer is complete OFF File has finished processing 6 Laser Cartridge The Laser Cartridge is a very...

Page 20: ...equipped with the 1 5 inch Focal Length lens It creates a nominal spot size of around 003 inches 08 mm The term Wattage signifies the amount of heat energy that the laser light is producing measured...

Page 21: ...alog of engraveable materials Unapproved materials if engraved or cut with a laser can produce toxic and caustic fumes DO NOT use materials other than those found in the Laser Personalization and Iden...

Page 22: ...er close to the ESC key and the speaker Power ON the Laser Module by pressing the switch in the front of the machine The Laser Module will perform its homing routine When completed the Green LED on th...

Page 23: ...ocess When the software is finished processing the graphic it will power ON the Filter Module and perform some operational checks If the filter s are saturated or there is an operational problem with...

Page 24: ...vided materials engraveable supplies including filters and accessories product modules trays Use of other products may damage the system create a safety hazard and will void the system warranty and vi...

Page 25: ...achine Always power the laser engraving system OFF and unplug it before performing any cleaning procedures Suggested Cleaning and Maintenance Supplies Soap solution mixture of 1 tablespoon 2 cl liquid...

Page 26: ...w 4 2 on right side 2 on left side of X axis Rail 14 Y axis Bearing 4 2 on right side Y axis Rail 2 on left side Y axis Rail 15 Y axis Rail 2 one right side and one left side 16 Y axis Rail Bearing Tr...

Page 27: ...system by hand to roll the bearings against the swab There are seven bearings in the system three 3 on the Focus Carriage two 2 on the left side of the X Rail and two 2 on the right side of the X Rail...

Page 28: ...come off of the cotton swab They will be vaporized as soon as the laser hits it You can cause more damage to the mirror by trying to get it off than by leaving it alone 3 Mirror and Focus Lens You mu...

Page 29: ...k wall and is yellow in color It is not necessary to remove the Beam Window for cleaning since it can only get dirty on the front side The backside is in a sealed environment To clean the Beam Window...

Page 30: ...lubrication that may be required is the screw threads for the table lifting mechanism After some time contaminants can adhere to the lubricant which can cause the engraving table to bind up or sound...

Page 31: ...o cool the laser tube the air must be filtered before it enters the inside of the laser system otherwise dirt and dust can build up inside of the laser system and damage it The contaminants reduce the...

Page 32: ...The software will prompt you if it detects that the Pre Filter is saturated Main Filter The software will also prompt you if the Main Filter is almost completely saturated The software will allow you...

Page 33: ...r X axis and Y axis Belt wear replace as necessary Check and or clean X axis and Y axis Drive Gears Check for X axis and Y axis Bearing wear replace as necessary Inspect system for loose screws and me...

Page 34: ...APPENDIX...
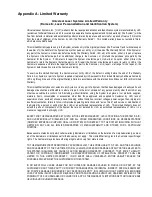
Page 35: ...ing without limitation using the System to engrave or cut products supplies materials items consumables or accessories other than those approved and supplied to Customer by ULS lack of supervision of...

Page 36: ...YEAR AFTER THE CAUSE OF ACTION AROSE OR SHOULD REASONABLY HAVE BEEN DISCOVERED Because some states do not permit the exclusion or limitation of liability for consequential or incidental damages some o...

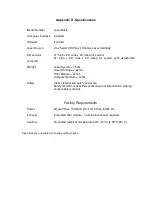
Page 37: ...ht Laser System 75 lbs Laser Cartridge 22 lbs Filter Module 67 lbs Computer Module 12 lbs Safety Class I interlocked safety enclosure Safety tested for Laser Personalization and Identification catalog...

Page 38: ...ck and or clean filters Make sure ambient temperature is within specifications Check AC electrical supply for power instability Replace laser tube Raster engraving appears sharp on both ends of the en...

Page 39: ...nearing its end Cylindrical main Filter is almost saturated Replace Cylindrical main filter The computer gives an error message Sadly the Cylindrical main filter s useful life is at an end Please ins...

Page 40: ...umber of the system available The serial number tag is located on the side of the machine next to the parallel port connector Step 3 Please contact us at Universal Laser Systems Inc 16008 North 81st S...

Reviews: