SuperSpeed
TM
(Optional Accessory)
The SuperSpeed option increases the productivity of the system by printing two lines of raster information
simultaneously with each pass of the X axis over the material being laser processed. This reduces job completion
times at a particular density by up to 50%. The option also provides two extra densities to choose from which can
improve productivity even further. The SuperSpeed option works by using a motor to tilt a system of beam splitting
optics to precisely split the laser beams from two lasers at various angles to the focus lens. This causes the
beams to focus at different locations with respect to each other in the Y axis with a desired spacing between
them. The pulsing information for two lines of raster data (pixels) from the image being printed is sent
simultaneously: one line to one laser and the second line to the other laser, with each pass of the X axis across
the material. Then the Y axis steps a small amount and the process is repeated.
This approach works well to dramatically increase productivity of a laser system without speeding up the motion
system. However, results from the SuperSpeed option are sensitive to the material and application as well as
setup and maintenance of the machine. SuperSpeed may not be an appropriate option for every application. Here
are some guidelines for its use:
•
The spacing between focus positions of the two lasers changes if you are out of focus. The system is
calibrated so that the beams are correctly spaced for each image density at the focal distance of the lens.
This beam spacing is very sensitive to the distance from the lens and moving a small amount (as small
as .010”) in the Z axis away from the calibrated focus distance can have a visible effect on image quality,
depending on the sensitivity of the material being used and image being printed. For example, large text
engraved on wood is much less sensitive than small text engraved on anodized aluminum. For optimal
results on sensitive materials (such as acrylic and anodized aluminum) when laser engraving small
precise features, the engraving table must be flat and level with the motion system arm across the entire
field to a very high degree. This is not as big a concern for most wood engraving. Even if the machine is
kept level and flat to a high degree, results can still vary if the material is not flat or tends to bow when
heat is applied to it by the laser beam. It is very important when using SuperSpeed mode to accurately
focus on the material.
•
The spacing of the laser beams for SuperSpeed mode is also very sensitive to laser alignment. Both
lasers must be very precisely aligned to each other and to the center of the optical path across the entire
field of the laser system. Alignment of the lasers is sensitive to movement of the machine. For very
precise alignment, a machine should be properly leveled and stationary. If a machine is moved it may
need to be re-leveled and realigned.
Pin Table
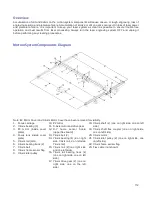
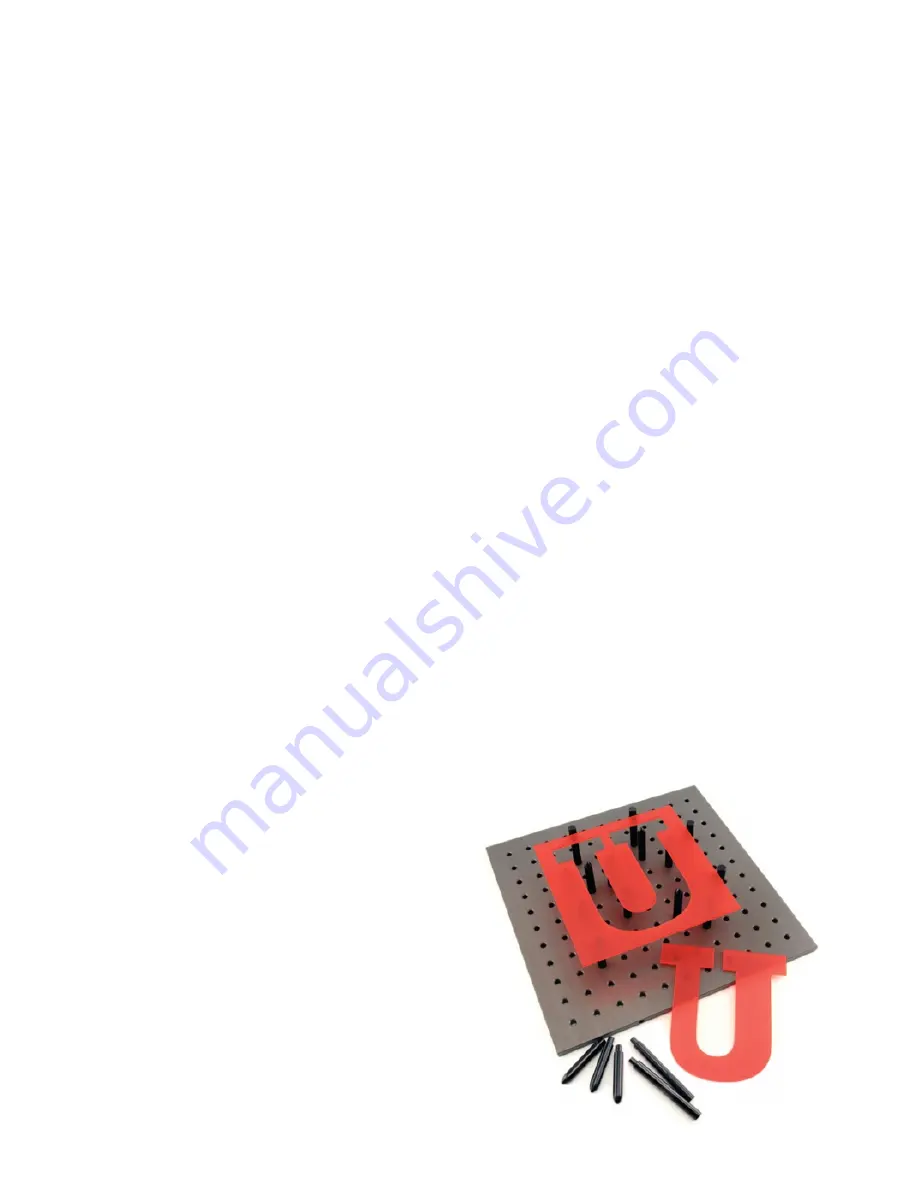
The Universal Pin Table is designed to eliminate certain
scorch marks and other defects which may occur when
cutting acrylic, wood or other sensitive materials using
conventional laser cutting tables. By using specially
coated aluminum pins to elevate the material being
processed, the Universal Pin Table greatly reduces the
amount of laser energy reflected back into the material
from the table surface.
The Universal Pin Table consists of a modular 12" x 12"
base with an energy absorbent coating, sixteen
supporting pins to elevate the material, and four fixture
pins for material positioning. The base contains magnets
which allow for quick and accurate alignment with
additional Universal Pin Tables. Pins slide snugly into the
pin slots in the base (arranged in a grid with 1" intervals)
and can then be locked in place with screws from bellow
for high-volume jobs.
108
Summary of Contents for PLS4.75
Page 1: ...PLS User Guide PLS4 75 PLS6 75 PLS6 150D PLS6MW www ulsinc com Revision August 2012...
Page 5: ...Chapter 1 Specifications 5...
Page 8: ...Chapter 2 Safety 8...
Page 14: ...Tamper Proof Labels Safety Labels...
Page 15: ...ULS Fiber Laser Cartridge Labels 15...
Page 16: ......
Page 17: ...PLS4 Back View 17...
Page 18: ...PLS6 Front View 18...
Page 19: ......
Page 22: ...Chapter 3 Installation 22...
Page 40: ......
Page 48: ...Chapter 4 Operation 48...
Page 83: ...Chapter 5 Accessories 83...
Page 99: ...Example Connection for PNP mode Example Connection for NPN mode 99...
Page 111: ...Chapter 6 Maintenance 111...
Page 119: ...www ulsinc com...


