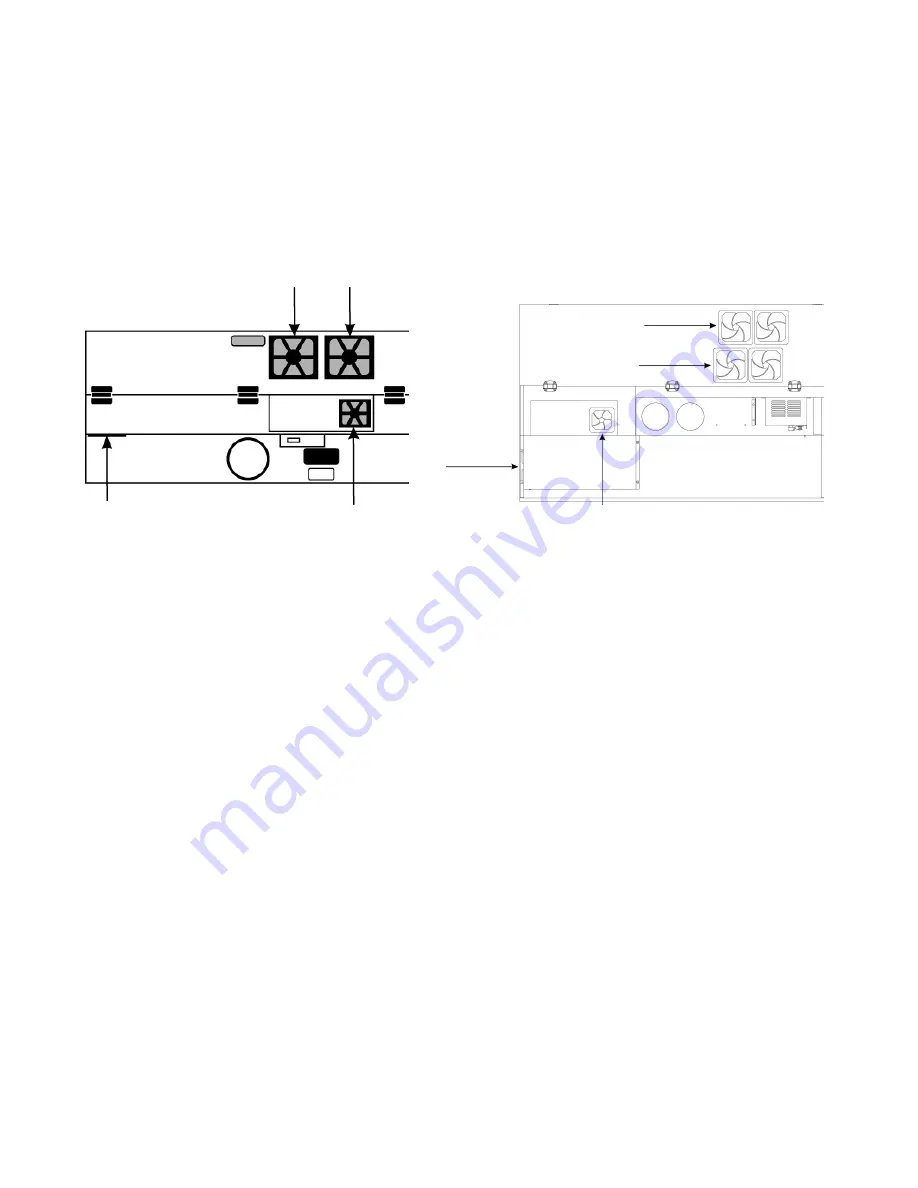
Cooling Fan Filters
This air-cooled laser system will require periodic cleaning of the cooling fan filters. Since ambient air is used to
cool a laser cartridge, the air must be filtered before it passes through the laser. Dust contamination in the intake
filter may reduce the cooling fan’s ability to keep the laser cartridge, as well as the CPU and power supply, from
overheating. An overheated laser cartridge will lose laser power during engraving and will eventually shut down
completely.
To service the filters, first turn OFF and unplug the laser system. To remove the filter(s), simply snap off the black
cover and remove the foam element. Wash the element in a soap and water solution, dry and re-install.
CAUTION:
Never operate the laser system with the cooling fan filters removed as dust and debris can build
up in the laser cooling channels, thus leading to overheating.
Adjustments and Lubrication
Periodic adjustments are not normally required. The bearings in the motion system will self-adjust to take up any
clearances as they begin to wear. The belts are fiber-reinforced and will not stretch under normal use, so periodic
tension adjustment is not necessary. All bearings in the system are sealed and do not require lubrication. Do not
lubricate the tracks that the bearings ride in. The only lubrication that may be required is to the screw threads for
the Z axis lifting mechanism. Over time contaminants may adhere to the lubricant which can cause the engraving
table to bind up. Periodically wipe off the contaminated grease with a soft cloth dampened with alcohol and apply
fresh white lithium grease to the screw threads. Never spray any degreasing solutions directly onto the threads.
Run the table up and down to work in the fresh grease.
117
Summary of Contents for PLS4.75
Page 1: ...PLS User Guide PLS4 75 PLS6 75 PLS6 150D PLS6MW www ulsinc com Revision August 2012...
Page 5: ...Chapter 1 Specifications 5...
Page 8: ...Chapter 2 Safety 8...
Page 14: ...Tamper Proof Labels Safety Labels...
Page 15: ...ULS Fiber Laser Cartridge Labels 15...
Page 16: ......
Page 17: ...PLS4 Back View 17...
Page 18: ...PLS6 Front View 18...
Page 19: ......
Page 22: ...Chapter 3 Installation 22...
Page 40: ......
Page 48: ...Chapter 4 Operation 48...
Page 83: ...Chapter 5 Accessories 83...
Page 99: ...Example Connection for PNP mode Example Connection for NPN mode 99...
Page 111: ...Chapter 6 Maintenance 111...
Page 119: ...www ulsinc com...


