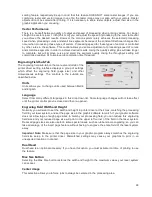
Can be Vector Cut
Select this switch if the material can be cut and enter information in the vector cut section.
Fixed Thickness
Select this switch if the material being added is only available in a particular thickness and you
want to lock the thickness to one value.
Stamp Support
Select this switch if the material supports rubber stamp mode.
Can Be Rastered
Select this switch if the material can be raster marked or engraved and enter information in the
Raster engraving section
Configuration Laser Mode
Use this section to select the laser type that the material settings you are editing apply to. There are
three types of lasers offered by ULS (not all lasers are compatible with a particular laser system)
either Fiber (1.06 micron), CO2 (10.6 micron) or CO2 (9.3 micron).
Fiber Laser Settings
If the material settings are for a fiber laser enter the fiber laser settings here.
Raster Engraving Settings
In this section of the Material Editor window you enter the laser job settings to be used for raster
engraving. These settings must be determined for your material through testing. For a deeper
explanation of these laser job settings, see the Manual Printer Driver Interface Tab section of the
manual.
Vector Engraving - Blue Pen
In this section of the Material Editor window you enter the laser job settings to be used for vector
marking. These settings must be determined for your material through testing. For a deeper
explanation of these laser job settings, see the Manual Printer Driver Interface Tab section of the
manual.
Vector Cutting - Red Pen
In this section of the Material Editor window you enter the laser job settings to be used for vector
cutting. These settings must be determined for your material through testing. If the material can be
cut by a laser you enable vector cutting by selecting the Material Can Be Vector Cut switch.
In order for the materials database to automatically calculate the necessary job settings for any
material thickness, you will need to determine job setting values for at least two different thicknesses
of the material and enter them into the cut data window. The materials database will interpolate and
extrapolate for other thicknesses as necessary up to the max possible depth which you can enter into
the max depth field. This field allows you to limit the material thickness values that can be entered at
time of printing. The more thicknesses you enter laser settings for the more accurately the materials
database can calculate the settings for other thicknesses. For a deeper explanation of these laser job
settings, see the Manual Printer Driver Interface Tab section of the manual.
54
Summary of Contents for PLS4.75
Page 1: ...PLS User Guide PLS4 75 PLS6 75 PLS6 150D PLS6MW www ulsinc com Revision August 2012...
Page 5: ...Chapter 1 Specifications 5...
Page 8: ...Chapter 2 Safety 8...
Page 14: ...Tamper Proof Labels Safety Labels...
Page 15: ...ULS Fiber Laser Cartridge Labels 15...
Page 16: ......
Page 17: ...PLS4 Back View 17...
Page 18: ...PLS6 Front View 18...
Page 19: ......
Page 22: ...Chapter 3 Installation 22...
Page 40: ......
Page 48: ...Chapter 4 Operation 48...
Page 83: ...Chapter 5 Accessories 83...
Page 99: ...Example Connection for PNP mode Example Connection for NPN mode 99...
Page 111: ...Chapter 6 Maintenance 111...
Page 119: ...www ulsinc com...


