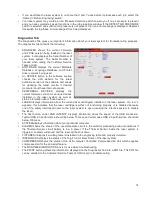
The Universal Control Panel (UCP)
When a graphic has been printed through the printer driver a laser job is created and passed to the queue in a
piece of software called the Universal Control Panel (UCP). The UCP software provides a convenient interface for
interacting with and controlling your laser system. Once you have installed the UCP, a red diamond-shaped icon
will appear in the lower right corner of your Windows taskbar. If for any reason the UCP is
deactivated, you can reactivate it by using the ULS Engraver shortcut found on your computer’s
desktop. The UCP is organized into three convenient tabs: Viewer, System and Diagnostics. The
following describes the features of each tab of the UCP.
Viewer Tab
You send jobs to your laser system by printing to
it. Anytime you print to the laser system, a job is
created and inserted into the laser systems job
queue. Selecting the viewer tab allows you to
navigate through and manage the jobs in the laser
system job queue. The viewer tab also allows you
to operate your laser system right from your
computer. The viewer tab has the following
functions:
Laser System Controls
•
The same controls found on the
control panel on your laser system are
duplicated here.
•
The green START button begins processing the selected job.
•
The PAUSE button stops the engraving process. Pressing the PAUSE button again resumes the
engraving process where it was last stopped.
•
The four navigation buttons move the focus carriage manually in X and Y.
•
The two up and down buttons move the Z-Axis table up or down.
•
The Home XY button re-homes the focus carriage to the upper right hand corner of the field.
•
The Home Z button re-homes the Z-Axis table to the bottom of the laser system.
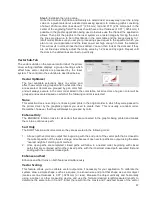
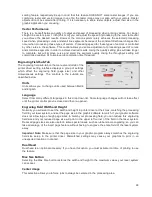
View Tab Modes
Icons allow you to select from various modes of operation for the preview screen.
Basic View (default mode)
•
The Basic View shows a preview window of the job currently selected.
•
The cursor becomes a magnifying glass (Zoom Tool) if you pass it over the preview window. Left-
clicking the mouse zooms in and right-clicking zooms out. (Mouse scroll wheel can be used in
any mode to zoom in and out.)
•
Selecting the Settings button takes you back to the printer driver interface to allow you to change
most of the settings for the job selected. Keep in mind that some settings cannot be changed
after printing from your graphics program, such as print density and vector quality. If a setting is
not adjustable after printing from your graphics program, it will be grayed out or not appear at all
when you press the settings button in the UCP.
70
Summary of Contents for PLS4.75
Page 1: ...PLS User Guide PLS4 75 PLS6 75 PLS6 150D PLS6MW www ulsinc com Revision August 2012...
Page 5: ...Chapter 1 Specifications 5...
Page 8: ...Chapter 2 Safety 8...
Page 14: ...Tamper Proof Labels Safety Labels...
Page 15: ...ULS Fiber Laser Cartridge Labels 15...
Page 16: ......
Page 17: ...PLS4 Back View 17...
Page 18: ...PLS6 Front View 18...
Page 19: ......
Page 22: ...Chapter 3 Installation 22...
Page 40: ......
Page 48: ...Chapter 4 Operation 48...
Page 83: ...Chapter 5 Accessories 83...
Page 99: ...Example Connection for PNP mode Example Connection for NPN mode 99...
Page 111: ...Chapter 6 Maintenance 111...
Page 119: ...www ulsinc com...


