Loading and Processing Materials
Before laser processing material, you will need to load material into the laser system and then focus the laser
system onto the top surface of the material.
Important Optics Notice
The PLS6MW uses special Multi-Wavelength compatible optics which are NOT interchangeable with standard
CO
2
laser optics. Only use lens kits marked MW (Multi-Wavelength) when operating you PLS6MW laser system.
All MW optics are compatible with all laser wavelengths offered for the PLS6MW laser system. There is no need
to change optics when switching between different laser types in a PLS6MW laser system.
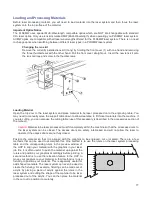
Changing the lens kit
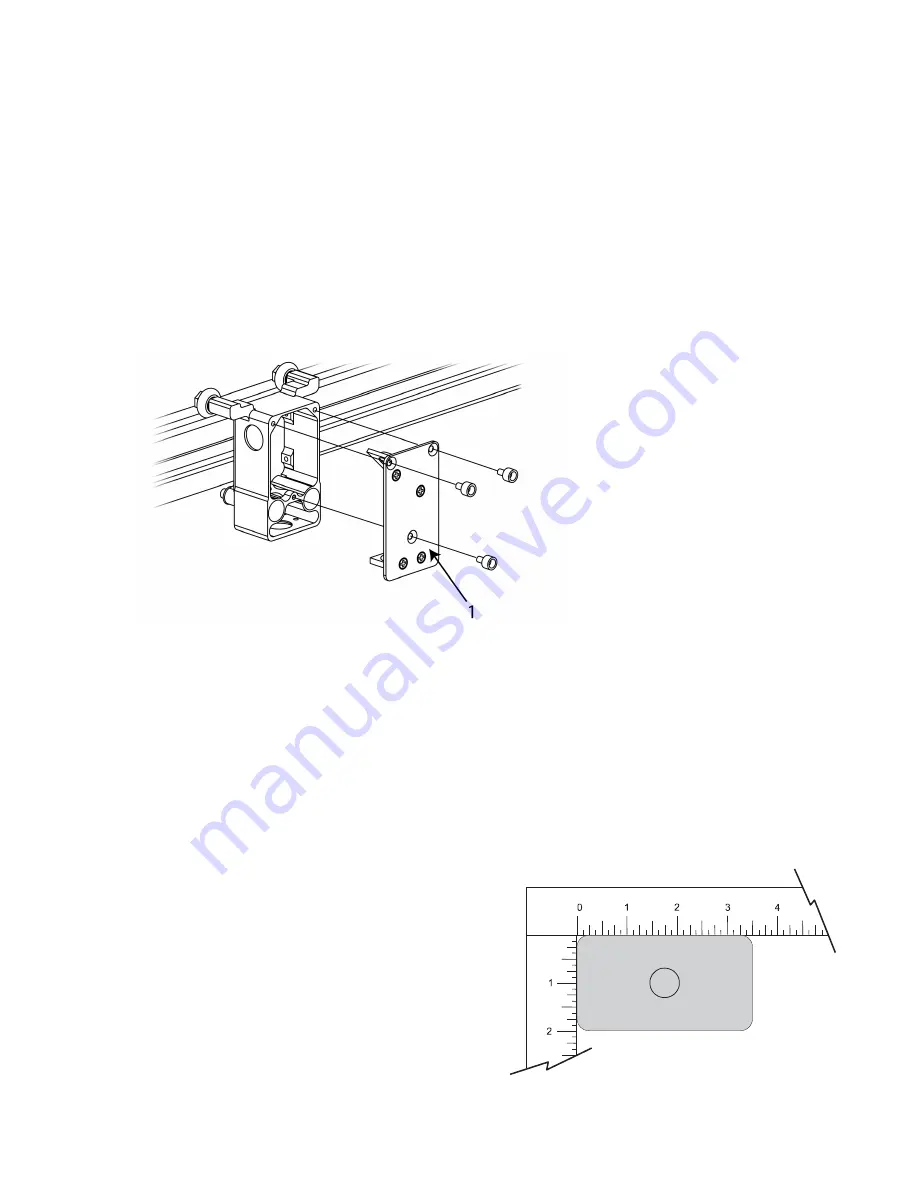
Remove the currently installed lens kit (if any) by holding the front cover (1) with one hand and removing
the three thumbscrews with the other hand. Pull the front cover straight out. Insert the new lens kit onto
the lens carriage and screw in the thumbscrews.
Loading Material
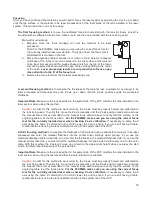
Open the top door to the laser system and place material to be laser processed onto the engraving table. You
may need to manually move the support table down to allow clearance to fit thicker materials into the machine. If
you are cutting, you can also use the cutting table (use of this accessory is described in the accessories section of
the manual).
Caution:
Material to be laser processed must fit completely within the machine so that the all access doors to
the laser system can be closed. The access doors are safety interlocked and will not allow the laser to
operate if the access doors are not fully closed.
Position the material so that it is aligned with the graphics to be engraved, cut or marked. There are a few
methods that can be used to accomplish this. One method is to use the rulers on the laser system processing
table and the corresponding rulers in the preview window of
the UCP to align your material with the graphics in your laser
job file. It is often useful to push the material up against the
rulers and position your graphics accordingly before printing. A
second method is to use the relocation feature in the UCP to
move your graphics to your material. A third method is to use
fixturing to position your material. This is especially useful for
odd shaped materials. The laser system can even be used to
create the fixturing. For example, fixturing can be made out of
acrylic by placing a piece of acrylic against the rulers in the
laser system and cutting the shape of the material to be laser
processed out of the acrylic. You can then place the material
in the cut out to position it accurately.
77
Summary of Contents for PLS4.75
Page 1: ...PLS User Guide PLS4 75 PLS6 75 PLS6 150D PLS6MW www ulsinc com Revision August 2012...
Page 5: ...Chapter 1 Specifications 5...
Page 8: ...Chapter 2 Safety 8...
Page 14: ...Tamper Proof Labels Safety Labels...
Page 15: ...ULS Fiber Laser Cartridge Labels 15...
Page 16: ......
Page 17: ...PLS4 Back View 17...
Page 18: ...PLS6 Front View 18...
Page 19: ......
Page 22: ...Chapter 3 Installation 22...
Page 40: ......
Page 48: ...Chapter 4 Operation 48...
Page 83: ...Chapter 5 Accessories 83...
Page 99: ...Example Connection for PNP mode Example Connection for NPN mode 99...
Page 111: ...Chapter 6 Maintenance 111...
Page 119: ...www ulsinc com...


