16
on the material being used, the type of engraving or cutting being performed, and the depth of
material removal required.
There are two methods for adjusting the processing speed:
1.
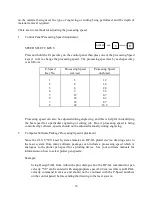
Control Panel Processing Speed Adjustment:
SPEED SELECT KEYS
P-SPEED
AND
1
8
THROUGH
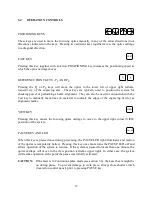
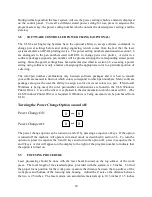
Press and hold the P-speed key on the control panel then press one of the processing Speed
keys (1 to 8) to change the processing speed. The processing speed set by each speed key
is as follows:
P-Speed
Key No.
Processing Speed
(cm/sec)
Processing Speed
(inch/sec)
1
3
1.2
2
4
1.6
3
6
2.4
4
9
3.5
5
12
4.7
6
16
6.3
7
22
8.7
8
42
16.5
Processing speed can also be adjusted during engraving, and this is helpful in identifying
the best speed for a particular engraving or cutting job. But, if processing speed is being
controlled by software, speeds should not be adjusted manually during engraving.
2.
Computer Software Package Processing Speed Adjustment
Since the ULS 1750Y Laser System emulates an HP-GL plotter device, drawings sent to
the laser system from many software packages can include a processing speed which is
analogous to the plotter pen speed for a plotting device. See your software manuals for
information on how to select plotter pen speeds.
Example:
Using DesignCAD, from within the plot dialogue box the HP-GL command for pen
velocity "VS" can be entered with an appropriate speed 1-42 cm/sec (this is an HP-GL
velocity command in cm/sec and should not be confused with the P-Speed numbers
on the control panel) before sending the drawing to the laser system.


