35
OTE:
Lower display should be flashing.
f.
Using keypad, enter 1000.
g.
Depress and release keypad "Pulse Rate".
h.
Depress and release keypad "Mode" until lower left of display is "C".
i.
Depress and release keypad "Store".
OTE:
While aligning the laser, it may be necessary to raise or lower the pulse width slightly to
ensure that a beam shows up on the thermal paper and tape used in the alignment
procedure without setting the paper or tape on fire.
19. Place a small piece of thermal paper in front of the laser outlet from the shutter block
assembly, open the shutter and press the TEST button on the control panel. Insure that a
beam is present. The beam should produce a small mark on the thermal paper.
OTE:
Use the TEST button to turn the laser on and off as necessary. Depressing test button
turns on laser, depressing again turns off laser.
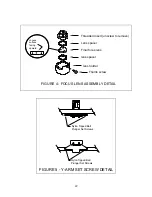
20. If no beam is present, loosen the set screws on the #1 mirror just enough to turn the mirror
with some friction and adjust mirror #1 by turning it one way or the other until a beam
appears on the thermal paper. If unable to obtain a beam, increase the pulse width by 5 and
attempt to find the beam again by adjusting the #1 mirror. If a beam still does not appear,
contact a Universal Laser Systems Technician.
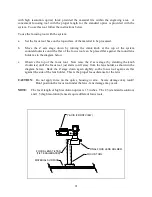
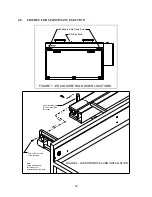
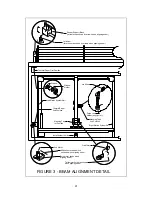
21. Place a piece of thermal paper in front of mirror #2 (reference Figure 3) and center the
beam on mirror #2 by adjusting mirror #1. Mirror #1 is adjusted in one axis by swiveling
the mirror itself and it is adjusted in the other axis by swiveling the shutter block in which
the mirror is mounted. The shutter block is adjusted by loosening the set screws which
hold the shutter block to the front of the laser just enough to turn the block with some
friction.
22. Turn the beam off by pressing the TEST button.
23. Remove and set aside mirrors #3 and #4 and the focus lens (see Optics Cleaning Section
4.3 for details on removal of mirrors and optics).
24. Place a short piece of brown masking tape over the beam entrance hole to the mirror #4
holder (reference Figure 3). Indent the tape with a finger to make the inner circle visible in
the tape.

