79
4.
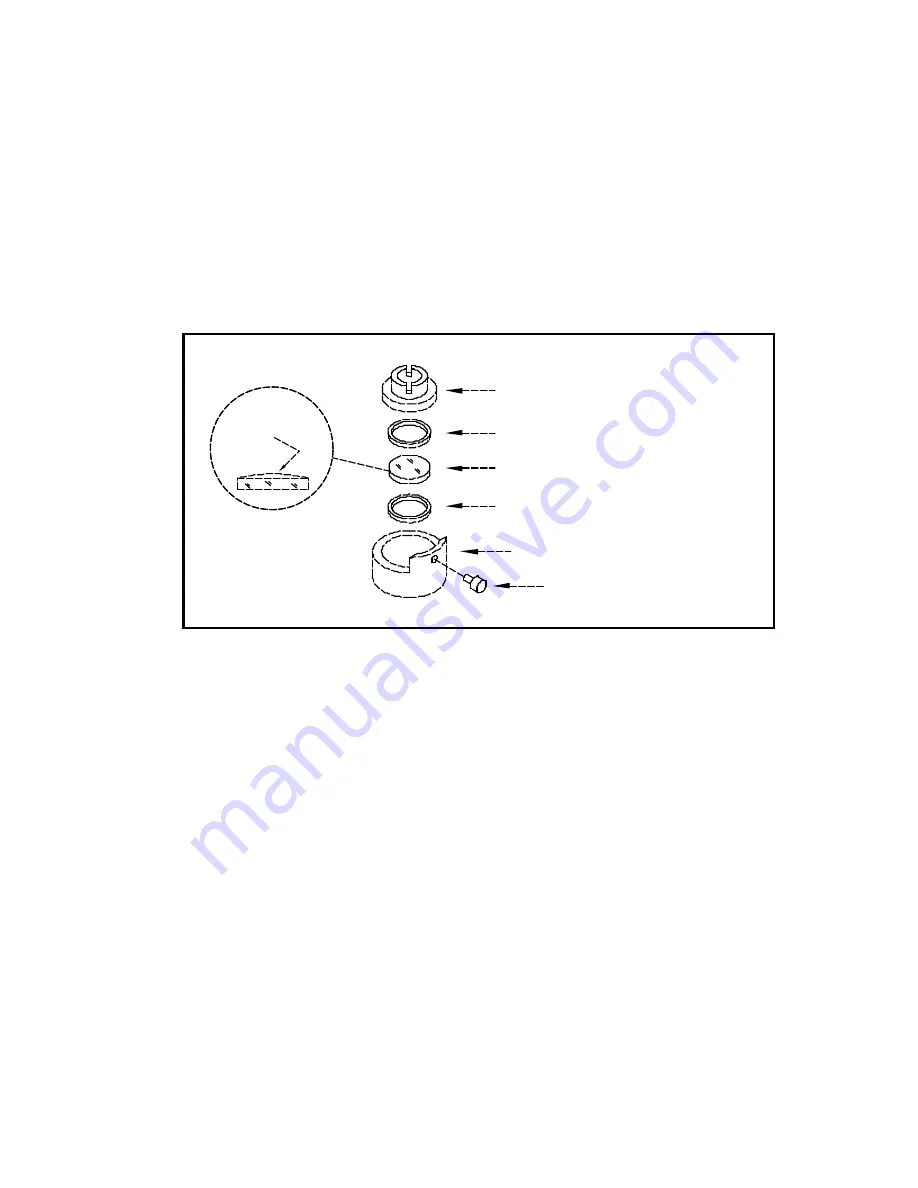
Sit down in front of a table and remove the lens from the lens holder by holder it in your left
hand and a clean sheet of lens tissue flat in your right hand. Carefully turn the lens holder
upside down onto a piece of the lens tissue which came with the system so that lens and
spacers drop out onto the tissue.
5.
Inspect lens spacers and clean them if necessary with a swab and lens cleaner.
6.
Hold the lens by its edges using lens tissue, and with a stream of lens cleaning solution from
the small plastic wash bottle that came with the system, flush both surfaces of the lens.
Threaded insert (unscrew to remove)
Lens spacer
Lens
Lens spacer
Lens holder
Thumb screw
convex
surface
facing
upward
7.
Apply some of the lens cleaning solution to one surface of the lens. Let it sit for
approximately one minute and then gently wipe the surface using several sheets of lens tissue
soaked with lens cleaning solution.
8.
Dry that side of the lens using dry lens tissue and repeat the process to clean the other side
of the lens.
NOTE:
Never reuse the lens tissue twice. Dust build-up on the tissue may scratch the surface
of the lens.
9.
Inspect the lens. If it is still dirty, repeat the cleaning procedure until it is clean.
10. Place one of the spacers into the lens holder and gently insert the lens into the lens holder
ensuring that the curved (convex) side of lens is facing upward away from the spacer. Place
the remaining spacer on top of the lens and screw the threaded insert snugly into place.
CAUTION:
Over-tightening the threaded insert can cause the lens to break.
11. Carefully slide the lens holder assembly back onto the optics carriage on the rail.
Summary of Contents for ULS-25
Page 3: ...3 APPENDIX E SOFTWARE ANOMALIES E...
Page 14: ...14 Sample Exhaust System Layouts...
Page 62: ...62...
Page 82: ...A APPENDIX A WARRANTY...

