31
5.
Check to make sure the laser end plate (which contains the solenoid) is on tight.
6.
Now perform a beam alignment on the system. After the beam alignment is finished, the
top cover can be reinstalled.
4.6
BEAM ALIGMET
Tools required: Thermal Paper (available from ULS), Masking Tape, 1/16, .050" Allen
Wrenches.
1.
Top Enclosure Removal:
a.
To remove the top cover, unclasp the four latches that hold the top cover down. Two
latches can be found on the right side of the machine and two can be found on the left
side of the machine.
b.
Ensure power cord is removed then gently lift the cover up and off of the machine.
This will require two people to accomplish. Watch out for the one inch mirror in the
front left corner of the machine and the electronics and water lines on the right side of
the machine.
2.
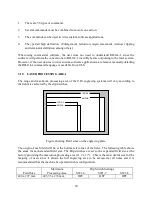
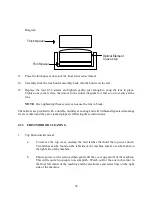
The defeat tool must be inserted into its receptacle in the center of the machine, behind the
front frame of the machine (reference Figure 13).
3.
Remove the #3 and #4 mirrors and the final focus lens.
CAUTIO
DAGER
Invisible laser radiation is radiated from this machine when the top cover is removed and
the interlock is defeated, no protection from injury is in place. Avoid eye or skin exposure
to direct or scattered radiation. An approved laser safety goggle MUST be worn during
alignment. Keep hands, arms, and eyes out of beam path as clothing and skin can be
burned.
4.
Plug in the machine after removing the top enclosure.
5.
Close shutter switch and turn on machine.
6.
Set laser power:
a.
Depress and release "Program Select" on the keypad.
b.
Depress and release "Pulse Width" on the keypad.


