34
17. The P2 dot at this point will completely cover the P1 dot (no figure eights or other such
patterns), thus appearing as a single dot. If the combined dot is centered side to side, then
move on to Step 17. If the combined dot is off center to the left of the opening leading to
the #3 mirror, then the #2 mirror mount must be moved towards the front of the machine
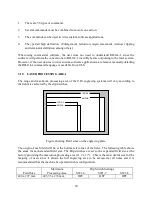
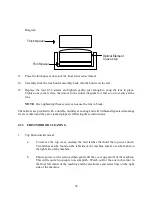
slightly. First, look down at the #2 mirror (see Figure 12). Loosen the socket head cap
screw holding the mirror bracket to the left motion system rail. Slide the mirror bracket
toward the front of the machine about half the distance you want the combined dot on the
masking tape to move. Tighten down the socket head cap screw, making sure that the lip
on the mirror bracket is flat against the left motion system rail. Recheck the P1 and P2
dots using a fresh piece of tape. If the dots are not directly on top of each other, then adjust
as in Steps 13 and 14. When the dots have been combined, check the combined (P1 and
P2) dot for center. If the dot is centered left and right in the opening, then go on to Step 16.
If the dot needs to be moved, adjust per Step 15 until the combined dot is centered left and
right.
18. At this point, the P1 dot is covered by the P2 dot. This combined dot (P1 and P2) will be
centered left and right in the opening leading to the #3 mirror. If the combined dot is also
perfectly centered vertically, go to Step 18.
In this step, the combined dot will be centered vertically in the #3 mirror opening. If the
combined dot is low in the opening, then the shutter block must be turned slightly
counterclockwise to raise where the P1 and P2 dots are hitting. To do this, loosen the two
nylon tip set screws holding down the shutter block. With the system at P1, turn on the
"Test" button. Move the shutter block counterclockwise until the P1 dot is centered in the
#3 mirror opening. Tighten down the set screws until snug and turn off the "Test" button.
Change the tape and burn a new P1 dot. The P1 dot should be centered. Keep adjusting the
shutter block until the P1 dot is centered. When the P1 dot is centered, tighten down both
of the shutter block set screws then burn a P2 dot to make sure the #2 mirror is still aligned
properly, i.e., P1 and P2 are on top of each other and centered left and right in the #3 mirror
opening. Adjust the mirror knobs and mirror bracket as necessary (Steps 13-15) to line up
P1 and p2.
19. P1 and P2 dots have now been aligned all the way to the third mirror. At this point, first
clean off all tape and residue. Wipe out the #3 mirror holder and tube with swabs and
alcohol. Wipe off the 45
o
face where the #3 mirror is seated, then install a clean #3 mirror
(the #3 and #4 mirrors are interchangeable).
OTE:
Make sure that when installing the #3 mirror, that is sits flat on the 45
o
surface on the #3 mirror holder.
Place masking tape over the hole in the focus lens carriage leading to the #4 mirror. Burn
P1 and P2 dots in the masking tape to check for alignment. If the P2 dot cannot be located
on the tape, first try bumping up the Pulse Width setting 5 to 15 units. It is also possible
that the beam is way off, so use a piece of thermal paper (with beam on) to find the beam.

