40
1.
Turn off the power and remove the power cord.
2.
Remove the top enclosure.
a.
To remove the top cover, unclasp the four latches that hold the top cover down. Two
latches can be found on the right side of the machine and two can be found on the
left side of the machine.
b.
Ensure power cord is removed then gently lift the cover up and off of the machine.
This will require two people to accomplish. Watch out for the one inch mirror on the
front left corner of the machine and the electronics and water lines on the right side
of the machine.
3.
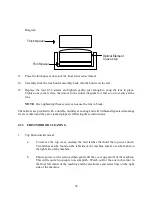
Remove the two Phillips tension screws from the back side of the Y rail rear support
(reference Figure 6).
4.
Loosen the two Phillips binding screws on sides of Y rail at the rear support (reference
Figure 6).
5.
Remove the two black screws located below the front Y axis motor (reference Figure 4).
6.
Carefully tilt motor so top of motor (pulley end) tilts towards rear of machine. The Y axis
belt should become slack.
7.
Carefully remove belt from around sprocket on Y axis motor and rear pulley at the back of
the Y rail.
OTE:
Rear pulley may have to be moved towards the middle of the Y rail slightly to
loosen belt (do not force).
8.
Remove belt from the focus lens carriage by sliding the belt straight down.
9.
Install new belt around rear pulley.
10. Install belt around sprocket at motor.
11. Feed belt through belt holder on the focus lens carriage.
12. Slide motor back into place and reinstall black screws in motor. Use Locktite 242 on
screws. Snug them only enough to hold the motor in place (reference Figure 4).
13. Reinstall tension screws in rear support but leave them loose.
14. Slide the final focus lens carriage to the front.

