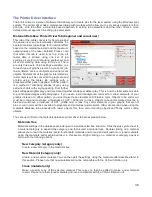
De
fi
ne Job (material only)
Add a sub-material record underneath the main record. This sub-material record captures all user-defined
settings in the materials tab GUI which are normally not part of a standard material record, including
fixture type, material thickness, printing direction, vector sliders and intensity adjustments.
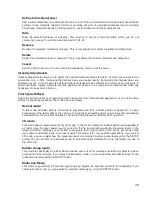
Hide
Hide the selected material or category. This function is useful to hide materials which you do not
commonly process. To un-hide materials, push CTRL-F2.
Rename
Rename the selected material or category. This is only allowed for custom materials and categories.
Delete
Delete the selected material or category. This is only allowed for custom materials and categories.
Cancel
Exits the right-click menu. You can also click outside the menu to exit the menu.
Intensity Adjustments
Intensity Adjustments allows you to adjust the nominal material settings for raster, vector mark and vector cut
operations up to +/-50%. Increasing the intensity gives you deeper results. Decreasing the intensity gives you
shallower results. In most cases the default material settings will be sufficient and it will not be necessary to
adjust intensities. Always start with intensity adjustments at zero on a scrap piece of material and make any
necessary changes after a trial run
Print Special E
ff
ects
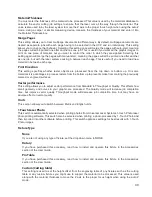
Select the print mode for your custom material, normal for most materials and application, or one of the other
modes for special applications. The modes work as follows:
Normal mode:
In this mode all raster data is converted to grayscale and then a dither pattern is applied to it. Laser
processing of the raster data is then done at a fixed laser job setting (laser power level and processing)
calculated from the materials database. This is the default recommended mode of operation.
3D mode:
This mode affects raster elements of your image. In this mode, instead of a dither pattern being applied to
all raster data, the laser power level is varied on the fly in accordance with the grayscale levels in the
image (multicolor bitmaps are converted to grayscale first). Lighter parts of the image will receive less
laser power and darker parts more laser power. This mode is for very specific applications. If you select
3D mode, you can adjust how the grayscale levels are mapped to laser power levels using the SETUP
button. You can contact our applications lab at Universal Laser Systems for more information on use of
the 3D mode.
Rubber stamp mode:
This mode is specifically for rubber stamp creation and is used for creating shoulders on characters when
processing rubber stamps. If you select rubber stamp mode, you can adjust the shoulder settings for the
rubber stamp mode using the SETUP button.
Reduction Mode:
This mode is specifically for barcode engraving and adjusts the barcode elements for readability. If you
select reduction mode, you can adjust the reduction settings by using the SETUP button.
39
Summary of Contents for VLS2.30
Page 1: ...VLS Desktop User Guide VLS2 30 VLS3 50 www ulsinc com Revision 2012 08...
Page 5: ...Chapter 1 Specifications 5...
Page 8: ...Chapter 2 Safety 8...
Page 9: ......
Page 15: ......
Page 16: ......
Page 19: ...Chapter 3 Installation 19...
Page 36: ...Chapter 4 Operation 36...
Page 62: ......
Page 68: ...Chapter 5 Accessories 68...
Page 80: ...Example Connection for PNP mode Example Connection for NPN mode 80...
Page 92: ...Chapter 6 Maintenance 92...
Page 99: ...www ulsinc com...


