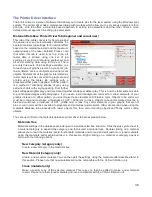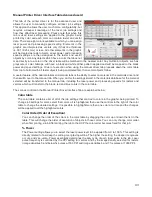
Fiber Laser Settings
If the material settings are for a fiber laser enter the fiber laser settings here.
Raster Engraving Settings
In this section of the Material Editor window you enter the laser job settings to be used for raster
engraving. These settings must be determined for your material through testing. For a deeper
explanation of these laser job settings, see the Manual Printer Driver Interface Tab section of the
manual.
Vector Engraving - Blue Pen
In this section of the Material Editor window you enter the laser job settings to be used for vector
marking. These settings must be determined for your material through testing. For a deeper
explanation of these laser job settings, see the Manual Printer Driver Interface Tab section of the
manual.
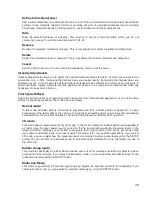
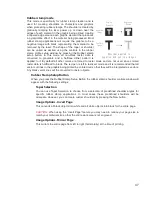
Vector Cutting - Red Pen
In this section of the Material Editor window you enter the laser job settings to be used for vector
cutting. These settings must be determined for your material through testing. If the material can be
cut by a laser you enable vector cutting by selecting the Material Can Be Vector Cut switch.
In order for the materials database to automatically calculate the necessary job settings for any
material thickness, you will need to determine job setting values for at least two different thicknesses
of the material and enter them into the cut data window. The materials database will interpolate and
extrapolate for other thicknesses as necessary up to the max possible depth which you can enter into
the max depth field. This field allows you to limit the material thickness values that can be entered at
time of printing. The more thicknesses you enter laser settings for the more accurately the materials
database can calculate the settings for other thicknesses. For a deeper explanation of these laser job
settings, see the Manual Printer Driver Interface Tab section of the manual.
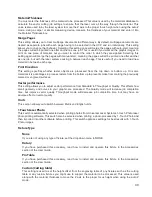
Apply Button
The APPLY button saves all changes made to the printer driver settings.
Default Button
The Default button will reset the driver settings to factory default values. You may abort these changes by
selecting Cancel; selecting OK or APPLY will approve the changes.
Load Button
To recall a snapshot of the printer driver settings that have been previously saved to a .LAS file using the save
button, select on the “Load” button and choose the desired .LAS settings file from the dialog box. The settings
that are currently on screen will be replaced by the settings from the .LAS file. You may abort these changes
by selecting Cancel; selecting OK or APPLY will approve the changes.
Save Button
The save button brings up a dialog box which allows you to save a snapshot of the laser job settings which
you can then reload at a later date. All settings will be stored in a file with “.LAS” extension. Verify that you
have pressed the SET button before you save any .LAS files to ensure that changes to the color table are
properly registered.
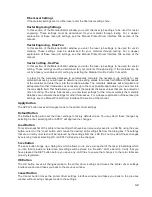
OK Button
The OK button saves all changes made to the printer driver settings and closes the printer driver settings
interface window and takes you back to the previous window.
Cancel Button
The Cancel button closes the printer driver settings interface window and takes you back to the previous
window without saving changes made to the settings.
42
Summary of Contents for VLS2.30
Page 1: ...VLS Desktop User Guide VLS2 30 VLS3 50 www ulsinc com Revision 2012 08...
Page 5: ...Chapter 1 Specifications 5...
Page 8: ...Chapter 2 Safety 8...
Page 9: ......
Page 15: ......
Page 16: ......
Page 19: ...Chapter 3 Installation 19...
Page 36: ...Chapter 4 Operation 36...
Page 62: ......
Page 68: ...Chapter 5 Accessories 68...
Page 80: ...Example Connection for PNP mode Example Connection for NPN mode 80...
Page 92: ...Chapter 6 Maintenance 92...
Page 99: ...www ulsinc com...

