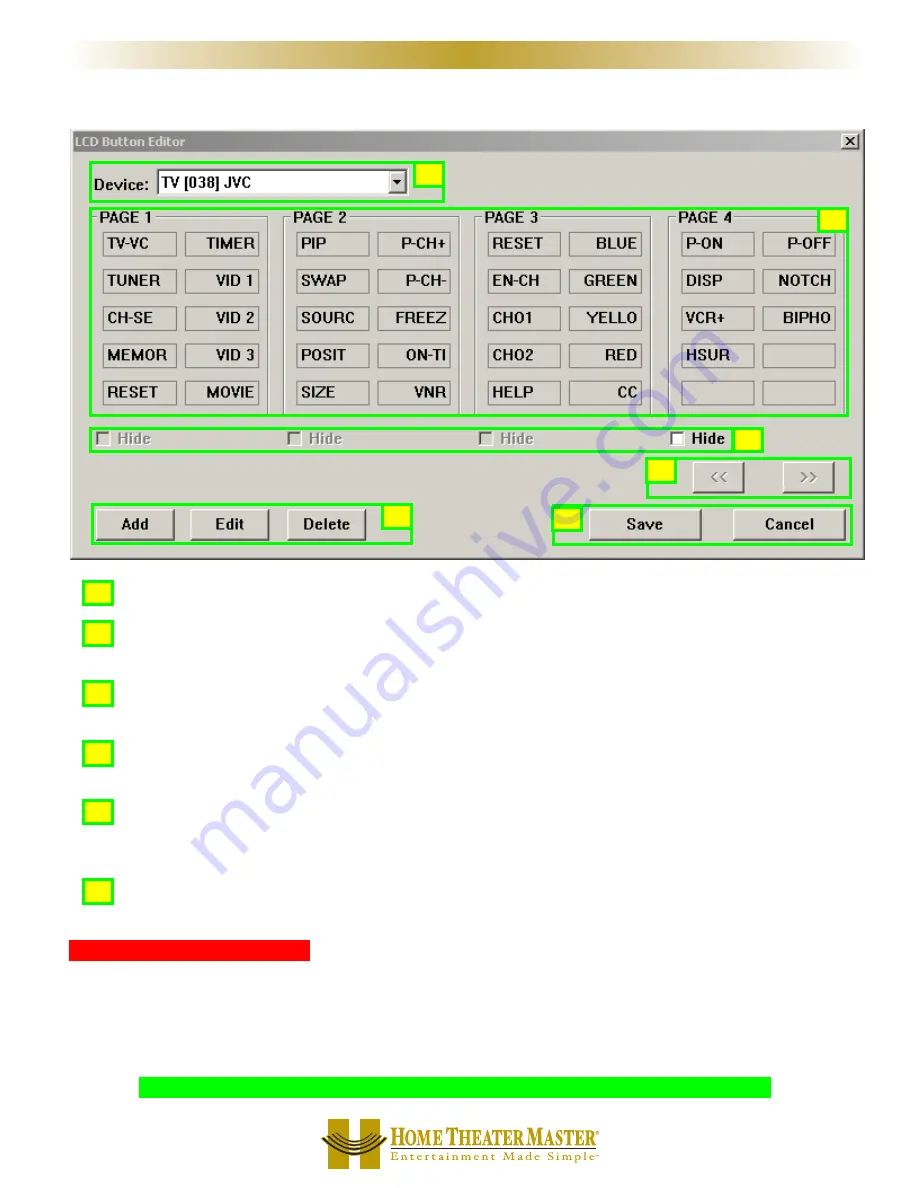
Using LCD Button Editor
D
De
evviicce
e L
Liisstt -- Select the device whose pages you would like to edit.
B
Bu
utttto
on
n L
Laab
be
ellss -- Select the button you would like to rename by double clicking.To delete, single click then
click on the Delete button in E.
H
Hiid
de
e P
Paagge
e C
Ch
he
ecck
k B
Bo
ox
xe
ess -- You must hide pages back to front. If you want page 1 hidden, move the buttons to
page 4, then hide page 4. See Hiding pages section on the next page for more detail on HIDDEN pages.
S
Sccrro
ollll P
Paagge
ess -- Since you can only view four pages at a time, the scroll pages buttons become active in FAV,
which has five pages.
A
Ad
dd
d,, E
Ed
diitt &
& D
De
elle
ette
e B
Bu
utttto
on
nss -- Select the button location where you would like to add, edit or delete a button,
then simply single click on the desired action. In fact, there is no difference in function between Add and Edit.
There are two buttons to prevent confusion.
S
Saavve
e aan
nd
d C
Caan
ncce
ell -- Only by clicking on SAVE, will your work be saved. No matter how many buttons you
move or edit, hitting CANCEL will discard all the work you have done.
L
Laab
be
elliin
ngg aan
nd
d D
De
elle
ettiin
ngg B
Bu
utttto
on
nss
Use the LCD Button Editor to correct labels for LCD buttons on each of the devices you’ve created. Label empty
buttons for codes that you need to learn.To LABEL a button, SELECT it by single clicking on it, then begin typing.
Delete a button by selecting it with a single click and then clicking on either the DELETE key on your keyboard or
the Delete button. Pressing the TAB or ENTER buttons on your keyboard will select the next position.
T
TIIP
P -- IIff yyo
ou
u llaab
be
ell aa b
bu
utttto
on
n o
on
n aa b
bllaan
nk
k p
paagge
e,, aa n
ne
ew
w p
paagge
e w
wiillll b
be
e aad
dd
de
ed
d aafftte
err yyo
ou
u ssaavve
e..
2
23
3
S
Stte
ep
p b
byy S
Stte
ep
p T
Tu
utto
orriiaall
M
X
8
0
0
M
X
7
0
0
M
X
2
0
0
R
E
M
O
T
E
S
A
A
F
F
E
E
D
D
C
C
B
B
A
A
B
B
C
C
D
D
E
E
F
F


