Page 9
MRF-300 B
ASE
S
TATION
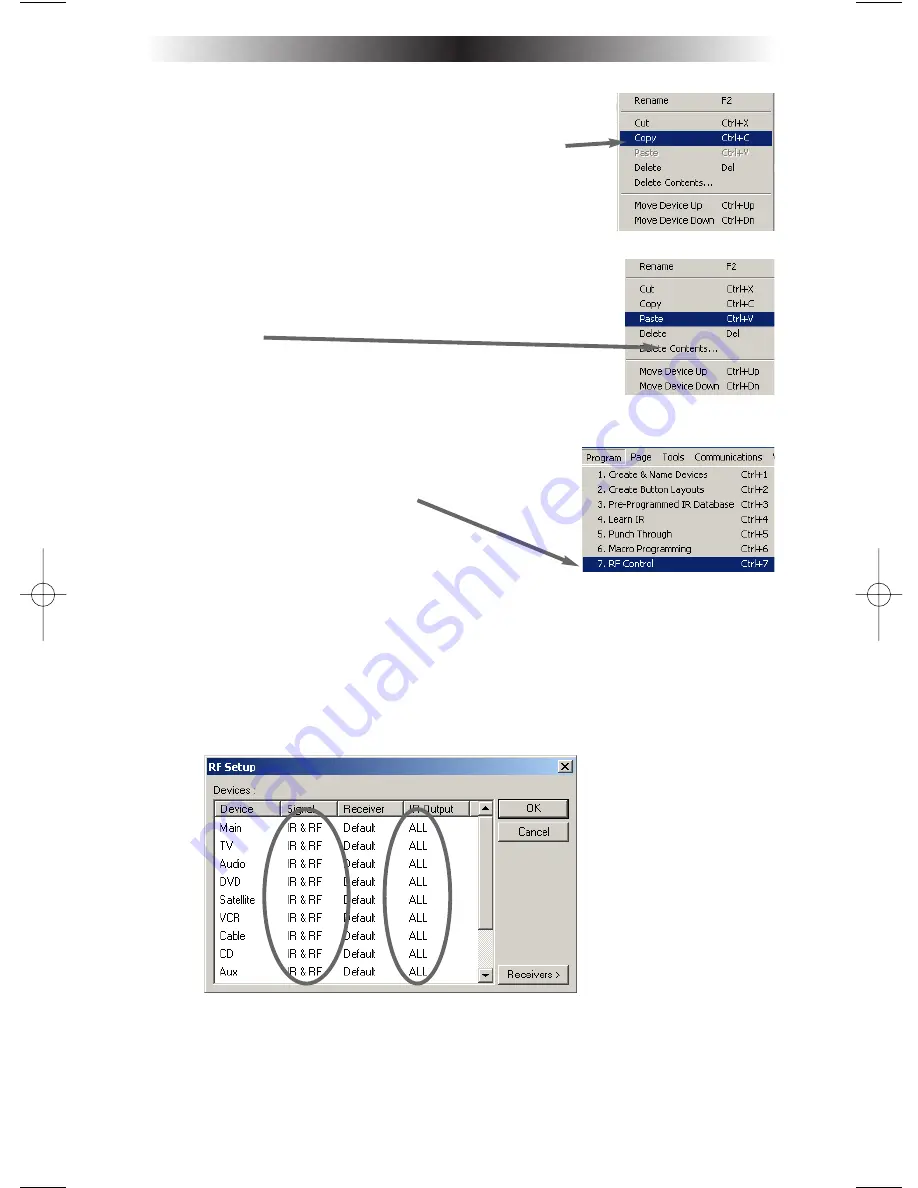
Step 3 - Copy The Programmed Device
In tree view, right click on the device you programmed.
From the context menu that appears, select COPY.
Step 4 - Paste The Programmed Device
In tree view, right click on the first device that is NOT
PROGRAMMED. From the context menu that appears,
select PASTE.
Repeat this PASTE on all of the other identical device. Save
your work.
Step 5 - Open the RF Setup Window
The RF Setup window opens after selecting RF
Control from the Program Menu.
The RF Setup window is composed of a “spread sheet” of options for EACH
of your devices. By looking at the Signal column, you can see that the factory
default programming sets all of the devices to send both IR and RF commands.
If you look at the column for Flashers, you can see that the default sends IR
commands for all devices to ALL of the flashers. Both options must be
changed for identical components.Additionally, if you are not using it, you may
wish to disable the Front Blaster (see page 7 for directions).
Step 6 - Adjust the Signal For Each of the Identical Devices
The RF Setup window enables you to adjust the Signal output for each device
individually, by clicking on the intersection of a row and a column and then
selecting
RF
from the three options shown in the pull down list box .
MRF-300 Manual.qxd 1/14/2005 12:40 PM Page 9


