
for 30 seconds. The next step must be
entered while the LED is on.
STEP3
Press the [CH
5
] or [CH
6
] button one at
a time or keep it pressed. The remote
will emit a series of Power ON/OFF
code signals. Release the [CH
5
] or [CH
6
]
button as soon as the equipment turns off.
*Note :
You can verify that you have selected the
correct code by pressing the [POWER]
button. The equipment should turn back
on. Then try all of the functions on the
remote control (i.e. volume, mute, etc.) to
ensure you have the correct code. If any of
the functions do not operate as they should,
repeat the instructions from STEP 3 above
to continue the Auto Search Method.
STEP4
Press the same [DEVICE] button to store
the code. The Device LED will blink twice
to confirm that the code has been stored.
E. The Learning Method
STEP1
Press the [DEVICE] button (TV,AUD, DVD,
or AUX) to be programmed and the
[ASPECT] buttons simultaneously for 3
seconds until the Device LED light turns on.
STEP2
Point the
PHAZR-5
at the other remote,
head-to-head, 1 or 2 inches apart.
STEP3
Press the button on the
PHAZR-5
that
you want to teach a command to. For
example, press the [MUTE] button to
learn a command to the [MUTE] button.
STEP4
Press and hold the button on the other
remote that corresponds to the command
you want to teach until the
PHAZR-5
Device LED light blinks twice.
*Note :
The LED will blink 5 times if there
was an error in the learning process.
Repeat STEPS 3 and 4 if this occurs.
Continue learning other buttons by
repeating STEPS 3 and 4.
STEP5
Once you have completed teaching the
PHAZR-5
all desired commands for the
component, save the learned commands
by pressing the [DEVICE] and [ASPECT]
buttons simultaneously until the Device
LED blinks 3 times. Now test all of the
buttons to make sure they operate correctly.
F. Erasing a Single Learned Command
STEP1
Press the [DEVICE] and [ASPECT] buttons
simultaneously for 3 seconds until the
Device LED light turns on.
STEP2
Press and hold the button you want to
erase for 3 seconds. The Device LED
will blink twice to confirm the erasure.
STEP3
To exit, press and hold both the [DEVICE]
and [ASPECT] buttons simultaneously
until the Device LED blinks 3 times.
G. Erasing All Learned Commands
from One Device
STEP1
Press the [DEVICE] and [ASPECT] buttons
simultaneously for 3 seconds until the
Device LED light turns on.
STEP2
Press and hold both the [DEVICE] button
you want to erase and the [PAUSE] button
for 5 seconds. The Device LED will blink
twice to confirm the erasure.
STEP3
To exit, press and hold both the [DEVICE]
and [ASPECT] buttons simultaneously
H.To Identify the 3-Digit Code
Programmed for a Device
STEP1
Press the appropriate [DEVICE] button
and the [OK/SEL] button simultaneously
for three seconds. The device LED will
turn on for 30 seconds. The next step
must be performed while the LED is on.
STEP2
Press the [INFO] button. The device LED
will blink a number of times indicating
the number of each digit for the code.
Each digit is separated by a one second
interval of the LED being off.
Example :
One blink, (pause) three blinks,
(pause) eight blinks indicates the
code number 138.
*Note :
Ten blinks indicates the number 0.
I. Programming the AUX Device
You can take advantage of the AUX function to
program a devices such as a media PC, gaming
console or satellite radio receiver. Follow the
instruction in section C to program an AUX
device. You can also program the AUX button for
a second TV, DVD or Audio Device. To do this
follow the instructions below.
STEP1
Turn on the 5th device you want to
program (TV, AUD, DVD, etc.).
STEP2
Press the [AUX] button and the
[OK/SEL] button simultaneously for 3
seconds. The [AUX] device LED will
turn on for 30 seconds.
STEP3
Press the [Device] button For the type of
device you want to setup. Point the remote
control toward the device and enter the
3-digit code number assigned to your brand.
*Note :
To program a second TV press TV, etc.
STEP4
When the equipment turns off verify
that you have selected the correct
code by pressing the [POWER] button.
The equipment should turn back on.
Then try all of the functions on the
remote control (i.e. volume, mute, etc.)
to ensure you have the correct code.
If any of the functions do not operate as
they should, enter the next 3-digit code
number from the brand list.
STEP5
Once you have found the correct 3-digit
code, save it by pressing the [AUX] button
one more time. The [AUX] LED light will
blink twice to confirm the code was stored.
J. Programming the System On/Off Button
This allows you to program the System On/Off
button so it can send up to five power On/Off
commands with one button press.
STEP1
Press the [STB] button.
STEP2
Press the [SYSTEM ON/OFF] button
and the [OK/SEL] button simultaneously
for 3 seconds. The [STB] button will
turn on for 30 seconds.
STEP3
Press the first [DEVICE] button you want to
store in the [SYSTEM ON/OFF] button and
then the [POWER] button. Repeat this for
other Components until you have stored
all the desired power commands into the
[SYSTEM ON/OFF] button.
STEP4
Press the [CH
5
] button to save the
power commands you stored. The
[STB] button will blink twice to confirm
the commands have been saved.
K. Programming Volume Control
Volume and Mute control are factory programmed
to automatically transfer to the respective
Device mode You select, as follows:
STB
: STB
T V
: TV
AUD
: AUD
DVD
: TV
AUX
: AUX
If you wish to store the TV volume control in STB
mode, use the following steps.
STEP1
Press the [OK/SEL] button and [STB]
button simultaneously for three
seconds. The device LED will turn on
for 30 seconds. The next step must
be performed while the LED is on.
STEP2
Press the [VOL
5
] button. The device
LED will blink.
STEP3
Press [TV] button. The device LED will
blink twice to confirm the programming.
*Note :
To return STB device to STB volume
repeat steps above replacing [TV] with
[STB] in Step 3.
L. Programming Channel Control
You can program the channel controls (Channel
Up, Channel Down, Last and Numbers) from
one Device to operate in another Device mode.
Default channel control settings on the remote
control are as follows:
STB
: STB
T V
: STB
AUD
: AUD
DVD
: DVD
AUX
: AUX
If you wish to store the TV channel controls in TV
mode, use the following steps.
STEP1
Press the [OK/SEL] button and [TV] button
simultaneously for three seconds. The
device LED will turn on for 30 seconds.
The next step must be performed while
the LED is on.
STEP2
Press the [VOL
6
] button. The device
LED will blink.
STEP3
Press [TV] button. The device LED will
blink twice to confirm the programming.
*Note :
To return TV device to STB channel
repeat steps above replacing [TV] with
[STB] in Step 3.
M. Programming a ‘Macro’ button.
If your remote model has custom-programmable
Macro buttons available(See Section 4), they can
be programmed to act as a 'Macro' or Favorite
Channel button in STB mode. This allows you to
program up to five 2-digit channels, four 3-digit
channels or three 4-digit channels that can be
accessed with one button press.
STEP1
Press the [STB] button to select the STB
mode.
STEP2
Press the [MACRO] button and
[OK/SEL] button simultaneously for
3 seconds. The [STB] button will turn
on for 30 seconds.
STEP3
Enter the the 2, 3 or 4-digit code for the
channel you want programmed first
(for example, 007) using the Number
Pad, then press the [STOP] button.
Then enter the code for the next chan-
nel (for example, 050), then press the
[STOP] button. Repeat this process for
the third channel. The [STB] button will
blink once for each channel entered.
STEP4
Press the [CH
5
] button to store the
channels that were selected. The
[STB] button will blink twice to confirm
the storage of commands.
To access the programmed channels, press the
[MACRO] button once. This will bring up the
first channel. Press once again and it will bring
up the second channel. Press again and it will
bring up the third channel.
N. Low Battery Warning
When the batteries are low and need to be
replaced with fresh batteries, the Device LED
lights will blink 2 times in sequence whenever a
[POWER] button is pressed to turn on equip-
ment.
O. Memory Lock System
This remote control is designed to retain
programmed memory for 10 years even after
batteries are removed from the remote con-
trol.
P. Record Your Component Set-up
Codes
TV
Set-up Code Number:
AUD
Set-up Code Number:
DVD
Set-up Code Number:
AUX
Set-up Code Number:
For additional information about your remote
control, go to www.universalremote.com
Manufacturer/Brand
Set-Up Code Number
STB-CABLE Converters
Set-up Code Tables
6
ADB
254 255 315 259
AMINO
249 256 257 260 261
AT&T
251
CISCO
313 251 316
COMCAST
313
DREAM
159
ENTONE
155 258
MINERVA
178
MYRIO
254 255
MOTOROLA
253
NOW TV
314
PACE
313
SCIENTIFIC ATLANTA 251
WEGENER
250
MOTOROLA
002 111 148
PACE
001 005 002
PIONEER
001 103 034 051 063 076 105
SAMSUNG
001 030
SCIENTIFIC ATLANTA/CISCO 001 003 041 042 045 046
A MARK
112 143
ABEX
025
ACCURIAN
036
ADMIRAL 072 251 333
ADVENT
247 388
ADVENTURA
002
AIKO
103
AKAI 116 146 248 404 405 473 475 323 387
391 615
ALBATRON
017
ALERON
028
AMERICA ACTION 043
AMPRO 073
AMSTRAD 052
ANAM 043 054 056 080 112
AOC 116 363 112 058 616
APEX
572
APEX DIGITAL
006
AQUAVISION
573 574
ASTAR
477
AUDIOVOX
076 454 388
AVENTURA
052
AVIELO
627 628
AVION
441
AXION
039
BELCOR
116
BELL&HOWELL 333 072
BENQ
423 600
BOXLIGHT
266
BRADFORD
043
BROCKWOOD
116
BROKSONIC
238
BYDESIGN
031 032
CANDLE 116 002 003 363
CAPEHART
058
CARY AUDIO DESIGN 266
CELEBRITY
001
CENTURION
116
CETRONIC 043
CHANGHONG
247
CITIZEN 116 002 003 363 043 258 103 143
CLARION
043
CLASSIC 043
CLP CLASSIC
333
COBY
640 641
COLORTYME
116
CONCERTO 363
CONCIERGE
073
CONTEC 043 050 051
CORNEA
116
CORONADO 143
CRAIG 043 054
CROSLEY
164
CROWN 043 143
CURTIS MATHES 116 258 363 143
CXC 043
CYBERHOME
015
DAEWOO 363 016 043 044 076 103 114 125 127
143
DAYTRON 363 143
DELL
320 164 363 618
DIGITAL PROJECTION 570
DIMENSIA
333
DREAMVISION
235
DUKANE
011 025
DUMONT
116 073
DURABRAND
096 052
DWIN 257
DYNASTY 043
DYNEX
400
EIKI
187
ELECTROBAND 001
ELECTROGRAPH 466
ELECTROHOME 143 024 076 196
ELEKTRA
072
ELEMENT
363 494 526 622
EMERSON 028 048 043 155 005 116 363 047 050
051 076 096 143 153 154 052 514
ENVISION
116
EPSON
324 590
ESA
323
FISHER 007 057
FUJITSU
246 198 410
FUNAI 028 043 052
FUSION
642
FUTURETECH 043
GATEWAY
242 268
GE 073 116 008 009 034 056 074 155 333
363
GEM
391
GIBRALTER
116 073
GO VIDEO
026
GOLDSTAR
113 116 102 363 106 112 127 143
GRUNPY
028 043
HAIER
363 501 623
HALL MARK 363
HANNSPREE
349 381
HARLEY DAVIDSON 028
HARVARD
043
HAVERMY
081
HELLO KITTY
076
HIMITSU
043
Manufacturer/Brand
Set-Up Code Number
STB-IPTV
Manufacturer/Brand
Set-Up Code Number
TV
Manufacturer/Brand
Set-Up Code Number
TV
A. Quick Set-Up Method
STEP1
Turn on the component you want to pro-
gram. To program your TV, turn on the TV.
STEP2
Point the remote control at the compo-
nent.
STEP3
Press and hold the [DEVICE] key for 5
seconds until the Device LED will blink
once and stays on. Continue to hold the
[DEVICE] key and press the number key
assigned to your brand in the Quick
Set-up Code Table. The component
should turn off as soon as the number
key is pressed. (If it does not turn off,
release the [DEVICE] key and use the
Pre-Programmed 3-Digit code Method
or Scanning Method.)
STEP4
Release the [DEVICE] key to save the
code. The Device LED will blink twice to
confirm that the code is stored.
Repeat the steps above for all components
(TV, AUD, DVD, AUX).
B. Quick Set-up Code Tables
C. Pre-Programmed 3-Dight Code Method
STEP1
Turn on the equipment that you want
the remote control to operate (Set top
Box, TV, DVD, etc.).
STEP2
Press the [DEVICE] button and the
[OK/SEL] button simultaneously for three
seconds. The corresponding device LED
will turn on indicating that it is ready to
be programmed. The LED will remain on
for 30 seconds. The next step must be
entered while the LED is on.
STEP3
Point the remote control toward the
equipment and enter the three-digit
code number assigned to your brand
from the code tables. If there are more
than one three-digit number listed for
your brand, try one code number at a
time until your equipment turns off.
*Note :
You can verify that you have selected the
correct code by pressing the [POWER]
button. The equipment should turn back
on. Then try all of the functions on the
remote control (i.e. volume, mute, etc.) to
ensure you have the correct code. If any
of the functions do not operate as they
should, repeat the instructions from
STEP 3 above using the next three digit
code number from the brand list.
STEP4
Store the three-digit code by pressing the
same [DEVICE] button once again. The
device LED will blink twice to confirm that
the code has been stored.
D. Auto-Search Method
If none of the three digit code numbers assigned to
your brand of equipment works, or the code table
does not list your brand, you can use the Auto
Search Method to find the correct three-digit code
number for your equipment by following steps:
STEP1
Turn on the equipment that you want
the remote control to operate (Set top
Box, TV, DVD, etc.).
STEP2
Press the [DEVICE] button and the
[OK/SEL] button simultaneously for
three seconds. The device LED will turn
on indicating that it is ready to be
programmed. The LED will remain on
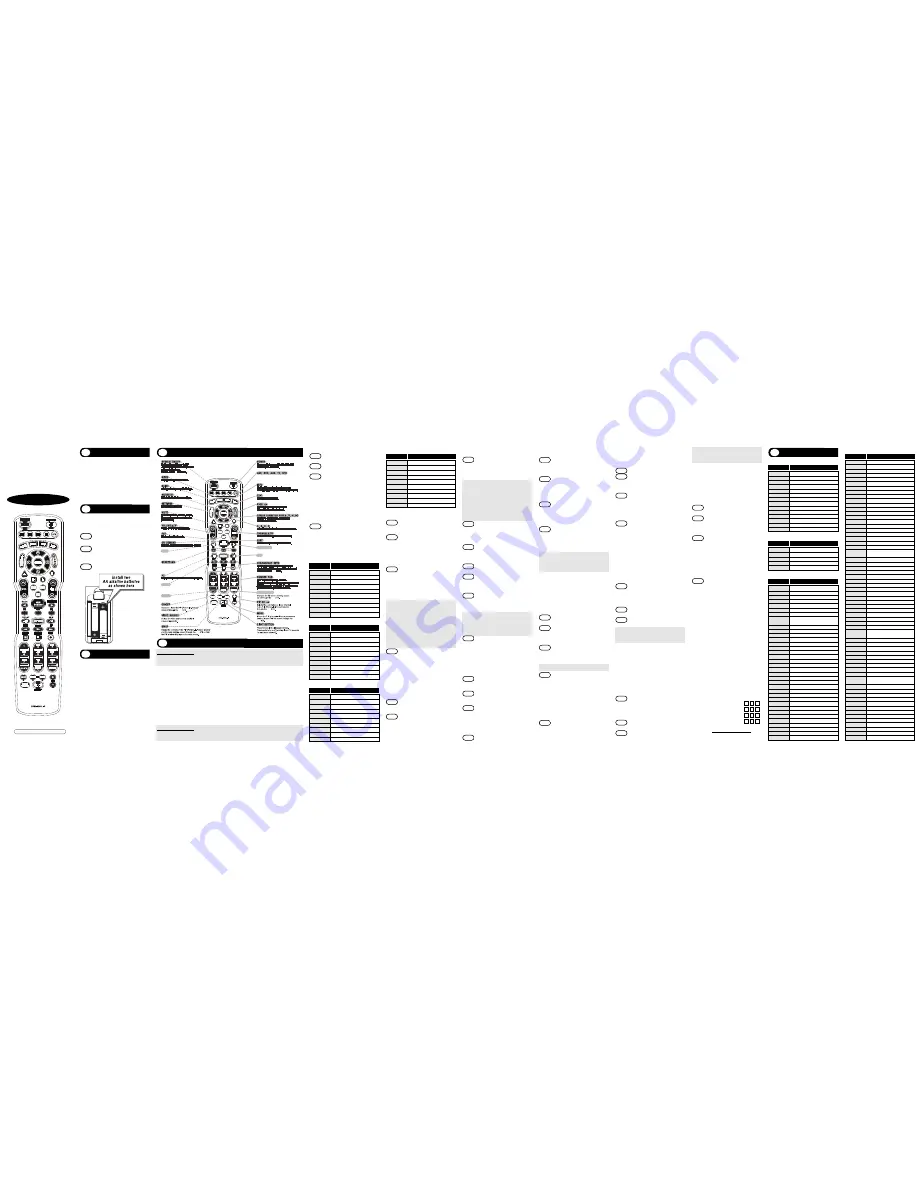
Button Functions
4
Programming the Remote Control
5
Return to previous menu screen or TV channel.
View personalized weather, sports, and traffic.
Forward ahead in stored or recorded programs.
STB
IPTV
IPTV
IPTV
IPTV company custom-programmable Macros.
Refer to Section
M
for programming steps.
Digital Video Recording.
IPTV
IPTV
Edit text on the screen.
BACK
INTERACTIVE
SKIP
ASPECT/ENTER
My DVR
DELETE
Device Buttons used to select the component
you want to operate and signals remote control
activity.
M
IMPORTANT SETUP NOTE!
In this section when you are instructed to press a [DEVICE] button, that means to press either the STB, TV, AUD,
DVD or AUX button, depending on what device you are programming the remote to operate.
There are four ways you can program your remote:
* Quick Set-Up Method
* The Pre-Programmed 3-Digit Code Method
* The Auto-Search Method
* The Learning Method
The Quick Set-Up Method is a unique feature that enables the fastest and easiest setup by using a 1 digit
code. This is the quickest way to set up devices made by popular manufacturers.
The Pre-Programmed Code Method allows you to setup all of the buttons at once by entering 3-digit
code numbers that correspond with the components manufacture/brand. Code tables for this method
are on the backside of the operating instructions.
The Auto-Search Method scans through all of the codes in the remote control, one at a time allowing you
to identify the correct code.
The Learning Method allows you to transfer functions from other remotes to the
PHAZR-5
one button at a time.
IMPORTANT SETUP NOTE!
This pertains to all programming steps. When you are in setup mode the device LED will light for 30 seconds. If you do
not press a button within 30 seconds, the LED light will turn off and exit setup mode, and you will need to start over.
Universal Remote Control, Inc.
www.universalremote.com
OCE-0087D Rev 03 (02/27/13)
Operating Instructions For
PHAZR-5
Cable Remote Control
The
Phazr 5
, UR5L-9000L-IP is designed
to operate virtually all IPTV, Digital and
DTA set top boxes plus the majority of TV,
AUD, DVD and AUX equipment on the
market as shown below.
STB
: Set-top Box
TV
: Televisions
AUD
: Audio Receivers
DVD
: DVD Players
AUX
: Media PC, Gaming System, etc.
Introduction
1
DEFAULT STATE:
Device Default:
Set-Top Box (STB)
Channel Default:
STB channel and numbers
through the STB. You have the option of
controlling your STB channel and numbers
through the TV or AUD. Refer to section
L
for
programming steps.
Volume Default:
Volume and Mute control are
automatically transferred to the respective
Component based on the Device selected:
STB
:Set-Top Box ;
TV
:TV ;
AUD
:AUD.
DVD
:TV ;
AUX
:AUX. You have the option of controlling
STB Volume and Mute through the TV, DVD
or AUD. Refer to section
K
for programming
steps.
Operations
3
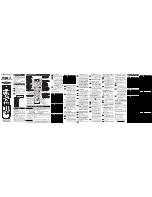
Replacing Batteries
2
Before you program or operate the remote
control, you must install two new AA
alkaline batteries.
STEP1
Remove the battery compartment cover
on the back of your remote control.
STEP2
Check battery polarity carefully, and
install the batteries as shown in the
illustration below.
STEP3
Replace the battery compartment cover.
UR5L-9000L-IP
0
SANYO
1
SONY
2
SAMSUNG
3
LG
4
TOSHIBA
5
PANASONIC
6
PHILIPS
7
HITACHI
8
SHARP
9
VIZIO
Quick Number
Manufacturer/Brand
TV
0
ROTEL
1
DENON
2
YAMAHA
3
MARANTZ
4
SONY
5
INTEGRA
6
HARMAN KARDON
7
PIONEER
8
ONKYO
9
LEXICON
Quick Number
Manufacturer/Brand
AUDIO
0
HITACHI
1
SONY
2
PHILIPS
3
SAMSUNG
4
PHILIPS MAGNAVOX
5
PANASONIC
6
LG
7
JVC
8
DENON
9
PIONEER
Quick Number
Manufacturer/Brand
DVD
0
BOSE
1
HP
2
APPLE / iPod
3
APPLE / iPod
4
MICROSOFT / XBOX
5
SONY / PS2
6
LUTRON
7
X-10
8
X-10
9
MICROSOFT / XBOX
Quick Number
Manufacturer/Brand
AUX


